Dell OptiPlex 390 Owners Manual - Page 45
System Board, Removing the System Board
 |
View all Dell OptiPlex 390 manuals
Add to My Manuals
Save this manual to your list of manuals |
Page 45 highlights
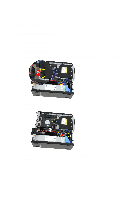
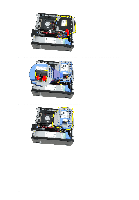
System Board 16 Removing the System Board 1. Follow the procedures in Before Working Inside Your Computer. 2. Remove the cover. 3. Remove the front bezel. 4. Remove the drive cage. 5. Remove the expansion cards. 6. Remove the heat sink and processor. 7. Remove the fan shelter. 8. Disconnect all the cables connected to the system board, and move the cables away from the chassis. 9. Lift and release the expansion-card latch, to gain access to the screws securing the system board. 45
-
 1
1 -
2
-
3
-
4
-
5
-
6
-
7
-
8
-
9
-
10
-
11
-
12
-
13
-
14
-
15
-
16
-
17
-
18
-
19
-
20
-
21
-
22
-
23
-
24
-
25
-
26
-
27
-
28
-
29
-
30
-
31
-
32
-
33
-
34
-
35
-
36
-
37
-
38
-
39
-
 40
40 -
 41
41 -
 42
42 -
 43
43 -
 44
44 -
 45
45 -
 46
46 -
 47
47 -
 48
48 -
 49
49 -
 50
50 -
51
-
52
-
53
-
54
-
55
-
56
-
57
-
58
-
59
-
60
-
61
-
62
-
63
-
64
-
65
-
66
-
67
-
68
-
69
-
70
-
71
-
72
-
73
-
74
-
75
-
76
-
77
-
78
-
79
-
80
-
81
-
82
-
83
-
84
-
85
-
86
-
87
-
88
-
89
-
90
 |
 |

System Board
16
Removing the System Board
1.
Follow the procedures in
Before Working Inside Your Computer
.
2.
Remove the
cover
.
3.
Remove the
front bezel
.
4.
Remove the
drive cage
.
5.
Remove the
expansion cards
.
6.
Remove the
heat sink and processor
.
7.
Remove the
fan shelter
.
8.
Disconnect all the cables connected to the system board, and move the
cables away from the chassis.
9.
Lift and release the expansion-card latch, to gain access to the screws
securing the system board.
45