Epson EX3220 Operation Guide - EasyMP Network Projection - Page 20
Setting Up a Projector to Connect in Advanced Connection Mode (Wired), Setup Complete, Complete
 |
View all Epson EX3220 manuals
Add to My Manuals
Save this manual to your list of manuals |
Page 20 highlights
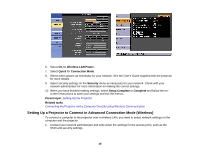
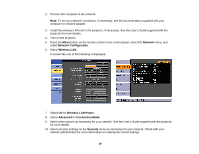
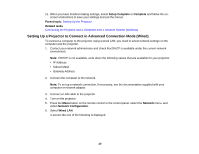
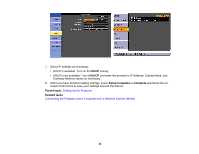
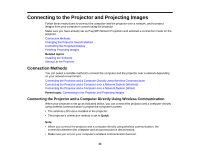
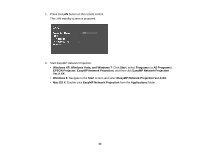
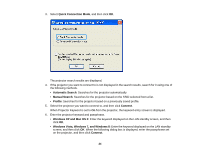
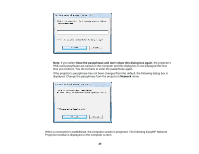
11. When you have finished making settings, select Setup Complete or Complete and follow the onscreen instructions to save your settings and exit the menus. Parent topic: Setting Up the Projector Related tasks Connecting the Projector and a Computer over a Network System (Wireless) Setting Up a Projector to Connect in Advanced Connection Mode (Wired) To connect a computer to the projector using a wired LAN, you need to select network settings on the computer and the projector. 1. Contact your network administrator and check that DHCP is available under the current network environment. Note: If DHCP is not available, write down the following values that are available for your projector. • IP Address • Subnet Mask • Gateway Address 2. Connect the computer to the network. Note: To set up a network connection, if necessary, see the documentation supplied with your computer or network adapter. 3. Connect a LAN cable to the projector. 4. Turn on the projector. 5. Press the Menu button on the remote control or the control panel, select the Network menu, and select Network Configuration. 6. Select Wired LAN. A screen like one of the following is displayed. 20
-
 1
1 -
2
-
3
-
4
-
5
-
6
-
7
-
8
-
9
-
10
-
11
-
12
-
13
-
14
-
 15
15 -
 16
16 -
 17
17 -
 18
18 -
 19
19 -
 20
20 -
 21
21 -
 22
22 -
 23
23 -
 24
24 -
 25
25 -
26
-
27
-
28
-
29
-
30
-
31
-
32
-
33
-
34
-
35
-
36
-
37
-
38
-
39
-
40
-
41
-
42
-
43
-
44
-
45
-
46
-
47
-
48
-
49
-
50
-
51
-
52
-
53
-
54
-
55
-
56
-
57
-
58
-
59
-
60
-
61
-
62
-
63
-
64
-
65
-
66
-
67
-
68
-
69
-
70
-
71
-
72
-
73
-
74
-
75
-
76
-
77
-
78
-
79
-
80
-
81
-
82
-
83
-
84
-
85
-
86
-
87
-
88
-
89
-
90
-
91
-
92
-
93
-
94
-
95
-
96
-
97
-
98
-
99
-
100
-
101
-
102
-
103
-
104
-
105
-
106
-
107
-
108
-
109
 |
 |
