Epson EX3220 Operation Guide - EasyMP Network Projection - Page 70
Wireless LAN Power
 |
View all Epson EX3220 manuals
Add to My Manuals
Save this manual to your list of manuals |
Page 70 highlights
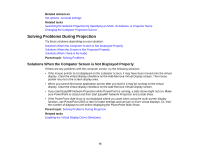
• Check for any obstacles between the access point and the computer or projector, and change their position to improve communication. Sometimes, indoor environments prevent the projector from being found in a search. • Set the radio strength for the network devices to the maximum. • Set the IP address, the subnet mask, and the gateway address for the access point correctly. • Check the projector's network settings. • Set the Connection Mode setting to Advanced. Go to Network > Network Configuration > Wireless LAN > Connection Mode. • Set the computer, the access point, and the projector to the same SSID. Go to Network > Network Configuration > Wireless LAN > SSID. • Set DHCP to Off. When DHCP is set to On, it may take some time to enter LAN standby status if an available DHCP server is not found. Go to Network > Network Configuration > Wireless LAN > DHCP or Network > Network Configuration > Wireless LAN > IP Settings > DHCP. • Set the IP address, the subnet mask, and the gateway address for the projector correctly. • Set Wireless LAN Power to On. Go to Network > Network Configuration > Wireless LAN > Wireless LAN Power. • Set the wireless LAN system to meet the standards supported by the access point. Go to Network > Network Configuration > Wireless LAN > Wireless LAN system or Wireless LAN Sys. • When you enable the security setting, set the same passphrase to the access point, the computer, and the projector. • Close network settings on the projector, and then return to the LAN standby screen. • Check the computer's network settings. • If the wireless LAN adapter is not installed on your computer, install a wireless LAN card on your computer. • Enable the wireless LAN setting or AirPort on your computer. • Connect to the access point to which the projector is connected. • Turn off the firewall. Or register the firewall as an exception. If you do not want to turn it off or register it as an exception, make the necessary settings to open the ports. The ports used by this software are "3620", "3621", and "3629". 70
-
 1
1 -
2
-
3
-
4
-
5
-
6
-
7
-
8
-
9
-
10
-
11
-
12
-
13
-
14
-
15
-
16
-
17
-
18
-
19
-
20
-
21
-
22
-
23
-
24
-
25
-
26
-
27
-
28
-
29
-
30
-
31
-
32
-
33
-
34
-
35
-
36
-
37
-
38
-
39
-
40
-
41
-
42
-
43
-
44
-
45
-
46
-
47
-
48
-
49
-
50
-
51
-
52
-
53
-
54
-
55
-
56
-
57
-
58
-
59
-
60
-
61
-
62
-
63
-
64
-
 65
65 -
 66
66 -
 67
67 -
 68
68 -
 69
69 -
 70
70 -
 71
71 -
 72
72 -
 73
73 -
 74
74 -
 75
75 -
76
-
77
-
78
-
79
-
80
-
81
-
82
-
83
-
84
-
85
-
86
-
87
-
88
-
89
-
90
-
91
-
92
-
93
-
94
-
95
-
96
-
97
-
98
-
99
-
100
-
101
-
102
-
103
-
104
-
105
-
106
-
107
-
108
-
109
 |
 |
