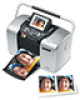
Epson PictureMate Deluxe Viewer Edition Using PictureMate Without a Computer - Page 18
Do More With Your Photos, Getting Help, Cropping
 |
View all Epson PictureMate Deluxe Viewer Edition manuals
Add to My Manuals
Save this manual to your list of manuals |
Page 18 highlights
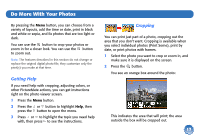
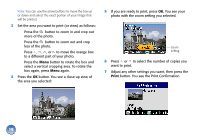
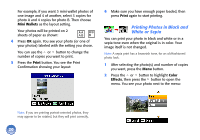
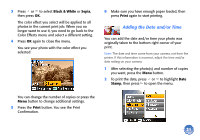
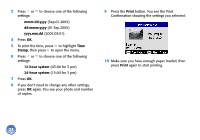
Do More With Your Photos By pressing the Menu button, you can choose from a variety of layouts, add the time or date, print in black and white or sepia, and fix photos that are too light or dark. You can use the button to crop your photos or zoom in for a closer look. You can use the button to zoom out. Note: The features described in this section do not change or replace the original digital photo file; they customize only the print(s) you make at that time. Getting Help If you need help with cropping, adjusting colors, or other PictureMate actions, you can get instructions right on the photo viewer screen. 1 Press the Menu button. 2 Press the or button to highlight Help, then press the button to open the menu. 3 Press or to highlight the topic you need help with, then press to see the instructions. Cropping You can print just part of a photo, cropping out the area that you don't want. Cropping is available when you select individual photos (Print Some), print by date, or print photos with frames. 1 Select the photo you want to crop or zoom in, and make sure it is displayed on the screen. 2 Press the button. You see an orange box around the photo: This indicates the area that will print; the area outside the box will be cropped out. 17
-
 1
1 -
2
-
3
-
4
-
5
-
6
-
7
-
8
-
9
-
10
-
11
-
12
-
 13
13 -
 14
14 -
 15
15 -
 16
16 -
 17
17 -
 18
18 -
 19
19 -
 20
20 -
 21
21 -
 22
22 -
 23
23 -
24
-
25
-
26
-
27
-
28
-
29
-
30
-
31
-
32
-
33
-
34
-
35
-
36
-
37
-
38
-
39
-
40
-
41
-
42
-
43
-
44
-
45
-
46
-
47
-
48
-
49
-
50
-
51
-
52
-
53
-
54
-
55
-
56
-
57
-
58
-
59
-
60
-
61
-
62
-
63
-
64
-
65
-
66
-
67
-
68
-
69
-
70
-
71
-
72
-
73
-
74
-
75
-
76
-
77
-
78
-
79
 |
 |
