Epson PowerLite 450W User's Guide - Page 85
as needed., To enter numbers, use the arrow buttons on the remote
 |
View all Epson PowerLite 450W manuals
Add to My Manuals
Save this manual to your list of manuals |
Page 85 highlights
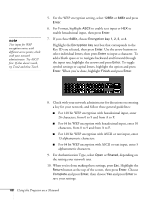
7. Highlight the SSID text box, press Enter, and enter the name you want to assign to the projector (Quick mode), or the name of your existing wireless network (Advanced mode): Use the arrow buttons to select individual letters; then press Enter to input a character. To add a blank space or to navigate backward and forward through the input text, highlight the arrows and press Enter. To toggle symbol settings or capital letters, highlight the option and press Enter. When you're done, highlight Finish and press Enter. Note that the SSID is case-sensitive (if you enter the name in uppercase on the projector, you must type it the same way on the computer connecting to the projector). 8. Select IP Settings and do one of the following: ■ If your network assigns addresses automatically, turn on the DHCP setting. ■ If your network does not assign addresses automatically, turn off DHCP and enter the projector's IP Address, Subnet Mask, and Gateway Address, as needed. To enter numbers, use the arrow buttons on the remote control to select each number on the screen, then press the Enter button. When you're finished entering an address in the network menu, highlight Finish, then press the Enter button. 9. If you want to prevent the SSID from being displayed on the standby screen, set the SSID Display option to Off. 10. To prevent the IP address from appearing on the standby screen, set the IP Address Display setting to Off. note For specific details about your network, please consult your network administrator. If you're using AirPort, start the AirPort Admin utility, select your base station and click Configure. Then click the Network tab to see your base station's IP address. Using the Projector on a Network 85
-
 1
1 -
2
-
3
-
4
-
5
-
6
-
7
-
8
-
9
-
10
-
11
-
12
-
13
-
14
-
15
-
16
-
17
-
18
-
19
-
20
-
21
-
22
-
23
-
24
-
25
-
26
-
27
-
28
-
29
-
30
-
31
-
32
-
33
-
34
-
35
-
36
-
37
-
38
-
39
-
40
-
41
-
42
-
43
-
44
-
45
-
46
-
47
-
48
-
49
-
50
-
51
-
52
-
53
-
54
-
55
-
56
-
57
-
58
-
59
-
60
-
61
-
62
-
63
-
64
-
65
-
66
-
67
-
68
-
69
-
70
-
71
-
72
-
73
-
74
-
75
-
76
-
77
-
78
-
79
-
 80
80 -
 81
81 -
 82
82 -
 83
83 -
 84
84 -
 85
85 -
 86
86 -
 87
87 -
 88
88 -
 89
89 -
 90
90 -
91
-
92
-
93
-
94
-
95
-
96
-
97
-
98
-
99
-
100
-
101
-
102
-
103
-
104
-
105
-
106
-
107
-
108
-
109
-
110
-
111
-
112
-
113
-
114
-
115
-
116
-
117
-
118
-
119
-
120
-
121
-
122
-
123
-
124
-
125
-
126
-
127
-
128
-
129
-
130
-
131
-
132
-
133
-
134
-
135
-
136
-
137
-
138
-
139
-
140
-
141
-
142
-
143
-
144
-
145
-
146
-
147
-
148
-
149
-
150
-
151
-
152
-
153
-
154
-
155
-
156
-
157
-
158
-
159
-
160
-
161
-
162
-
163
-
164
-
165
-
166
-
167
-
168
-
169
-
170
-
171
-
172
-
173
-
174
 |
 |
