Epson Stylus Photo R2000 Basics - Page 22
User's Guide, or see your online - user guide
 |
View all Epson Stylus Photo R2000 manuals
Add to My Manuals
Save this manual to your list of manuals |
Page 22 highlights
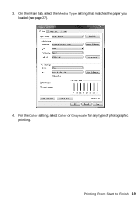
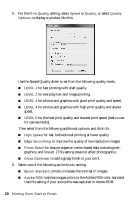
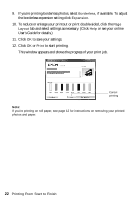
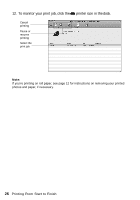
9. If you're printing borderless photos, select Borderless, if available. To adjust the borderless expansion setting click Expansion. 10. To reduce or enlarge your printout or print double-sided, click the Page Layout tab and select settings as necessary. (Click Help or see your online User's Guide for details.) 11. Click OK to save your settings. 12. Click OK or Print to start printing. This window appears and shows the progress of your print job. Cancel printing Note: If you're printing on roll paper, see page 12 for instructions on removing your printed photos and paper. 22 Printing From Start to Finish
-
 1
1 -
2
-
3
-
4
-
5
-
6
-
7
-
8
-
9
-
10
-
11
-
12
-
13
-
14
-
15
-
16
-
 17
17 -
 18
18 -
 19
19 -
 20
20 -
 21
21 -
 22
22 -
 23
23 -
 24
24 -
 25
25 -
 26
26 -
 27
27 -
28
-
29
-
30
-
31
-
32
-
33
-
34
-
35
-
36
-
37
-
38
-
39
-
40
-
41
-
42
-
43
-
44
-
45
-
46
-
47
-
48
-
49
-
50
-
51
-
52
-
53
-
54
-
55
-
56
-
57
-
58
-
59
-
60
 |
 |

22
Printing From Start to Finish
9.
If you’re printing borderless photos, select
Borderless
, if available. To adjust
the borderless expansion setting click
Expansion
.
10.
To reduce or enlarge your printout or print double-sided, click the
Page
Layout
tab and select settings as necessary. (Click
Help
or see your online
User’s Guide
for details.)
11. Click
OK
to save your settings.
12. Click
OK
or
Print
to start printing.
This window appears and shows the progress of your print job.
Note:
If you’re printing on roll paper, see page 12 for instructions on removing your printed
photos and paper.
Cancel
printing