Epson Stylus Photo R2000 Basics - Page 30
Make sure that the CD/DVD tray is beneath the guide rails, then slide
 |
View all Epson Stylus Photo R2000 manuals
Add to My Manuals
Save this manual to your list of manuals |
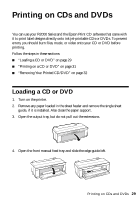
Page 30 highlights
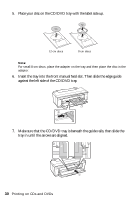
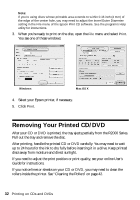
5. Place your disc on the CD/DVD tray with the label side up. 12-cm discs 8-cm discs Note: For small 8-cm discs, place the adapter on the tray and then place the disc in the adapter. 6. Insert the tray into the front manual feed slot. Then slide the edge guide against the left side of the CD/DVD tray. 7. Make sure that the CD/DVD tray is beneath the guide rails, then slide the tray in until the arrows are aligned. 30 Printing on CDs and DVDs
-
 1
1 -
2
-
3
-
4
-
5
-
6
-
7
-
8
-
9
-
10
-
11
-
12
-
13
-
14
-
15
-
16
-
17
-
18
-
19
-
20
-
21
-
22
-
23
-
24
-
 25
25 -
 26
26 -
 27
27 -
 28
28 -
 29
29 -
 30
30 -
 31
31 -
 32
32 -
 33
33 -
 34
34 -
 35
35 -
36
-
37
-
38
-
39
-
40
-
41
-
42
-
43
-
44
-
45
-
46
-
47
-
48
-
49
-
50
-
51
-
52
-
53
-
54
-
55
-
56
-
57
-
58
-
59
-
60
 |
 |

30
Printing on CDs and DVDs
5.
Place your disc on the CD/DVD tray with the label side up.
Note:
For small 8-cm discs, place the adapter on the tray and then place the disc in the
adapter.
6.
Insert the tray into the front manual feed slot. Then slide the edge guide
against the left side of the CD/DVD tray.
7.
Make sure that the CD/DVD tray is beneath the guide rails, then slide the
tray in until the arrows are aligned.
12-cm discs
8-cm discs