Garmin fenix 2 Owner's Manual - Page 14
Applications, Customizing Your Device - video
 |
View all Garmin fenix 2 manuals
Add to My Manuals
Save this manual to your list of manuals |
Page 14 highlights
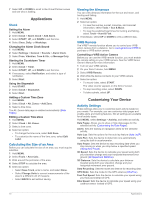
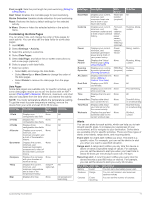
7 Select UP or DOWN to scroll to the Virtual Partner screen and see who is leading. Applications Clock Setting the Alarm 1 Hold MENU. 2 Select Clock > Alarm Clock > Add Alarm. 3 Select START, UP, and DOWN to set the time. 4 Select Once, Daily, or Weekdays. Changing the Alarm Clock Sound 1 Hold MENU. 2 Select Settings > General > Sounds > Alarm Clock. 3 Select Tone, Vibration, Tone & Vib. , or Message Only. Starting the Countdown Timer 1 Hold MENU. 2 Select Clock > Timer. 3 Select START, UP, and DOWN to set the time. 4 If necessary, select Notification, and select a type of notification. 5 Select Start. Using the Stopwatch 1 Hold START. 2 Select Clock > Stopwatch. 3 Select Start. Adding a Custom Time Zone 1 Hold MENU. 2 Select Clock > Alt. Zones > Add Zone. 3 Select a time zone. The Alt. Zones data page is enabled automatically (Data Pages). Editing a Custom Time Zone 1 Hold MENU. 2 Select Clock > Alt. Zones. 3 Select a time zone. 4 Select an option: • To change the time zone, select Edit Zone. • To customize the name of the time zone, select Edit Label. Calculating the Size of an Area Before you can calculate the size of an area, you must acquire satellites. 1 Hold MENU. 2 Select Tools > Area Calc. . 3 Walk around the perimeter of the area. 4 Select STOP to calculate the area. 5 Select an option: • Select Save Track, enter a name, and select Done. • Select Change Units to convert measurements of the area to a different unit of measure. • Select BACK to exit without saving. Viewing the Almanacs You can view almanac information for the sun and moon, and hunting and fishing. 1 Hold MENU. 2 Select an option: • To view the sunrise, sunset, moonrise, and moonset information, select Tools > Sun & Moon. • To view the predicted best times for hunting and fishing, select Tools > Hunt & Fish. 3 If necessary, select UP or DOWN to view a different day. VIRB Remote The VIRB™ remote function allows you to control your VIRB action camera from a distance. Go to www.garmin.com/ VIRB to purchase a VIRB action camera. Controlling a VIRB Action Camera Before you can use the VIRB remote function, you must enable the remote setting on your VIRB camera. See the VIRB Series Owner's Manual for more information. 1 Turn on your VIRB camera. 2 On your fēnix 2 device, hold MENU. 3 Select VIRB Remote. 4 Wait while the device connects to your VIRB camera. 5 Select an option: • To record video, select START. The video counter appears on the fēnix 2 screen. • To stop recording video, select DOWN. • To take a photo, select UP. Customizing Your Device Activity Settings These settings allow you to customize each activity based on your needs. For example, you can customize data pages and enable alerts and training features. Not all settings are available for all activity types. Hold MENU, select Settings > Activity, and select an activity. Data Pages: Allows you to show or hide data pages for the selected activity (Customizing the Data Pages). Alerts: Sets the training or navigation alerts for the selected activity. Auto Lap: Sets the options for the auto lap feature (Auto Lap®). Auto Run: Sets the device to detect ski runs automatically using the built-in accelerometer. Auto Pause: Sets the device to stop recording data when you stop moving or when you drop below a specified speed (Using Auto Pause). 3D Speed: Sets the device to calculate your speed using both your elevation change and your horizontal movement over ground (3D Speed and Distance). 3D Distance: Sets the device to calculate your distance traveled using both your elevation change and your horizontal movement over ground. Data Recording: Sets the mode and interval for recording data. GPS Mode: Sets the mode for the GPS antenna (UltraTrac). Foot Pod Speed: Sets the device to calculate your speed using your foot pod instead of GPS. Bike Speed: Sets the device to calculate your speed using your cadence sensor instead of GPS. 10 Applications
-
 1
1 -
2
-
3
-
4
-
5
-
6
-
7
-
8
-
 9
9 -
 10
10 -
 11
11 -
 12
12 -
 13
13 -
 14
14 -
 15
15 -
 16
16 -
 17
17 -
 18
18 -
 19
19 -
20
-
21
-
22
-
23
-
24
-
25
-
26
 |
 |
