HP 5590 HP Scanjet 5590 digital flatbed scanner - User's Manual - Page 20
gray plastic film., Slide the clear side of the edge of the clear ADF window under - scanner windows 7
 |
UPC - 829160198705
View all HP 5590 manuals
Add to My Manuals
Save this manual to your list of manuals |
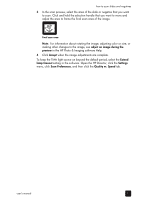
Page 20 highlights
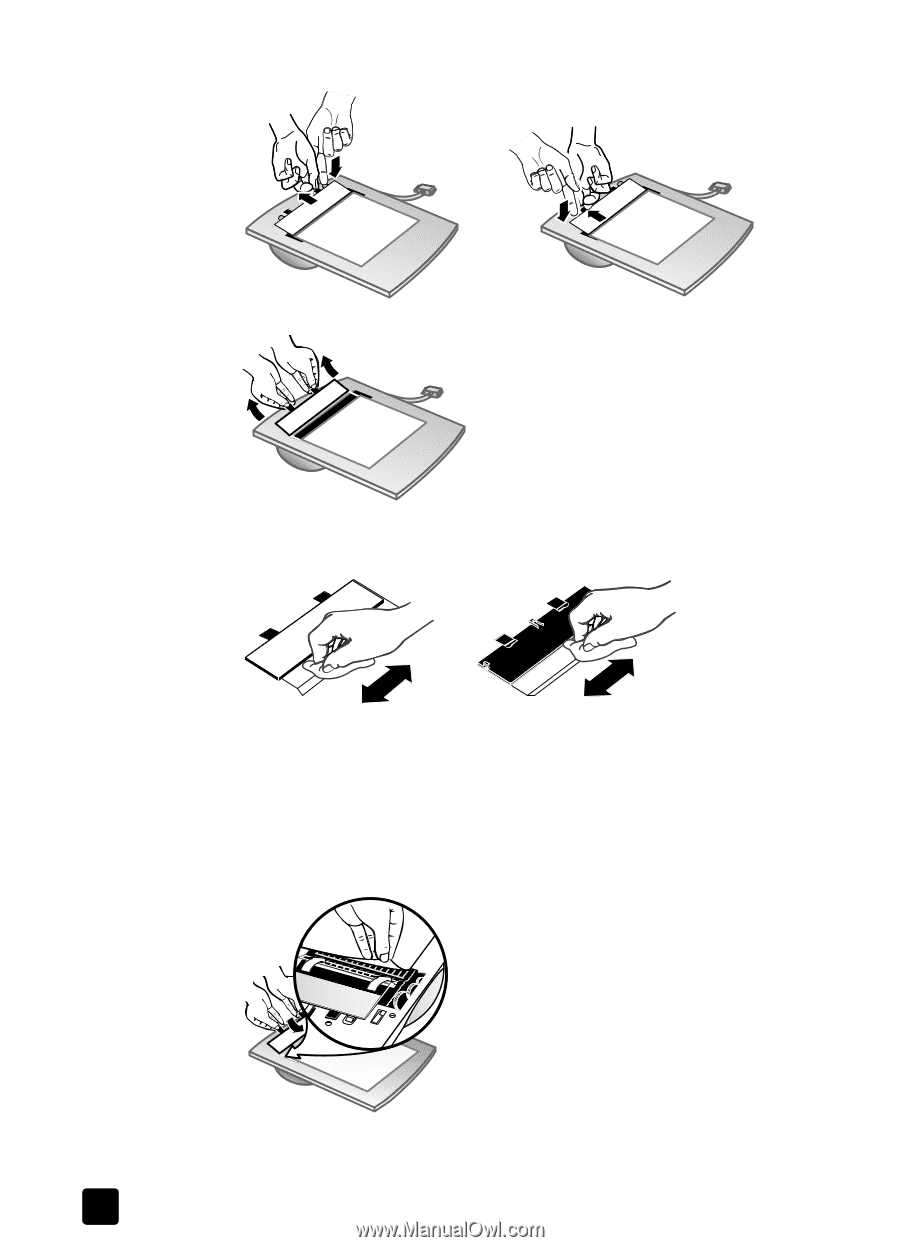
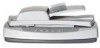
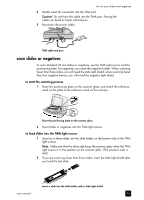
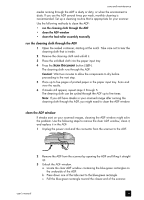
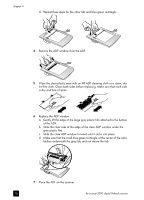
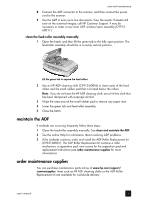
chapter 4 d. Repeat these steps for the other tab and blue-green rectangle. 4 Remove the ADF window from the ADF. 5 Wipe the clear plastic area with an HP ADF cleaning cloth or a clean, dry lint-free cloth. Clean both sides before replacing. Make sure that each side is dry and free of spots. 6 Replace the ADF window. a. Gently lift the edge of the large gray plastic film attached to the bottom of the ADF. b. Slide the clear side of the edge of the clear ADF window under the gray plastic film. c. Slide the clear ADF window forward until it clicks into place. d. Make sure that the small blue-green rectangle at the center of the optic latches underneath the gray tab and not above the tab. 7 Place the ADF on the scanner. 15 hp scanjet 5590 digital flatbed scanner
-
 1
1 -
2
-
3
-
4
-
5
-
6
-
7
-
8
-
9
-
10
-
11
-
12
-
13
-
14
-
 15
15 -
 16
16 -
 17
17 -
 18
18 -
 19
19 -
 20
20 -
 21
21 -
 22
22 -
 23
23 -
 24
24 -
 25
25 -
26
-
27
-
28
-
29
-
30
-
31
-
32
 |
 |