HP 600 HP StorageWorks 600 Modular Disk System Maintenance and Service Guide - Page 29
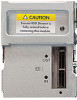
Hard drive drawer display board
 |
View all HP 600 manuals
Add to My Manuals
Save this manual to your list of manuals |
Page 29 highlights
4. Remove the eight T-8 Torx screws securing the bezel to the hard drive drawer. 5. Be sure the drawer handle is in the down position. 6. Lean the bezel forward, and then remove it from the hard drive drawer. To replace the component, reverse the removal procedure. The screws are different lengths. Be sure they are installed in the proper location. Hard drive drawer display board To remove the component: 1. Power down the MDS600 ("Power down" on page 25). 2. Disconnect the power cord from the AC source. 3. Extend the hard drive drawer (on page 25). 4. Remove the hard drives in device bays 2 and 7 ("Hard drive" on page 27). Removal and replacement procedures 29
-
 1
1 -
2
-
3
-
4
-
5
-
6
-
7
-
8
-
9
-
10
-
11
-
12
-
13
-
14
-
15
-
16
-
17
-
18
-
19
-
20
-
21
-
22
-
23
-
 24
24 -
 25
25 -
 26
26 -
 27
27 -
 28
28 -
 29
29 -
 30
30 -
 31
31 -
 32
32 -
 33
33 -
 34
34 -
35
-
36
-
37
-
38
-
39
-
40
-
41
-
42
-
43
-
44
-
45
-
46
-
47
-
48
-
49
-
50
-
51
-
52
-
53
-
54
-
55
-
56
-
57
-
58
-
59
-
60
-
61
-
62
-
63
 |
 |

Removal and replacement procedures
29
4.
Remove the eight T-8 Torx screws securing the bezel to the hard drive drawer.
5.
Be sure the drawer handle is in the down position.
6.
Lean the bezel forward, and then remove it from the hard drive drawer.
To replace the component, reverse the removal procedure. The screws are different lengths. Be sure they are
installed in the proper location.
Hard drive drawer display board
To remove the component:
1.
Power down the MDS600 ("
Power down
" on page
25
).
2.
Disconnect the power cord from the AC source.
3.
Extend the hard drive drawer (on page
25
).
4.
Remove the hard drives in device bays 2 and 7 ("
Hard drive
" on page
27
).