HP 600 HP StorageWorks 600 Modular Disk System Maintenance and Service Guide - Page 34
Power supply
 |
View all HP 600 manuals
Add to My Manuals
Save this manual to your list of manuals |
Page 34 highlights
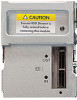
Remove the component as indicated. To replace the component, reverse the removal procedure. Be sure the I/O module blank is fully seated and the I/O module blank handle is in the locked position. Power supply Before removing the component, be sure to do the following: • Verify the status of the power supply to be replaced by reviewing rear panel LEDs and buttons (on page 56). • Be sure that your configuration can support your actions. If the proper redundancy is not in place, power down the MDS600 before beginning this procedure. To remove the component: 1. Disconnect the AC power cord. Removal and replacement procedures 34
-
 1
1 -
2
-
3
-
4
-
5
-
6
-
7
-
8
-
9
-
10
-
11
-
12
-
13
-
14
-
15
-
16
-
17
-
18
-
19
-
20
-
21
-
22
-
23
-
24
-
25
-
26
-
27
-
28
-
 29
29 -
 30
30 -
 31
31 -
 32
32 -
 33
33 -
 34
34 -
 35
35 -
 36
36 -
 37
37 -
 38
38 -
 39
39 -
40
-
41
-
42
-
43
-
44
-
45
-
46
-
47
-
48
-
49
-
50
-
51
-
52
-
53
-
54
-
55
-
56
-
57
-
58
-
59
-
60
-
61
-
62
-
63
 |
 |

Removal and replacement procedures
34
Remove the component as indicated.
To replace the component, reverse the removal procedure. Be sure the I/O module blank is fully seated and
the I/O module blank handle is in the locked position.
Power supply
Before removing the component, be sure to do the following:
•
Verify the status of the power supply to be replaced by reviewing rear panel LEDs and buttons (on page
56
).
•
Be sure that your configuration can support your actions. If the proper redundancy is not in place,
power down the MDS600 before beginning this procedure.
To remove the component:
1.
Disconnect the AC power cord.