HP 8550dn HP Color LaserJet 8550MFP Printer - System Ready Reference Guide, C7 - Page 23
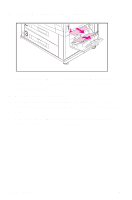
Rotate the blue levers back up until they snap into place., On each side of the fuser
 |
UPC - 088698946428
View all HP 8550dn manuals
Add to My Manuals
Save this manual to your list of manuals |
Page 23 highlights
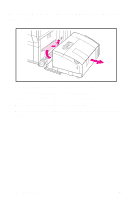
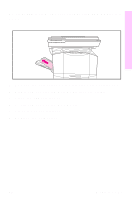
Overview 5 Remove any jammed media from the duplexer by lifting the green guide. Remove any media and lower the green guide. 6 On the left side of the fuser, pull down on the green tab, carefully remove any media, and release the tab. Note Repeated jams in the fuser area indicate that the fuser might not be installed properly. Complete steps 7 through 9 if you experience repeated jams in the fuser area; otherwise, proceed to step 10. 7 Press down the large green lever on the right side of the fuser to ensure that it is in its proper position. 8 On each side of the fuser, rotate the blue levers down slightly. 9 Rotate the blue levers back up until they snap into place. 10 Slide the duplexer back into the printer unit until it clicks into place. 11 Close the lower left door. 12 Reinstall the left output tray. EN Media jams 21
-
 1
1 -
2
-
3
-
4
-
5
-
6
-
7
-
8
-
9
-
10
-
11
-
12
-
13
-
14
-
15
-
16
-
17
-
 18
18 -
 19
19 -
 20
20 -
 21
21 -
 22
22 -
 23
23 -
 24
24 -
 25
25 -
 26
26 -
 27
27 -
 28
28 -
29
-
30
-
31
-
32
-
33
-
34
-
35
-
36
-
37
-
38
-
39
-
40
-
41
-
42
-
43
-
44
-
45
-
46
-
47
-
48
-
49
-
50
-
51
-
52
-
53
-
54
-
55
-
56
-
57
-
58
-
59
-
60
-
61
-
62
-
63
-
64
 |
 |