HP 930c HP DeskJet 930CM Printer - (English) UserÂ’s Guide for Mac - Page 53
Paper Type, Paper/Type Quality, Quality, Paper Type/Quality, Automatic, Normal - review
 |
View all HP 930c manuals
Add to My Manuals
Save this manual to your list of manuals |
Page 53 highlights
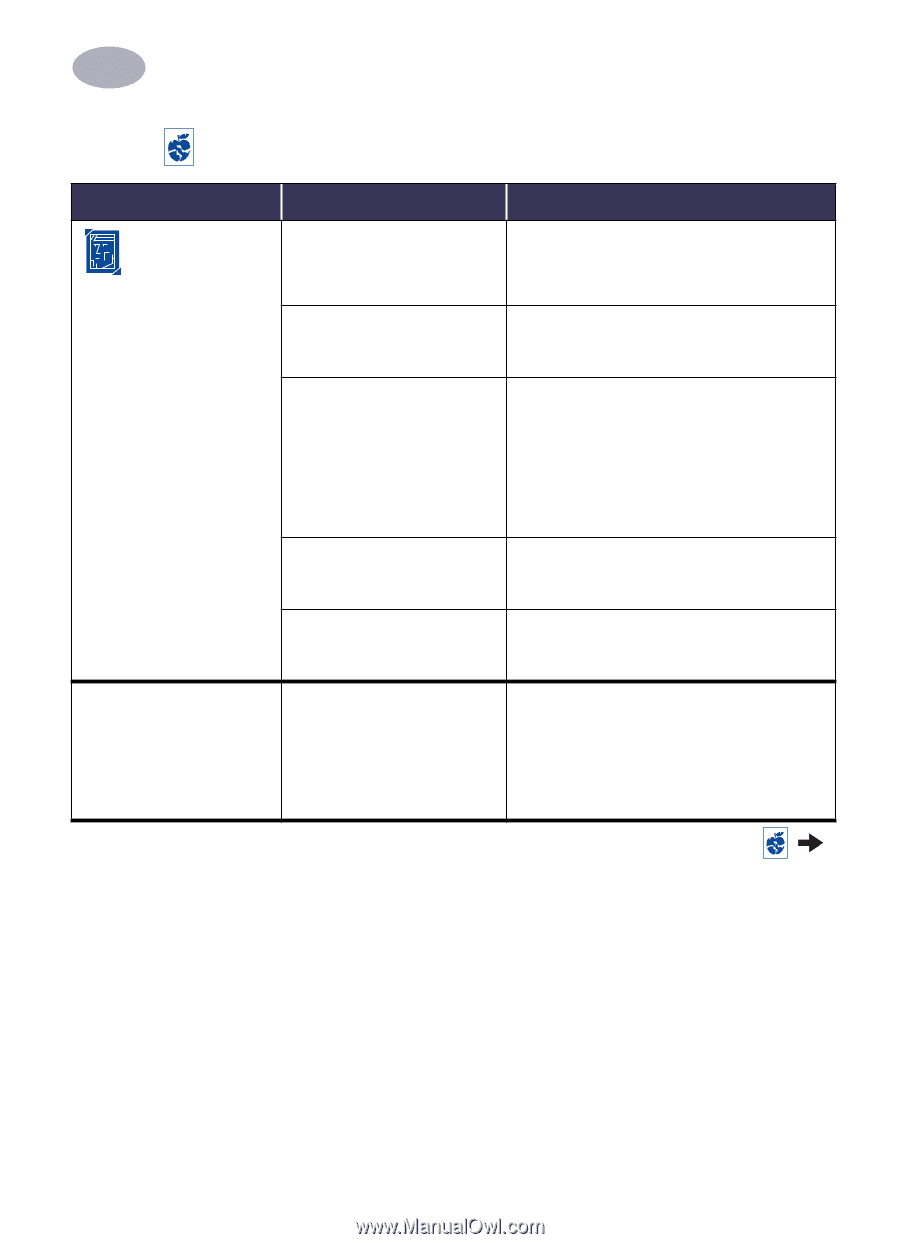
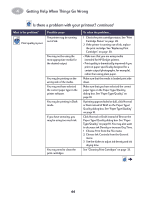
4 Getting Help When Things Go Wrong Is there a problem with your printout? continued What is the problem? Photos aren't printing correctly. When the paper type defaults to Automatic, the print quality looks different. Possible cause You may not have inserted the photo media correctly. The photo paper may not be fully engaged. You may not have selected the appropriate Paper Type/ Quality. You may not have selected Best print quality. The photo may not be in an electronic (digital) format. When the paper type defaults to Automatic, the print quality is automatically set to Normal. If the Paper Type is set to a specific paper type, the print Quality may be set. To solve the problem... Insert the photo media glossy side down. 1 Review the printing instructions on page 15. 2 Make sure that the paper length guides are snug up against the photo paper. 1 Go to the Paper/Type Quality dialog box. See "Paper Type/Quality" on page 10. 2 Select HP Photo Paper as the Paper Type. 3 Select Best as the Quality type. 4 Select High Res Photo from better print resolution. 5 Print your document. 1 Go to the Paper Type/Quality dialog box. See "Paper Type/Quality" on page 10. 2 Select Best print quality. Take a digital picture, scan a photo, or get an electronic file of your photo from a camera shop. After selecting the Paper Type, choose the desired print Quality. See "Paper Type/ Quality" on page 10. 46
-
 1
1 -
2
-
3
-
4
-
5
-
6
-
7
-
8
-
9
-
10
-
11
-
12
-
13
-
14
-
15
-
16
-
17
-
18
-
19
-
20
-
21
-
22
-
23
-
24
-
25
-
26
-
27
-
28
-
29
-
30
-
31
-
32
-
33
-
34
-
35
-
36
-
37
-
38
-
39
-
40
-
41
-
42
-
43
-
44
-
45
-
46
-
47
-
 48
48 -
 49
49 -
 50
50 -
 51
51 -
 52
52 -
 53
53 -
 54
54 -
 55
55 -
 56
56 -
 57
57 -
 58
58 -
59
-
60
-
61
-
62
-
63
-
64
-
65
-
66
-
67
-
68
-
69
-
70
-
71
-
72
 |
 |