HP LaserJet 1220 HP LaserJet 1200 Series - User Guide - Page 251
Removing a DIMM
 |
View all HP LaserJet 1220 manuals
Add to My Manuals
Save this manual to your list of manuals |
Page 251 highlights
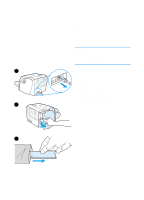
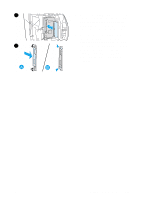
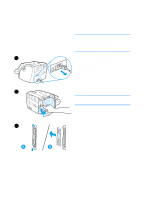
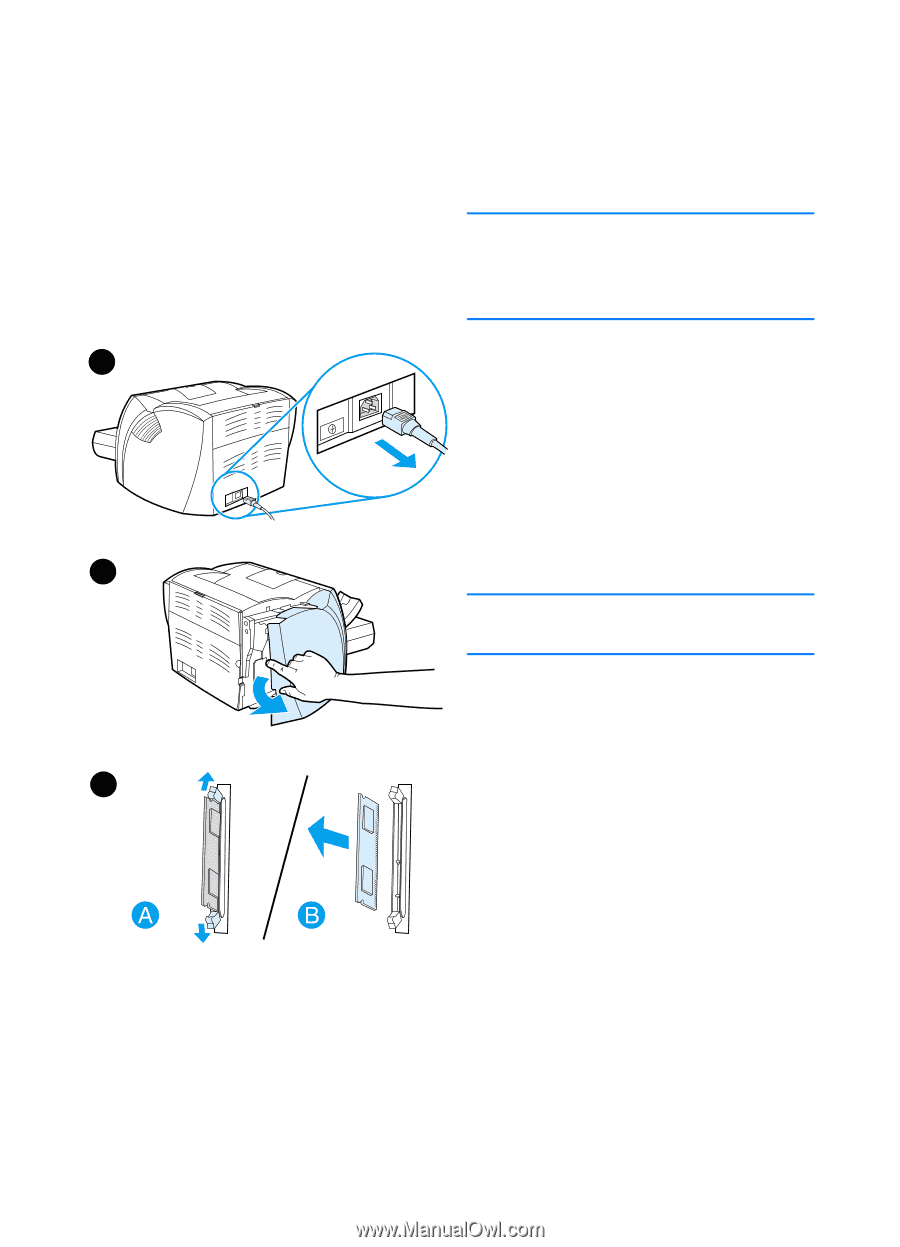
Removing a DIMM 1 2 To remove a DIMM, follow the instructions below: CAUTION Handling a DIMM chip (memory) without wearing a grounded, antistatic device might damage the DIMM chip. 1 Turn off the power switch (220v models only), and unplug the printer. 2 To open the left side panel, gently pull it out. 3 To unlock the cam latches, press them outward (A). Grasp the DIMM chip on the edge, gently pull straight out, and remove the chip from the printer (B). Note Store the DIMM chip in an antistatic bag. 3 EN Removing a DIMM 249
-
 1
1 -
2
-
3
-
4
-
5
-
6
-
7
-
8
-
9
-
10
-
11
-
12
-
13
-
14
-
15
-
16
-
17
-
18
-
19
-
20
-
21
-
22
-
23
-
24
-
25
-
26
-
27
-
28
-
29
-
30
-
31
-
32
-
33
-
34
-
35
-
36
-
37
-
38
-
39
-
40
-
41
-
42
-
43
-
44
-
45
-
46
-
47
-
48
-
49
-
50
-
51
-
52
-
53
-
54
-
55
-
56
-
57
-
58
-
59
-
60
-
61
-
62
-
63
-
64
-
65
-
66
-
67
-
68
-
69
-
70
-
71
-
72
-
73
-
74
-
75
-
76
-
77
-
78
-
79
-
80
-
81
-
82
-
83
-
84
-
85
-
86
-
87
-
88
-
89
-
90
-
91
-
92
-
93
-
94
-
95
-
96
-
97
-
98
-
99
-
100
-
101
-
102
-
103
-
104
-
105
-
106
-
107
-
108
-
109
-
110
-
111
-
112
-
113
-
114
-
115
-
116
-
117
-
118
-
119
-
120
-
121
-
122
-
123
-
124
-
125
-
126
-
127
-
128
-
129
-
130
-
131
-
132
-
133
-
134
-
135
-
136
-
137
-
138
-
139
-
140
-
141
-
142
-
143
-
144
-
145
-
146
-
147
-
148
-
149
-
150
-
151
-
152
-
153
-
154
-
155
-
156
-
157
-
158
-
159
-
160
-
161
-
162
-
163
-
164
-
165
-
166
-
167
-
168
-
169
-
170
-
171
-
172
-
173
-
174
-
175
-
176
-
177
-
178
-
179
-
180
-
181
-
182
-
183
-
184
-
185
-
186
-
187
-
188
-
189
-
190
-
191
-
192
-
193
-
194
-
195
-
196
-
197
-
198
-
199
-
200
-
201
-
202
-
203
-
204
-
205
-
206
-
207
-
208
-
209
-
210
-
211
-
212
-
213
-
214
-
215
-
216
-
217
-
218
-
219
-
220
-
221
-
222
-
223
-
224
-
225
-
226
-
227
-
228
-
229
-
230
-
231
-
232
-
233
-
234
-
235
-
236
-
237
-
238
-
239
-
240
-
241
-
242
-
243
-
244
-
245
-
 246
246 -
 247
247 -
 248
248 -
 249
249 -
 250
250 -
 251
251 -
 252
252 -
 253
253 -
 254
254 -
 255
255 -
 256
256 -
257
-
258
-
259
-
260
-
261
-
262
-
263
-
264
-
265
-
266
-
267
-
268
-
269
-
270
-
271
-
272
-
273
-
274
-
275
-
276
-
277
-
278
 |
 |
EN
Removing a DIMM
249
Removing a DIMM
To remove a DIMM, follow the
instructions below:
CAUTION
Handling a DIMM chip (memory) without
wearing a grounded, antistatic device
might damage the DIMM chip.
1
Turn off the power switch (220v
models only), and unplug the printer.
2
To open the left side panel, gently
pull it out.
3
To unlock the cam latches, press
them outward (A). Grasp the DIMM
chip on the edge, gently pull straight
out, and remove the chip from the
printer (B).
Note
Store the DIMM chip in an antistatic bag.
1
2
3