HP Officejet 700 HP OfficeJet 700 Series All-in-One - (English) User Guide - Page 35
Three - ink cartridges
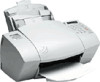 |
View all HP Officejet 700 manuals
Add to My Manuals
Save this manual to your list of manuals |
Page 35 highlights
Three 1 Make sure you have the following materials at hand: l Cotton swabs or any soft material that will not come apart or leave fibers. l Distilled, filtered, or bottled water. l Scrap paper to set the print cartridges on while you are working. 2 Remove the print cartridges: l Turn on the HP OfficeJet and lift the top cover. The print cartridges move to the center. l With the print cartridges in the center, unplug the power cord. l Remove the print cartridges and place them on their sides on a scrap piece of paper. Caution: l Don't leave the print cartridges outside the printer more than 30 minutes. l Keep print cartridges out of reach of children. l Be careful not to get ink on your hands or clothing. 3 Clean the black print cartridge: l Dip a clean cotton swab into distilled water and squeeze out any excess water. l Hold the print cartridge by the colored cap. l Clean the face and edges of the print cartridge. DO NOT wipe the nozzle plate. l Hold the print cartridge up to the light to inspect for fibers on the face and edges. If fibers remain, clean the cartridge again. 4 Clean the color print cartridge (Repeat step 3.) 5 Clean the print cartridge holder: l Locate the print cartridge holder inside the HP OfficeJet in the center. l Using clean, moistened swabs, wipe the flat surface of the underside of the arms on the bottom of the holder. Clean from back to front until thoroughly clean...3-3
-
 1
1 -
2
-
3
-
4
-
5
-
6
-
7
-
8
-
9
-
10
-
11
-
12
-
13
-
14
-
15
-
16
-
17
-
18
-
19
-
20
-
21
-
22
-
23
-
24
-
25
-
26
-
27
-
28
-
29
-
 30
30 -
 31
31 -
 32
32 -
 33
33 -
 34
34 -
 35
35 -
 36
36 -
 37
37 -
 38
38 -
 39
39 -
 40
40
 |
 |
