HP Pavilion a6000 Upgrading and Servicing Guide - Page 10
Replacing the Front Panel
 |
View all HP Pavilion a6000 manuals
Add to My Manuals
Save this manual to your list of manuals |
Page 10 highlights
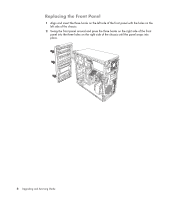
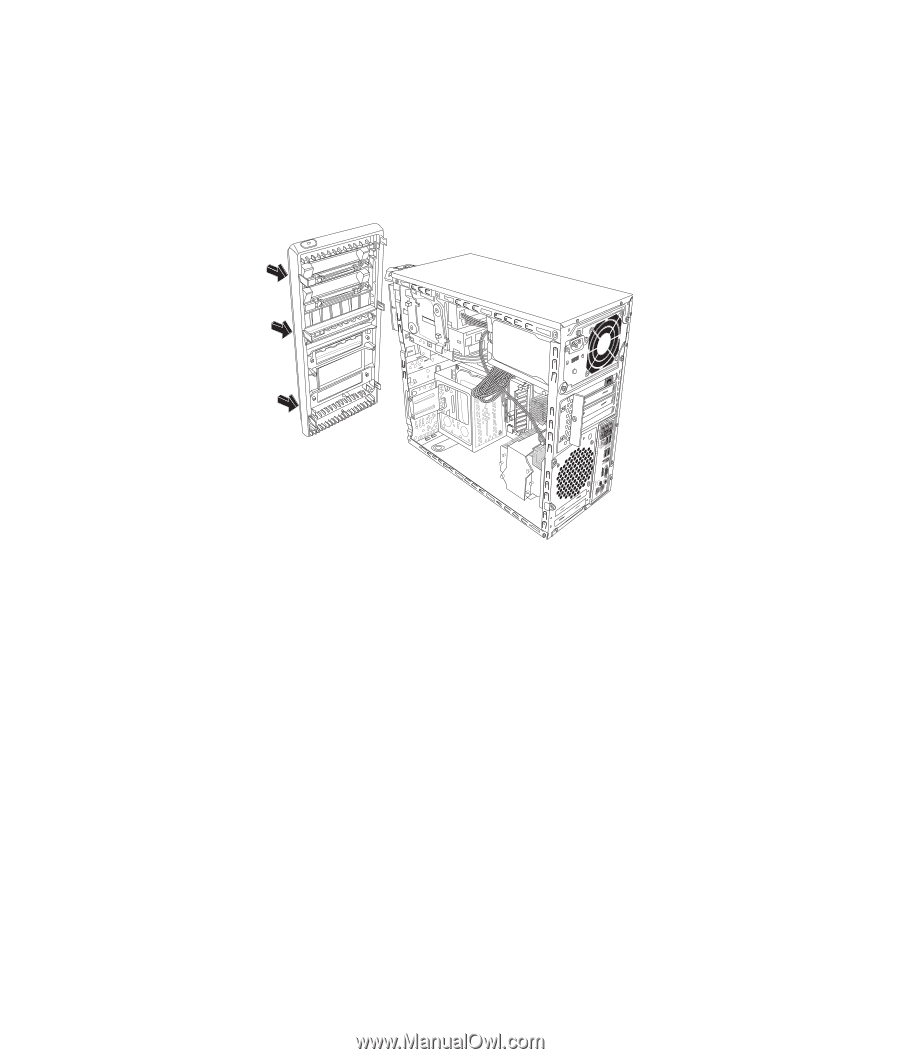
Replacing the Front Panel 1 Align and insert the three hooks on the left side of the front panel with the holes on the left side of the chassis. 2 Swing the front panel around and press the three hooks on the right side of the front panel into the three holes on the right side of the chassis until the panel snaps into place. 6 Upgrading and Servicing Guide
-
 1
1 -
2
-
3
-
4
-
 5
5 -
 6
6 -
 7
7 -
 8
8 -
 9
9 -
 10
10 -
 11
11 -
 12
12 -
 13
13 -
 14
14 -
 15
15 -
16
-
17
-
18
-
19
-
20
-
21
-
22
-
23
-
24
-
25
-
26
-
27
-
28
-
29
-
30
-
31
-
32
 |
 |
6
Upgrading and Servicing Guide
Replacing the Front Panel
1
Align and insert the three hooks on the left side of the front panel with the holes on the
left side of the chassis.
2
Swing the front panel around and press the three hooks on the right side of the front
panel into the three holes on the right side of the chassis until the panel snaps into
place.