HP Pavilion a6000 Upgrading and Servicing Guide - Page 27
Removing a Memory Module - pc motherboard
 |
View all HP Pavilion a6000 manuals
Add to My Manuals
Save this manual to your list of manuals |
Page 27 highlights
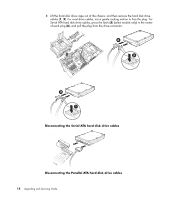
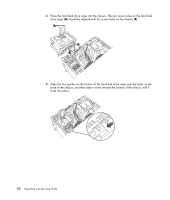
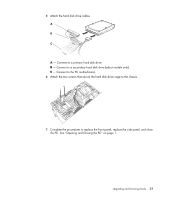
Removing a Memory Module 1 Complete the procedures to prepare the PC and to remove the side panel. See "Opening and Closing the PC" on page 1. 2 Gently lay the PC on its side. 3 Locate the memory sockets on the motherboard. CAUTION: When handling a memory module, be careful not to touch any of the contacts. Doing so may damage the module. 4 Move any cabling out of the way, if necessary. 5 Push down the two retaining clips on the ends of the memory socket until the memory module pops out of the socket. WARNING: Do not pull the memory module out of the socket. Use the retaining clips to remove the module. 6 Lift the memory module from the memory socket. Upgrading and Servicing Guide 23
-
 1
1 -
2
-
3
-
4
-
5
-
6
-
7
-
8
-
9
-
10
-
11
-
12
-
13
-
14
-
15
-
16
-
17
-
18
-
19
-
20
-
21
-
 22
22 -
 23
23 -
 24
24 -
 25
25 -
 26
26 -
 27
27 -
 28
28 -
 29
29 -
 30
30 -
 31
31 -
 32
32
 |
 |
Upgrading and Servicing Guide
23
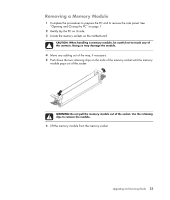
Removing a Memory Module
1
Complete the procedures to prepare the PC and to remove the side panel. See
“Opening and Closing the PC” on page 1.
2
Gently lay the PC on its side.
3
Locate the memory sockets on the motherboard.
4
Move any cabling out of the way, if necessary.
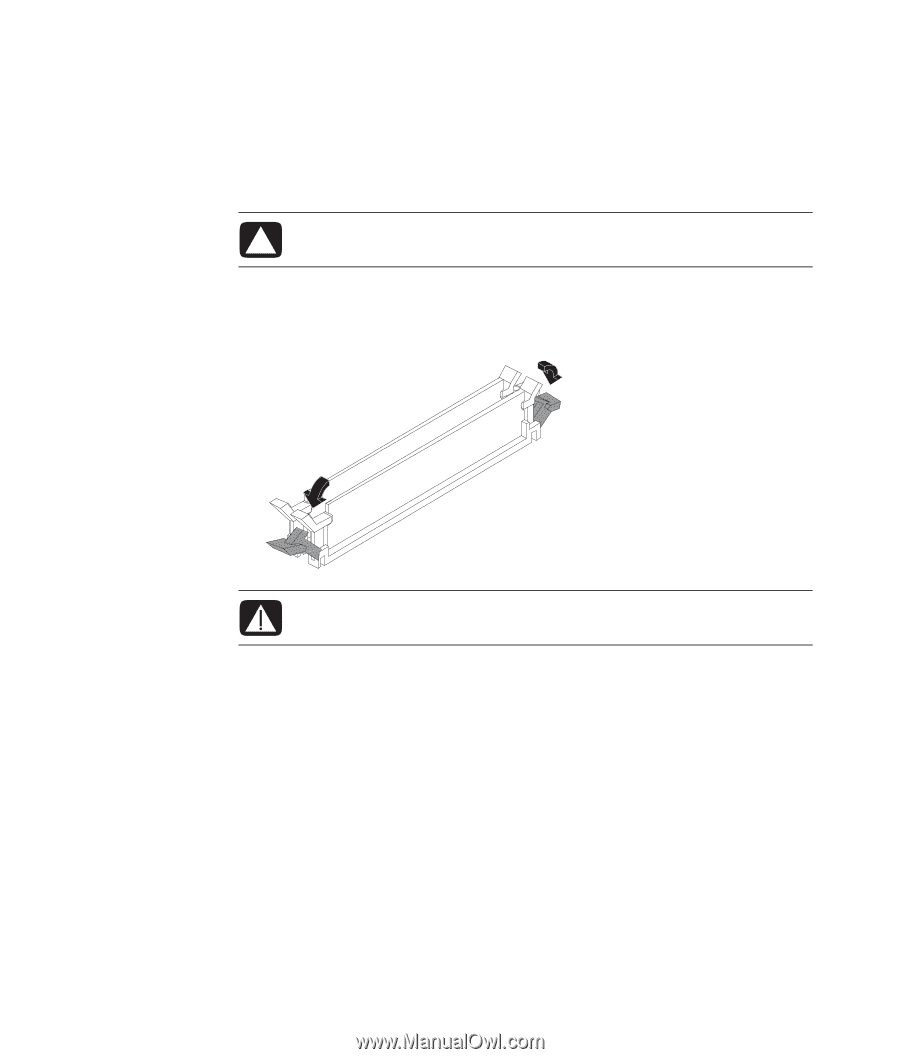
5
Push down the two retaining clips on the ends of the memory socket until the memory
module pops out of the socket.
6
Lift the memory module from the memory socket.
CAUTION: When handling a memory module, be careful not to touch any of
the contacts. Doing so may damage the module.
WARNING: Do not pull the memory module out of the socket. Use the retaining
clips to remove the module.