HP Photosmart C4700 User Guide - Page 63
Check paper, Cause, Solution - printer cartridge problem
 |
View all HP Photosmart C4700 manuals
Add to My Manuals
Save this manual to your list of manuals |
Page 63 highlights
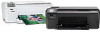
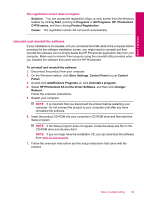
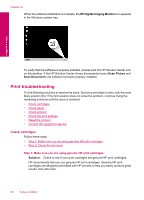
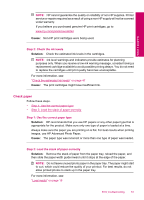
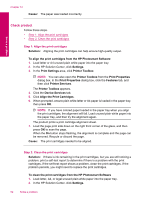
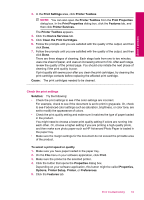
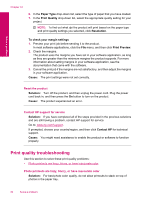
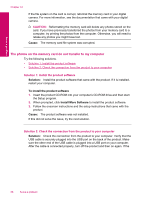
Solve a problem NOTE: HP cannot guarantee the quality or reliability of non-HP supplies. Printer service or repairs required as a result of using a non-HP supply will not be covered under warranty. If you believe you purchased genuine HP print cartridges, go to: www.hp.com/go/anticounterfeit Cause: Non-HP print cartridges were being used. Step 2: Check the ink levels Solution: Check the estimated ink levels in the cartridges. NOTE: Ink level warnings and indicators provide estimates for planning purposes only. When you receive a low-ink warning message, consider having a replacement cartridge available to avoid possible printing delays. You do not need to replace the cartridges until print quality becomes unacceptable. For more information, see: "Check the estimated ink levels" on page 47 Cause: The print cartridges might have insufficient ink. Check paper Follow these steps. • Step 1: Use the correct paper type • Step 2: Load the stack of paper correctly Step 1: Use the correct paper type Solution: HP recommends that you use HP papers or any other paper type that is appropriate for the product. Make sure only one type of paper is loaded at a time. Always make sure the paper you are printing on is flat. For best results when printing images, use HP Advanced Photo Paper. Cause: The paper type was incorrect or more than one type of paper was loaded. Step 2: Load the stack of paper correctly Solution: Remove the stack of paper from the paper tray, reload the paper, and then slide the paper-width guide inward until it stops at the edge of the paper. NOTE: Do not leave unused photo paper in the paper tray. The paper might start to curl, which could reduce the quality of your printout. For best results, do not allow printed photos to stack up in the paper tray. For more information, see: "Load media" on page 18 Print troubleshooting 61
-
 1
1 -
2
-
3
-
4
-
5
-
6
-
7
-
8
-
9
-
10
-
11
-
12
-
13
-
14
-
15
-
16
-
17
-
18
-
19
-
20
-
21
-
22
-
23
-
24
-
25
-
26
-
27
-
28
-
29
-
30
-
31
-
32
-
33
-
34
-
35
-
36
-
37
-
38
-
39
-
40
-
41
-
42
-
43
-
44
-
45
-
46
-
47
-
48
-
49
-
50
-
51
-
52
-
53
-
54
-
55
-
56
-
57
-
 58
58 -
 59
59 -
 60
60 -
 61
61 -
 62
62 -
 63
63 -
 64
64 -
 65
65 -
 66
66 -
 67
67 -
 68
68 -
69
-
70
-
71
-
72
-
73
-
74
-
75
-
76
-
77
-
78
-
79
-
80
-
81
-
82
-
83
-
84
-
85
-
86
-
87
-
88
-
89
-
90
-
91
-
92
-
93
-
94
-
95
-
96
-
97
-
98
-
99
-
100
-
101
-
102
-
103
-
104
-
105
-
106
-
107
-
108
-
109
-
110
-
111
-
112
-
113
-
114
-
115
-
116
-
117
-
118
-
119
-
120
 |
 |
