HP ProBook 5330m HP ProBook 5330m Notebook PC - Maintenance and Service Guide - Page 56
If it is necessary to replace the hard drive bracket, follow these steps, from the sides of the hard
 |
View all HP ProBook 5330m manuals
Add to My Manuals
Save this manual to your list of manuals |
Page 56 highlights
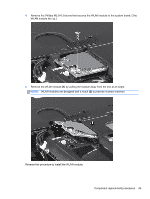
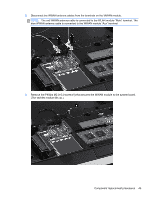
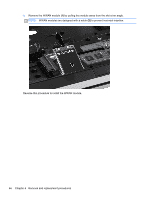
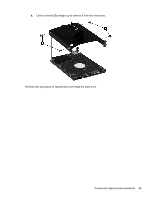
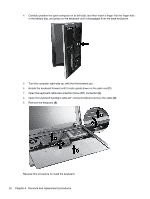
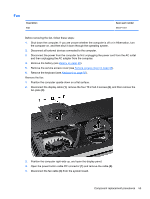
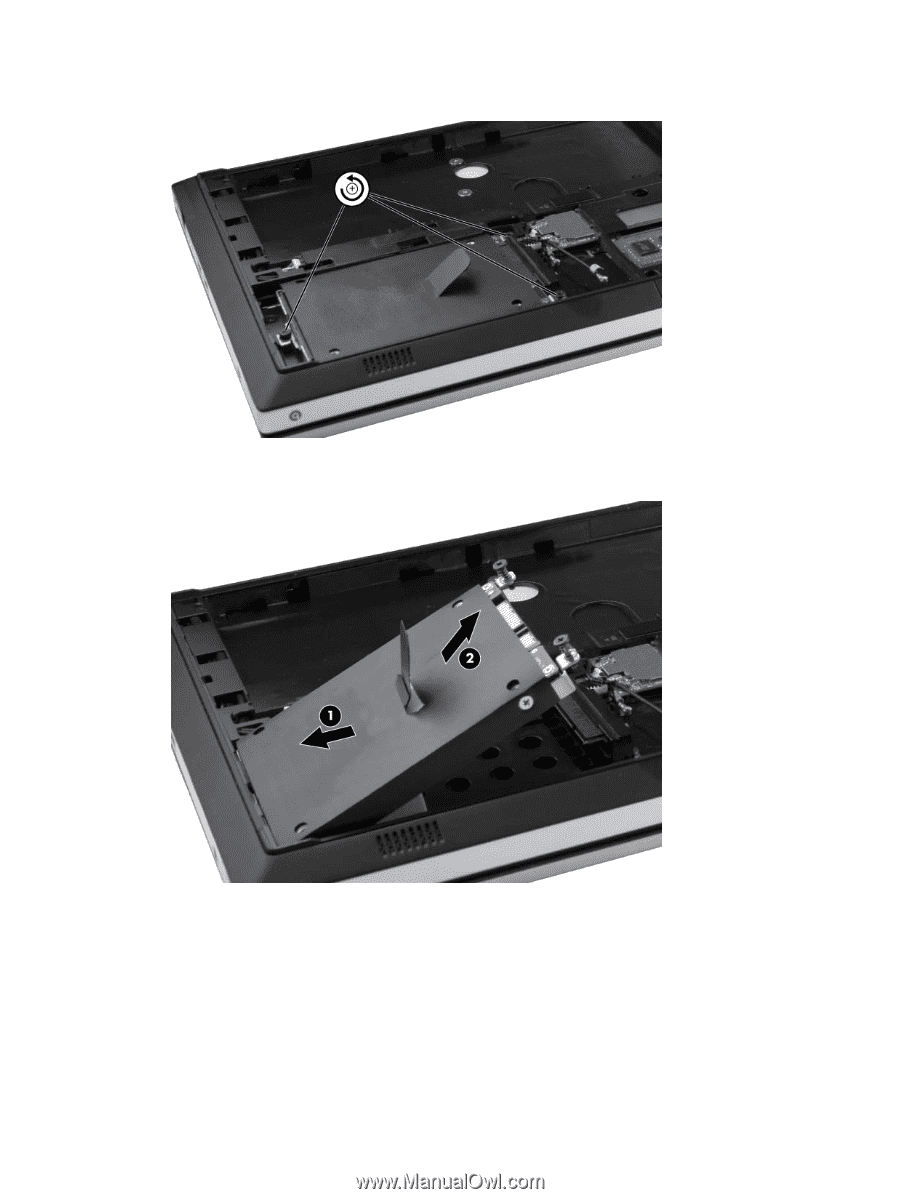
2. Loosen the three Phillips M10.0x2.5 captive screws that secure the hard drive to the computer. 3. Grasp the tab (1) on the hard drive, pull the hard drive to the left, and then remove the hard drive (2) at an angle. 4. If it is necessary to replace the hard drive bracket, follow these steps: a. Remove the four Phillips M3.0×3.0 hard drive bracket screws (1) from the sides of the hard drive. 48 Chapter 4 Removal and replacement procedures
-
 1
1 -
2
-
3
-
4
-
5
-
6
-
7
-
8
-
9
-
10
-
11
-
12
-
13
-
14
-
15
-
16
-
17
-
18
-
19
-
20
-
21
-
22
-
23
-
24
-
25
-
26
-
27
-
28
-
29
-
30
-
31
-
32
-
33
-
34
-
35
-
36
-
37
-
38
-
39
-
40
-
41
-
42
-
43
-
44
-
45
-
46
-
47
-
48
-
49
-
50
-
 51
51 -
 52
52 -
 53
53 -
 54
54 -
 55
55 -
 56
56 -
 57
57 -
 58
58 -
 59
59 -
 60
60 -
 61
61 -
62
-
63
-
64
-
65
-
66
-
67
-
68
-
69
-
70
-
71
-
72
-
73
-
74
-
75
-
76
-
77
-
78
-
79
-
80
-
81
-
82
-
83
-
84
-
85
-
86
-
87
-
88
-
89
-
90
-
91
-
92
-
93
-
94
-
95
-
96
-
97
-
98
-
99
-
100
-
101
-
102
-
103
-
104
-
105
-
106
-
107
-
108
-
109
-
110
-
111
-
112
-
113
-
114
-
115
-
116
-
117
-
118
-
119
-
120
-
121
-
122
-
123
-
124
-
125
-
126
-
127
-
128
-
129
 |
 |
2.
Loosen the three Phillips M10.0x2.5 captive screws that secure the hard drive to the computer.
3.
Grasp the tab
(1)
on the hard drive, pull the hard drive to the left, and then remove the hard drive
(2)
at an angle.
4.
If it is necessary to replace the hard drive bracket, follow these steps:
a.
Remove the four Phillips M3.0×3.0 hard drive bracket screws
(1)
from the sides of the hard
drive.
48
Chapter 4
Removal and replacement procedures