HP ProBook 5330m HP ProBook 5330m Notebook PC - Maintenance and Service Guide - Page 75
Reverse this procedure to install the system board
 |
View all HP ProBook 5330m manuals
Add to My Manuals
Save this manual to your list of manuals |
Page 75 highlights
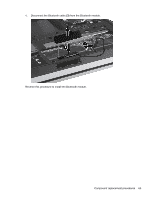
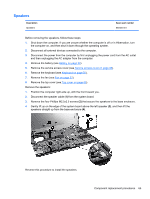
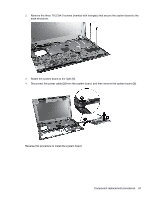
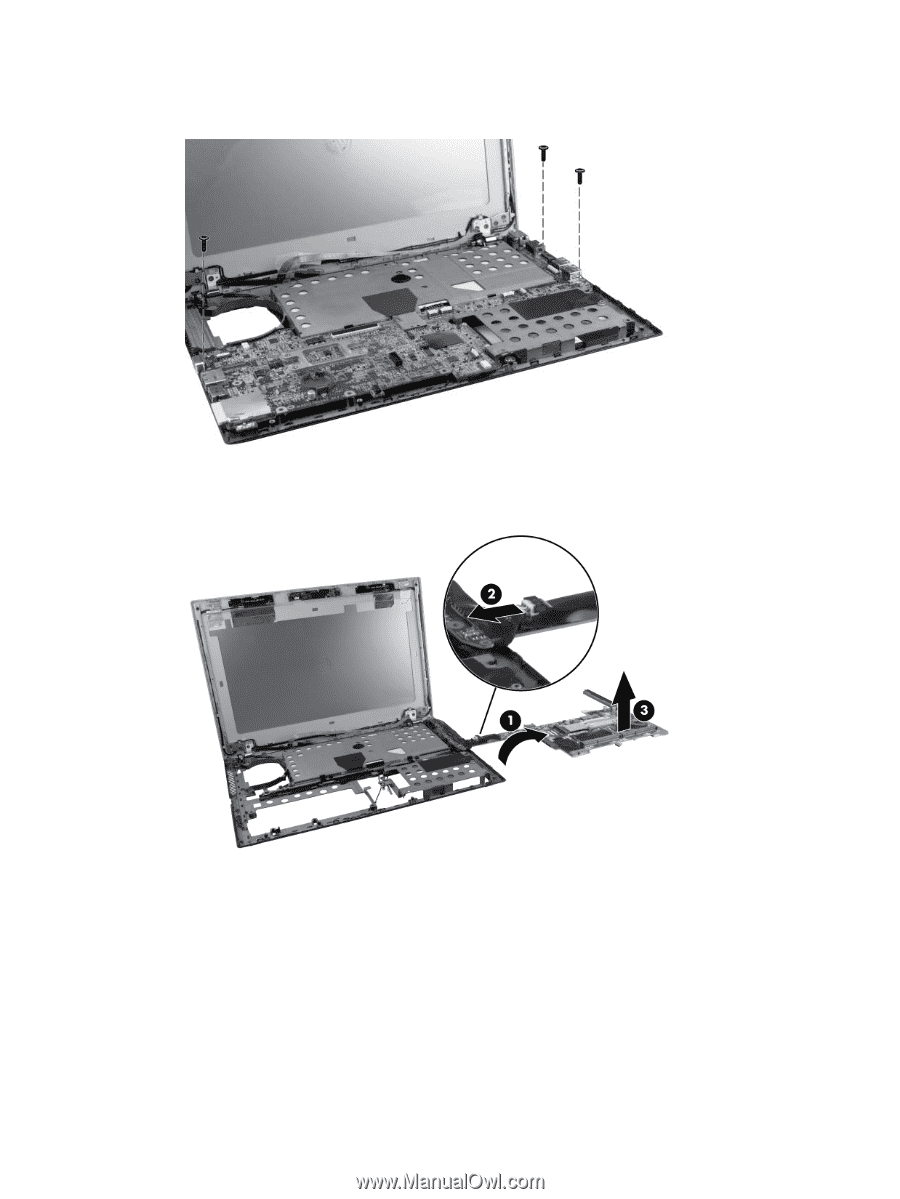
2. Remove the three T8 2.5x4.0 screws (marked with triangles) that secure the system board to the base enclosure. 3. Rotate the system board to the right (1). 4. Disconnect the power cable (2) from the system board, and then remove the system board (3). Reverse this procedure to install the system board. Component replacement procedures 67
-
 1
1 -
2
-
3
-
4
-
5
-
6
-
7
-
8
-
9
-
10
-
11
-
12
-
13
-
14
-
15
-
16
-
17
-
18
-
19
-
20
-
21
-
22
-
23
-
24
-
25
-
26
-
27
-
28
-
29
-
30
-
31
-
32
-
33
-
34
-
35
-
36
-
37
-
38
-
39
-
40
-
41
-
42
-
43
-
44
-
45
-
46
-
47
-
48
-
49
-
50
-
51
-
52
-
53
-
54
-
55
-
56
-
57
-
58
-
59
-
60
-
61
-
62
-
63
-
64
-
65
-
66
-
67
-
68
-
69
-
 70
70 -
 71
71 -
 72
72 -
 73
73 -
 74
74 -
 75
75 -
 76
76 -
 77
77 -
 78
78 -
 79
79 -
 80
80 -
81
-
82
-
83
-
84
-
85
-
86
-
87
-
88
-
89
-
90
-
91
-
92
-
93
-
94
-
95
-
96
-
97
-
98
-
99
-
100
-
101
-
102
-
103
-
104
-
105
-
106
-
107
-
108
-
109
-
110
-
111
-
112
-
113
-
114
-
115
-
116
-
117
-
118
-
119
-
120
-
121
-
122
-
123
-
124
-
125
-
126
-
127
-
128
-
129
 |
 |
2.
Remove the three T8 2.5x4.0 screws (marked with triangles) that secure the system board to the
base enclosure.
3.
Rotate the system board to the right
(1)
.
4.
Disconnect the power cable
(2)
from the system board, and then remove the system board
(3)
.
Reverse this procedure to install the system board.
Component replacement procedures
67