HP Q3409A HP Photosmart 7400 series User's Guide - Page 13
Ink-backup Printing Mode lets you, Inserting the cartridges, right
 |
View all HP Q3409A manuals
Add to My Manuals
Save this manual to your list of manuals |
Page 13 highlights
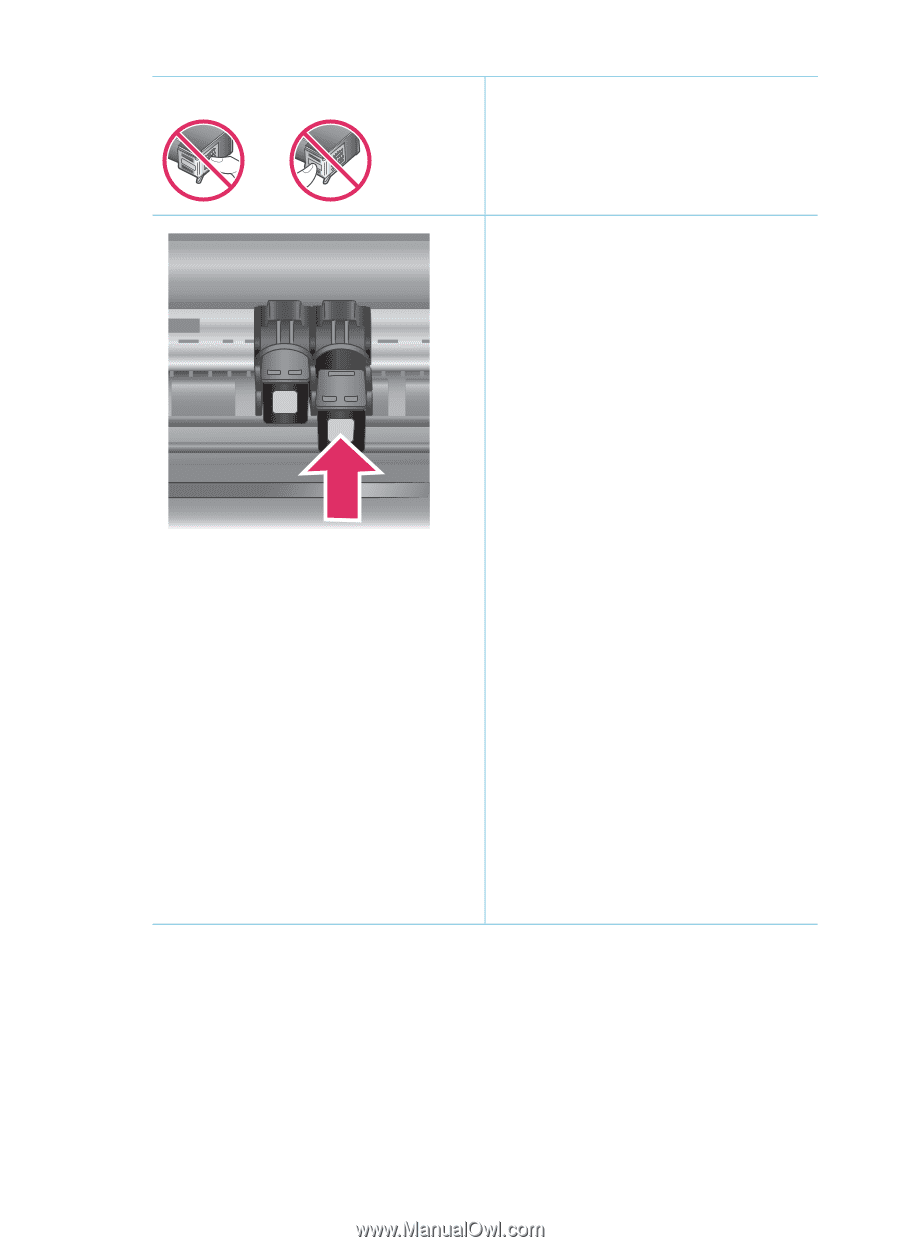
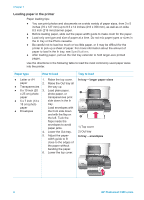
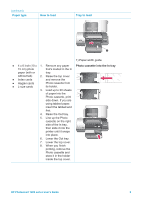
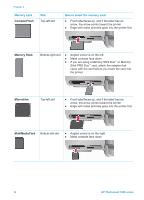
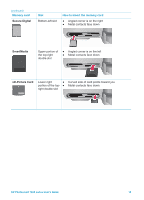
Inserting and replacing the print cartridges (continued) Do not touch the ink nozzles or the copper-colored contacts, and do not retape the cartridges. Inserting the cartridges 1. If you are replacing a Black or Photo cartridge, push down and pull outward on the cartridge in the right stall to remove it. 2. Hold the new Black or Photo cartridge with the label on top. Slide the cartridge at a slight upward angle into the right stall so the copper-colored contacts go in first. Push the cartridge until it snaps into place. Caution To avoid print carriage jams, make sure the print cartridge snaps securely into place as you insert it. 3. Repeat the previous step to install the Tri-color cartridge in the left stall. 4. Lower the top cover. You must install both cartridges in order for the printer to work normally. Tip Ink-backup Printing Mode lets you keep printing even if one of the cartridges fails or runs out of ink. Remove the cartridge and close the top cover to enter Ink-backup Printing Mode. The printer continues to print, but at a slower speed and with inferior print quality. Replace the empty cartridge as soon as possible. HP Photosmart 7400 series User's Guide 11
-
 1
1 -
2
-
3
-
4
-
5
-
6
-
7
-
 8
8 -
 9
9 -
 10
10 -
 11
11 -
 12
12 -
 13
13 -
 14
14 -
 15
15 -
 16
16 -
 17
17 -
 18
18 -
19
-
20
-
21
-
22
-
23
-
24
-
25
-
26
-
27
-
28
-
29
-
30
-
31
-
32
-
33
-
34
-
35
-
36
-
37
-
38
-
39
-
40
-
41
-
42
-
43
-
44
-
45
-
46
-
47
-
48
-
49
-
50
-
51
 |
 |