HP Q3409A HP Photosmart 7400 series User's Guide - Page 14
Align the Printer, Open HP Photosmart
 |
View all HP Q3409A manuals
Add to My Manuals
Save this manual to your list of manuals |
Page 14 highlights
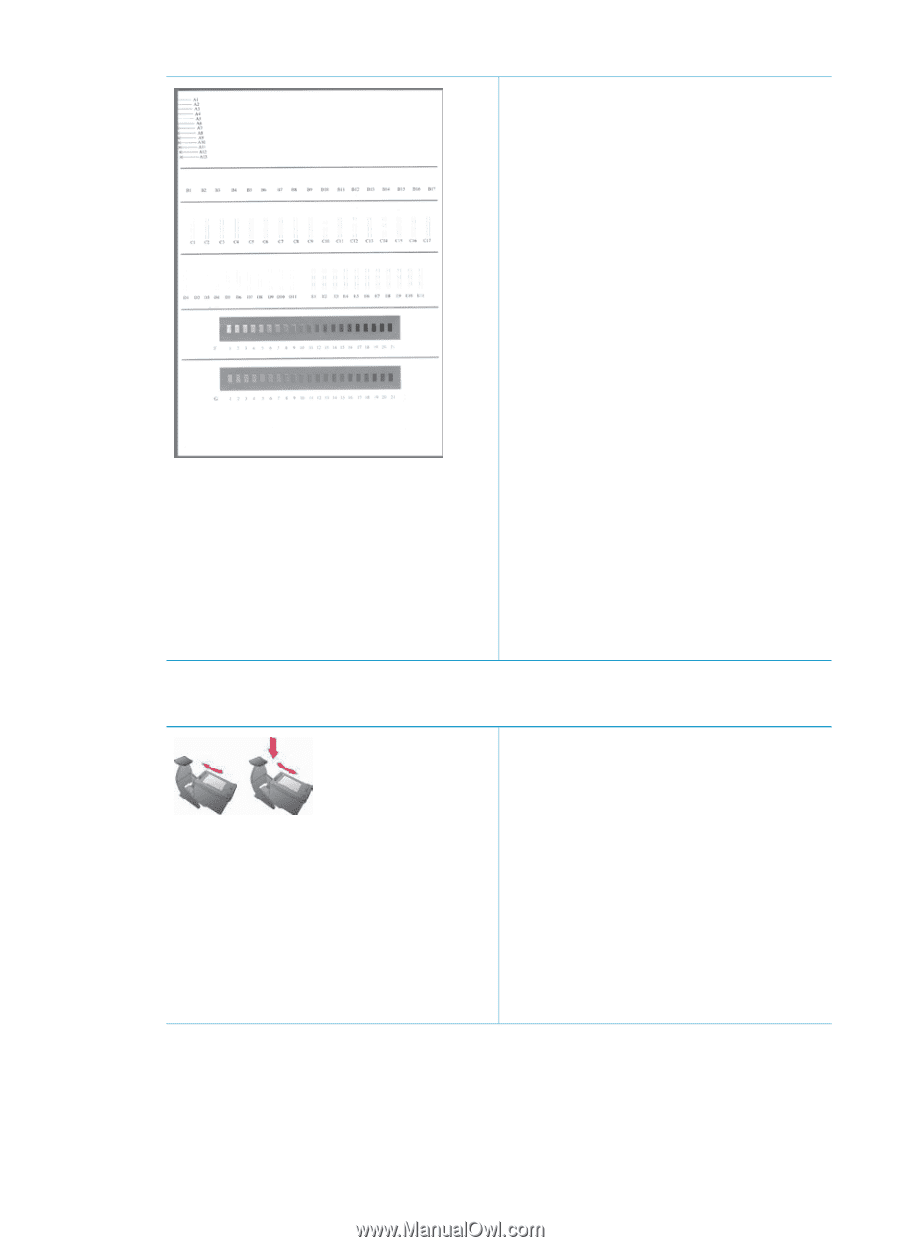
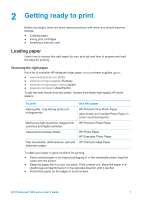
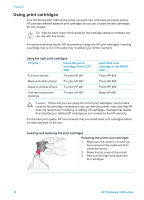
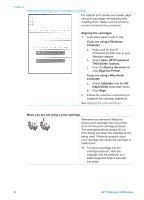
Chapter 2 Inserting and replacing the print cartridges (continued) For optimal print quality and speed, align new print cartridges immediately after installing them. Make sure the printer is on and connected to a computer. Aligning the cartridges 1. Load plain paper in the In tray. If you are using a Windows computer: a. Right-click on the HP Photosmart printer icon in your Windows taskbar. b. Select Open HP Photosmart 7400 Series Toolbox. c. From the Device Services tab, click Align the Printer. If you are using a Macintosh computer: a. Select Calibrate from the HP Inkjet Utility drop-down menu. b. Click Align. 2. Follow the onscreen instructions to complete the cartridge alignment. See Aligning the print cartridges. When you are not using a print cartridge Whenever you remove a filled (not empty) print cartridge from the printer, store it in the print cartridge protector. The cartridge protector keeps the ink from drying out when the cartridge is not being used. Failure to properly store your cartridge can cause the cartridge to malfunction. ➔ To insert a cartridge into the cartridge protector, slide the cartridge into the protector at a slight angle and snap it securely into place. 12 HP Photosmart 7400 series
-
 1
1 -
2
-
3
-
4
-
5
-
6
-
7
-
8
-
 9
9 -
 10
10 -
 11
11 -
 12
12 -
 13
13 -
 14
14 -
 15
15 -
 16
16 -
 17
17 -
 18
18 -
 19
19 -
20
-
21
-
22
-
23
-
24
-
25
-
26
-
27
-
28
-
29
-
30
-
31
-
32
-
33
-
34
-
35
-
36
-
37
-
38
-
39
-
40
-
41
-
42
-
43
-
44
-
45
-
46
-
47
-
48
-
49
-
50
-
51
 |
 |