IBM 8486 User Guide
IBM 8486 - eServer xSeries 100 Manual
 |
UPC - 000435839718
View all IBM 8486 manuals
Add to My Manuals
Save this manual to your list of manuals |
IBM 8486 manual content summary:
- IBM 8486 | User Guide - Page 1
ERserver xSeries 100 Type 8486 User's Guide - IBM 8486 | User Guide - Page 2
- IBM 8486 | User Guide - Page 3
ERserver xSeries 100 Type 8486 User's Guide - IBM 8486 | User Guide - Page 4
, read the general information in "Notices," on page 47, and the Warranty and Support Information document on the IBM xSeries Documentation CD. First Edition (October 2005) © Copyright International Business Machines Corporation 2005. All rights reserved. US Government Users Restricted Rights - IBM 8486 | User Guide - Page 5
xSeries 100 Type 8486 server 1 Related documentation 2 Notices and statements in this document 3 Features and specifications 4 What your server offers 5 Reliability, availability, and serviceability 6 IBM Director 7 Update Xpress program 7 Server 19 Installing a memory module 20 Installing - IBM 8486 | User Guide - Page 6
Gigabit Ethernet Utility program . . . . . 45 Configuring the Broadcom NetXtreme Gigabit Ethernet controller 45 Updating IBM Director 46 Appendix. Notices 47 Edition notice 47 Trademarks 48 Important notes 48 Product recycling and disposal 49 Index 51 iv xSeries 100 Type 8486: User's Guide - IBM 8486 | User Guide - Page 7
, leggere le Informazioni sulla Sicurezza. Les sikkerhetsinformasjonen (Safety Information) før du installerer dette produktet. Antes de instalar este produto, leia as Informações sobre Segurança. © Copyright IBM Corp. 2005 v - IBM 8486 | User Guide - Page 8
systems, networks, and modems before you open the device covers, unless instructed otherwise in the installation and configuration procedures. v Connect and disconnect cables outlet. 3. Remove signal cables from connectors. 4. Remove all cables from devices. vi xSeries 100 Type 8486: User's Guide - IBM 8486 | User Guide - Page 9
CAUTION: When replacing the lithium battery, use only IBM Part Number 33F8354 or an equivalent type battery recommended the laser product could result in exposure to hazardous laser radiation. There are no serviceable parts inside the device. v Use of controls or adjustments or performance of - IBM 8486 | User Guide - Page 10
more than one power cord. To remove all electrical current from the device, ensure that all power cords are disconnected from the power source. 2 1 viii xSeries 100 Type 8486: User's Guide - IBM 8486 | User Guide - Page 11
energy levels are present inside any component that has this label attached. There are no serviceable parts inside these components. If you suspect a problem with one of these parts, contact a service technician. Statement 12: CAUTION: The following label indicates a hot surface nearby. Statement 13 - IBM 8486 | User Guide - Page 12
translated versions of the caution or danger statement in the IBM Safety Information book. For example, if a caution statement instructions. Read any additional safety information that comes with your server or optional device before you install the device. x xSeries 100 Type 8486: User's Guide - IBM 8486 | User Guide - Page 13
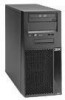
Type 8486 server The IBM® ® xSeries® 100 Type 8486 server is a high-performance server Eserver based on IBM X-Architecture™ technologies. It is ideally suited for networking environments that require superior microprocessor performance, improved systems management as well as flexible memory - IBM 8486 | User Guide - Page 14
comes with the server: v Installation Guide This printed document contains instructions for setting up the server and basic instructions for installing some options. v Warranty and Support Information This document is in Portable Document Format (PDF) on the IBM xSeries Documentation CD. It - IBM 8486 | User Guide - Page 15
Safety Information document, which is on the IBM xSeries® Documentation CD. Each statement is numbered for problem situations. v Attention: These notices indicate potential damage to programs, devices, or data. An attention notice is placed just before the instruction xSeries 100 Type 8486 server 3 - IBM 8486 | User Guide - Page 16
Processor v 1 MB Level-2 or 256 KB level-2 cache v 800 MHz front-side bus (FSB) or 533 MHz front-side bus Note: Use the Configuration/Setup Utility program to determine the type and speed of the microprocessor. Memory right level - Server off: 0° manually selected xSeries 100 Type 8486: User's Guide - IBM 8486 | User Guide - Page 17
Architecture technology combines proven, innovative IBM designs to make your Intel-processor-based server powerful, scalable, and reliable. For more information, see http://www.ibm.com/us/eserver/xseries/xarchitecture/enterprise/index.htm. v IBM ServerGuide Setup and Installation CD The ServerGuide - IBM 8486 | User Guide - Page 18
and diagnostics LEDs on the system board v Upgradeable microcode for POST, BIOS, and read-only memory (ROM) resident code, locally or over a LAN v Wake on LAN® capability 1. Service availability will vary by country. Response time varies; may exclude holidays. 6 xSeries 100 Type 8486: User's Guide - IBM 8486 | User Guide - Page 19
IT personnel and users v Reduced service and support costs For more information about IBM Director, see the IBM Director documentation on the CD image on the IBM xSeries Systems Management Web page at http://www1.ibm.com/servers/eserver/xseries/systems_management/xseries_sm.html, which presents an - IBM 8486 | User Guide - Page 20
The following illustration shows the controls and LEDs on the front of the server. Power-on LED Power-control button (Optional) Diskette drive activity LED this button to turn the server on and off manually. A power-control-button shield comes with the server. 8 xSeries 100 Type 8486: User's Guide - IBM 8486 | User Guide - Page 21
that the server is turned the server. The LED might be burned out. To remove all electrical power from the server, you connectors on the rear of the server. Power-cord connector Connect the power this green LED is lit, it indicates that the server is connected to an ac power source. Mouse connector - IBM 8486 | User Guide - Page 22
is reserved for various system resources and is unavailable to the operating system. The amount of memory that is reserved for system resources depends on the operating system, the configuration of the server, and the configured PCI or PCI Express options. 10 xSeries 100 Type 8486: User's Guide - IBM 8486 | User Guide - Page 23
the server, if your operating system supports this feature server. v If the Wake on LAN feature turned on the server, the Wake on LAN feature can turn off the server. v The server can turn itself off as an automatic response to a critical system failure. Chapter 1. The xSeries 100 Type 8486 server - IBM 8486 | User Guide - Page 24
12 xSeries 100 Type 8486: User's Guide - IBM 8486 | User Guide - Page 25
Chapter 2. Installing options This chapter provides detailed instructions for installing optional hardware devices in the server. Server components The following illustration shows the major components in the server. The illustrations in this document might differ slightly from your hardware. Drive - IBM 8486 | User Guide - Page 26
system board. System fan 3 (rear fan) Battery Wake on LAN Microprocessor System fan 1 (fan sink) Main power Microprocessor power Diskette drive (optional) SATA 2 SATA 0 Primary IDE Front shows the external input/output connectors on the system board. 14 xSeries 100 Type 8486: User's Guide - IBM 8486 | User Guide - Page 27
USB (2) Ethernet (RJ-45) Nonmaskable interrupt (NMI) Serial 2 Video Parallel Serial 1 Keyboard Mouse System-board LEDs The following illustration shows the LEDs on the system board. System fan 3 error (LED2) System fan 1 error (LED3) Standby power (LED1) VRD good (LED11) System fan 2 error (LED13) - IBM 8486 | User Guide - Page 28
work safely. v Make sure you have an adequate number of properly grounded electrical outlets for the server, monitor, and other devices. v Observe good housekeeping in the area where you are working. drives. v Have a small flat-blade screwdriver available. 16 xSeries 100 Type 8486: User's Guide - IBM 8486 | User Guide - Page 29
.) See the instructions for removing and installing a specific hot-swap component for any additional procedures that you might have to perform before you remove or install the component. v For a list of supported options for the server, see http://www.ibm.com/servers/eserver/serverproven/compat//us - IBM 8486 | User Guide - Page 30
"Installing the side cover" on page 35. Attention: For proper cooling and airflow, replace the cover before turning on the server. Operating the server for extended periods of time (more than 30 minutes) with the cover removed might damage server components. 18 xSeries 100 Type 8486: User's Guide - IBM 8486 | User Guide - Page 31
3. Press up slightly on both bezel release tabs while pulling the bottom of the bezel away from the server to disengage the tabs and remove the bezel. 4. Store the bezel in a safe place. For instructions for replacing the bezel, see "Installing the bezel" on page 34. Chapter 2. Installing options 19 - IBM 8486 | User Guide - Page 32
com/servers/eserver/serverproven/compat/us/; then, select your country and navigate to the list of options for your computer. v When you restart the server after adding or removing a DIMM, the server displays a message that the memory configuration has changed. 20 xSeries 100 Type 8486: User's Guide - IBM 8486 | User Guide - Page 33
error LED DIMM 3 error LED DIMM 2 error LED DIMM 1 error LED Memory installation sequence DIMMs Slots 1 DIMM 1 2 DIMMs 1, 3 4 DIMMs 1, 2, 3, 4 Note: You can install one, two, or four DIMMs in the server, but not three DIMMs. Three DIMMs are not supported. Chapter 2. Installing options 21 - IBM 8486 | User Guide - Page 34
DIMM. 3. Touch the static-protective package that contains the DIMM to any unpainted metal surface on the server. Then, remove the new DIMM from the package. 4. Turn the DIMM so that the DIMM keys otherwise, go to "Completing the installation" on page 34. 22 xSeries 100 Type 8486: User's Guide - IBM 8486 | User Guide - Page 35
with the drive and make sure that you have all the cables and other equipment specified in the documentation that comes with the drive. v The server supports a maximum of two hard disk drives, four DIMMs, and one 5.25-inch device; or, one hard disk drive, four DIMMs, and two 5.25-inch devices - IBM 8486 | User Guide - Page 36
guidelines" on page 16. 2. Turn off the server and peripheral devices, and disconnect the power cords and all external cables. 3. Remove the side cover (see "Removing the side cover" on page 18). 4. Remove the bezel (see "Removing the bezel" on page 19). 24 xSeries 100 Type 8486: User's Guide - IBM 8486 | User Guide - Page 37
the filler panel release tab on the inside of the bezel and remove it from the bezel; then, pry the EMC shield away from the server. Store the filler panel and EMC shield in a safe place. Release tab Filler panel EMC shield Drive retainer clip Note: If you are installing a drive - IBM 8486 | User Guide - Page 38
radiation. There are no serviceable parts inside the device. to any unpainted metal surface on the server; then, remove the drive from the outward). 9. Align the drive assembly with the guide rails in the bay. Push the drive rear of the drives or over the microprocessor and DIMMs. 12. If you have - IBM 8486 | User Guide - Page 39
following information: v Read the documentation that comes with the drive for cabling instructions. v Route the cable before you install the drive. Do not block the the fans. v You can install two SATA hard disk drives in the server. Note: Each Serial ATA drive comes with a cable. If you install an - IBM 8486 | User Guide - Page 40
the drive to any unpainted metal surface on the server; then, remove the drive from the package and with the drive. 7. Align the drive assembly with the guide rails in the bay (with the connector end of to the rear of the drives or over the microprocessor and DIMMs. 12. Connect the power cable to - IBM 8486 | User Guide - Page 41
drives to the system board. Two or three types of signal cables come with the server: - IDE: The wider IDE signal cable has three connectors. One of these connectors See the optional ServeRAID-7t S-ATA controller documentation for cabling instructions. - SCSI A SCSI cable connects SCSI devices to an - IBM 8486 | User Guide - Page 42
server components. 5. Touch the static-protective package that contains the adapter to any unpainted metal surface on the server. Then, remove the adapter from the static-protective package. Avoid touching the components and gold-edge connectors on the adapter. 30 xSeries 100 Type 8486: User's Guide - IBM 8486 | User Guide - Page 43
6. Follow the instructions that come with the adapter to set jumpers or switches, if any. Attention: Avoid touching the components and gold-edge connectors on the adapter. 7. Carefully grasp the adapter by the top edge or upper corners, and align it with the expansion-slot guides; then, press the - IBM 8486 | User Guide - Page 44
hard disk drives. See your SCSI adapter option documentation for complete instructions for installing a SCSI adapter in the server and for additional information about SCSI adapters. Note: An optional SCSI Complete the installation of the optional SCSI adapter. 32 xSeries 100 Type 8486: User's Guide - IBM 8486 | User Guide - Page 45
. After you add the security cable, make sure that it does not interfere with other cables that are connected to the server. Before you begin, obtain the following items: v A flat-blade screwdriver v An adjustable wrench v A 19 mm (0.75 in.) rope clip or wire rope (similar to National - IBM 8486 | User Guide - Page 46
cables and, for certain options, run the Configuration/Setup Utility program. Follow the instructions in this section. Installing the bezel To replace the bezel, complete the following steps bottom of the bezel toward the server until the bezel snaps into place. 34 xSeries 100 Type 8486: User's Guide - IBM 8486 | User Guide - Page 47
and that you have not left loose tools or parts inside the server. 2. Align the cover over the server (with the rear of the cover slightly hanging off the rear of the server) and slide the cover toward the front of the server until it is completely closed. Thumbscrews 3. Use the two thumbscrews that - IBM 8486 | User Guide - Page 48
. See the documentation that comes with each option for information about installing device drivers. If the server has an optional RAID adapter and you have installed or removed a hard disk the Broadcom NetXtreme Gigabit Ethernet controller" on page 45. 36 xSeries 100 Type 8486: User's Guide - IBM 8486 | User Guide - Page 49
program is part of the BIOS code in your server. You can use it xSeries servers. If you plan to use IBM Director to manage the server, you can download the CD image at http://www.ibm.com/eserver/xseries/systems_management/xseries_sm/dwnl.htm. For detailed information about IBM Director, see the IBM - IBM 8486 | User Guide - Page 50
the server will have no SCSI capability. If you disable the integrated Ethernet controller and no Ethernet adapter is installed, the server will have no Ethernet capability. This choice is on the full Configuration/Setup Utility menu only. - Parallel Port Setup 38 xSeries 100 Type 8486: User's Guide - IBM 8486 | User Guide - Page 51
memory (ROM) starts during POST. - Advanced Chipset Control Select this choice to modify settings that control features of the core chip set on the system board. Attention: Do not make changes in the Advanced Chipset Control option unless directed to do so by an IBM authorized service the server - IBM 8486 | User Guide - Page 52
enabling or disabling the microprocessor cache and Hyper-Threading Technology. The default status for Hyper-Threading Technology is Enabled. Attention: Do not make changes in the Advanced Processor Control option unless directed to do so by an IBM authorized service representative. v Error Logs - IBM 8486 | User Guide - Page 53
Start the Configuration/Setup Utility program and reset the power-on password. v Remove the server battery and then reinstall it. See the Problem Determination and Service Guide on the IBM xSeries Documentation CD for instructions for removing the battery. v Change the pin position of the clear CMOS - IBM 8486 | User Guide - Page 54
Password choice is on the Configuration/Setup Utility menu only if an optional IBM Remote Supervisor Adapter II is installed. Resetting passwords If you forget the power the next time you start the server the original user password will be reinstated. 42 xSeries 100 Type 8486: User's Guide - IBM 8486 | User Guide - Page 55
. Turn on the server. The Configuration/Setup Utility program starts. 11. Follow the instructions to erase the existing v Device drivers that are provided for your server model and detected features are supported on all server models. The ServerGuide program requires a supported IBM server with an - IBM 8486 | User Guide - Page 56
server hardware and you are not using the ServerGuide program to install your operating system, complete the following steps to download the latest operating-system installation instructions from the IBM Support Web page: 1. Go to http://www.ibm.com/support/. 44 xSeries 100 Type 8486: User's Guide - IBM 8486 | User Guide - Page 57
drivers. 3. On the "Downloads and drivers" page, in the Brand field, select, Servers. 4. In the Family field, select xSeries 100. 5. Click Continue. 6. In the View by document type field, select OS installation. 7. Select the instructions Ethernet port in the server supports auto-negotiation, the - IBM 8486 | User Guide - Page 58
.com/eserver/xseries/systems_management/xseries_sm/dwnl.html. b. Follow the instructions on the Web page to download the latest version. 2. Install the IBM Director program. 3. Download and install any applicable updates or interim fixes for the server: a. Go to http://www.ibm.com. b. Click Support - IBM 8486 | User Guide - Page 59
right may be used instead. However, it is the user's responsibility to evaluate and verify the operation of any non-IBM product, program, or service. IBM may have patents or pending patent applications covering subject matter described in this document. The furnishing of this document does not - IBM 8486 | User Guide - Page 60
States and other countries. Other company, product, or service names may be trademarks or service marks of others. Important notes Processor speeds indicate the internal clock speed of the microprocessor; other factors also affect application performance. 48 xSeries 100 Type 8486: User's Guide - IBM 8486 | User Guide - Page 61
the maximum possible. When referring to processor storage, real and virtual storage, or supported drives available from IBM. Maximum memory may require replacement of the standard memory with an optional memory module. IBM makes no representation or warranties regarding non-IBM products and services - IBM 8486 | User Guide - Page 62
, ladite étiquette précise que le produit sur lequel elle est apposée ne doit pas être jeté mais être récupéré en fin de vie. 50 xSeries 100 Type 8486: User's Guide - IBM 8486 | User Guide - Page 63
35 © Copyright IBM Corp. 2005 D danger statements 3 data rate, Ethernet 45 device driver, update 7 DIMM connector installing memory 21 locations 21 DIMM Utility enabling 45 F features reliability, availability, and serviceability 6 server 4, 5 ServerGuide 43 filler panel 25 firmware, update - IBM 8486 | User Guide - Page 64
23 M memory installing 20 modules 21 memory module order of installation specifications 4 supported 20 memory specifications microprocessor cache 40 of installation, memory modules 20, 21 P password administrator setting 42 forgotten power-on 41 52 xSeries 100 Type 8486: User's Guide password ( - IBM 8486 | User Guide - Page 65
reliability 17 system specifications 4 systems management 7 T tape drive, installing 23 temperature 4 trademarks 48 U update device drivers and firmware 7 using Boot Menu program 45 IBM Configuration/Setup Utility program 37 passwords 39, 41 V video 4 video controller 4 W Web site compatible options - IBM 8486 | User Guide - Page 66
54 xSeries 100 Type 8486: User's Guide - IBM 8486 | User Guide - Page 67
- IBM 8486 | User Guide - Page 68
Part Number: 31R2069 Printed in USA (1P) P/N: 31R2069
-
 1
1 -
 2
2 -
 3
3 -
 4
4 -
 5
5 -
 6
6 -
 7
7 -
8
-
9
-
10
-
11
-
12
-
13
-
14
-
15
-
16
-
17
-
18
-
19
-
20
-
21
-
22
-
23
-
24
-
25
-
26
-
27
-
28
-
29
-
30
-
31
-
32
-
33
-
34
-
35
-
36
-
37
-
38
-
39
-
40
-
41
-
42
-
43
-
44
-
45
-
46
-
47
-
48
-
49
-
50
-
51
-
52
-
53
-
54
-
55
-
56
-
57
-
58
-
59
-
60
-
61
-
62
-
63
-
64
-
65
-
66
-
67
-
68
 |
 |

xSeries
100
Type
8486
User’s
Guide
E
Rserver
±²³