IBM 8862 User Manual - Page 41
Updating, server, configuration
 |
UPC - 000435172679
View all IBM 8862 manuals
Add to My Manuals
Save this manual to your list of manuals |
Page 41 highlights
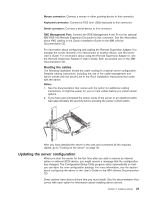
Mouse connector: Connect a mouse or other pointing device to this connector. Keyboard connector: Connect a PS/2 (non-USB) keyboard to this connector. Serial connector: Connect a serial device to this connector. RXE Management Port: Connect the RXE Management A (In) Port of an optional IBM RXE-100 Remote Expansion Enclosure to this connector. See the information about RXE cabling in the Option Installation Guide on the IBM xSeries Documentation CD. For information about configuring and cabling the Remote Supervisor Adapter II to manage the server remotely or to interconnect to another device, see the server User's Guide. For information about using the Remote Supervisor Adapter II, see the Remote Supervisor Adapter II User's Guide. Both documents are on the IBM Documentation CD. Routing the cables The following illustration shows the cable routing for a typical server configuration. Detailed cabling instructions, including the use of the cable-management arm (which comes with the server) are in the Rack Installation Instructions that come with the server. Notes: 1. See the documentation that comes with the option for additional cabling instructions. It might be easier for you to route cables before you install certain options. 2. If you have just connected the power cords of the server to an electrical outlet, wait approximately 20 seconds before pressing the power-control button. After you have installed the server in the rack and connected all the required cables, go to "Turning on the server" on page 35. Updating the server configuration When you start the server for the first time after you add or remove an internal option or external SCSI device, you might receive a message that the configuration has changed. The Configuration/Setup Utility program starts automatically so that you can save the new configuration settings. For more information, see the section about configuring the server in the User's Guide on the IBM xSeries Documentation CD. Some options have device drivers that you must install. See the documentation that comes with each option for information about installing device drivers. Chapter 2. Installing options 29
-
 1
1 -
2
-
3
-
4
-
5
-
6
-
7
-
8
-
9
-
10
-
11
-
12
-
13
-
14
-
15
-
16
-
17
-
18
-
19
-
20
-
21
-
22
-
23
-
24
-
25
-
26
-
27
-
28
-
29
-
30
-
31
-
32
-
33
-
34
-
35
-
 36
36 -
 37
37 -
 38
38 -
 39
39 -
 40
40 -
 41
41 -
 42
42 -
 43
43 -
 44
44 -
 45
45 -
 46
46 -
47
-
48
-
49
-
50
-
51
-
52
-
53
-
54
-
55
-
56
-
57
-
58
-
59
-
60
-
61
-
62
-
63
-
64
-
65
-
66
-
67
-
68
-
69
-
70
-
71
-
72
-
73
-
74
-
75
-
76
-
77
-
78
-
79
-
80
-
81
-
82
-
83
-
84
-
85
-
86
-
87
-
88
-
89
-
90
-
91
-
92
-
93
-
94
-
95
-
96
-
97
-
98
-
99
-
100
-
101
-
102
-
103
-
104
 |
 |
