Insignia NS-19LCD User Manual (English) - Page 13
Adjusting the image in D-Sub mode, Adjusting the sound - ns sharp 19 lcd tv
 |
View all Insignia NS-19LCD manuals
Add to My Manuals
Save this manual to your list of manuals |
Page 13 highlights
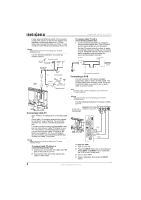
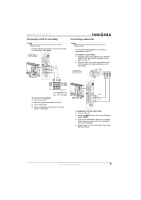
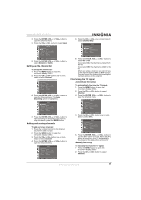
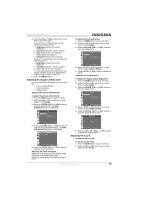
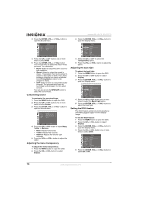
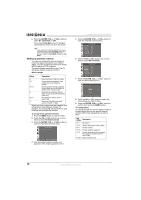
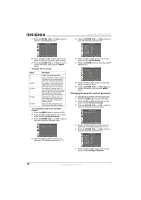
Insignia NS-19LCD 19" LCD TV 4 Press the VOL+ or VOL- button one or more time to adjust the option. If you are in TV or Video mode, you can adjust the following options: • Brightness-Adjusts the screen brightness. • Contrast-Adjusts the screen contrast. • Color-Adjusts the color saturation. • Tint-Adjusts the image tint. • Sharpness-Adjusts the sharpness. If you are in D-Sub mode, you can adjust the following options: • Brightness-Adjusts the screen brightness. • Contrast-Adjusts the screen contrast. • Color-Adjusts the color saturation. For information about other options you can change in D-Sub mode, see "Adjusting the image in D-Sub mode" on page 13. 5 Press the MENU button. Adjusting the image in D-Sub mode If you are using the D-Sub mode, you can adjust the: • Picture (automatically) • Clock and phase • Image position Adjusting the picture automatically To adjust the picture automatically: 1 Press the MENU button to open the OSD. 2 Press the CH+ or CH- button one or more times to select Image. 3 Press the ENTER, VOL+, or VOL- button to open the Image menu. The Auto Adjustment option is highlighted. To adjust the clock and phase: 1 Press the MENU button to open the OSD. 2 Press the CH+ or CH- button one or more times to select Image. 3 Press the ENTER, VOL+, or VOL- button to open the Image menu. 4 Press the CH+ or CH- button one or more times to select Clock or Phase. 5 Press the VOL+ or VOL- button to adjust the option. Adjusting the image position To adjust the image position (alignment): 1 Press the MENU button to open the OSD. 2 Press the CH+ or CH- button one or more times to select Image. 3 Press the ENTER, VOL+, or VOL- button to open the Image menu. 4 Press the CH+ or CH- button one or more times to select Image Position. 5 Press the ENTER, VOL+, or VOL- button to open the Image Position menu. 4 Press the ENTER, VOL+, or VOL- button to open the Auto Adjustment menu. The Auto Adjustment/Yes option is highlighted. 5 Press the ENTER, VOL+, or VOL- button to start the auto adjustment. Adjusting the clock and phase Adjust the clock frequency if the display image shimmers or has rainbow-like noise. Adjust the phase setting if the display image is blurry. 6 Press the CH+, CH-, VOL+, or VOL- button to adjust the image position. Adjusting the sound Setting the stereo mode To set the stereo mode: 1 Press the MENU button to open the OSD. 2 Press the CH+ or CH- button one or more times to select Sound. www.insignia-products.com 13
-
 1
1 -
2
-
3
-
4
-
5
-
6
-
7
-
 8
8 -
 9
9 -
 10
10 -
 11
11 -
 12
12 -
 13
13 -
 14
14 -
 15
15 -
 16
16 -
 17
17 -
 18
18 -
19
-
20
-
21
-
22
-
23
-
24
-
25
-
26
-
27
-
28
-
29
-
30
-
31
-
32
-
33
-
34
-
35
-
36
-
37
-
38
-
39
-
40
-
41
-
42
-
43
-
44
-
45
-
46
-
47
-
48
-
49
-
50
-
51
-
52
-
53
-
54
-
55
-
56
-
57
-
58
-
59
-
60
-
61
-
62
-
63
-
64
-
65
-
66
-
67
-
68
-
69
-
70
-
71
-
72
 |
 |
