Invacare TER Owners Manual - Page 27
adjustment square in the back angle plates Detail A. Otherwise, serious injury could result.
 |
View all Invacare TER manuals
Add to My Manuals
Save this manual to your list of manuals |
Page 27 highlights
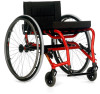
SECTION 4-BACK 7. Secure the adjustment square to the back angle plate with the mounting screw. Tighten securely. 8. Repeat STEPS 2‐6 for remaining back cane. ƽ WARNING After unfolding the back, ensure that the plunger pins are fully engaged in the mounting holes of the adjustment square in the back angle plates (Detail "A"). Otherwise, serious injury could result. 9. Unfold the back until the plunger pins lock into the mounting holes in the adjustment square. 10. Unthread the mounting screw until head of screw rests on seat rail (Detail "F"). 11. Completely tighten jam nut up against bottom of back cane (Detail "F"). NOTE: When adjusted properly, the back should have a small amount of movement when locked in the open position. Plunger pins should snap in and release easily without resistance. Placement Screw DETAIL "A" Jam Nut Back Cane Placement Screw DETAIL "B" Jam Nut Back Cane Back Angle Plate Adjustment Square Mounting screw secures the adjustment square from the other side of the plate DETAIL "C" DETAIL "D" Mounting Screw Recess for Adjustment Square Back Angle Plate Adjustment Square NOTE: Back angle plate, mounting screw and adjustment square are removed for clarity. Back Cane Jam Nut Mounting Screw Seat Rail FIGURE 4.3 Back Angle Adjustment - Terminator Wheelchairs Part No 1122172 27 Everyday Series Wheelchairs/Sport Series Wheelchairs
-
 1
1 -
2
-
3
-
4
-
5
-
6
-
7
-
8
-
9
-
10
-
11
-
12
-
13
-
14
-
15
-
16
-
17
-
18
-
19
-
20
-
21
-
 22
22 -
 23
23 -
 24
24 -
 25
25 -
 26
26 -
 27
27 -
 28
28 -
 29
29 -
 30
30 -
 31
31 -
 32
32 -
33
-
34
-
35
-
36
-
37
-
38
-
39
-
40
-
41
-
42
-
43
-
44
-
45
-
46
-
47
-
48
-
49
-
50
-
51
-
52
-
53
-
54
-
55
-
56
-
57
-
58
-
59
-
60
-
61
-
62
-
63
-
64
 |
 |
