Jabra GO 6470 User Manual - Page 9
English - accessories
 |
View all Jabra GO 6470 manuals
Add to My Manuals
Save this manual to your list of manuals |
Page 9 highlights
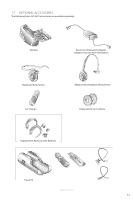
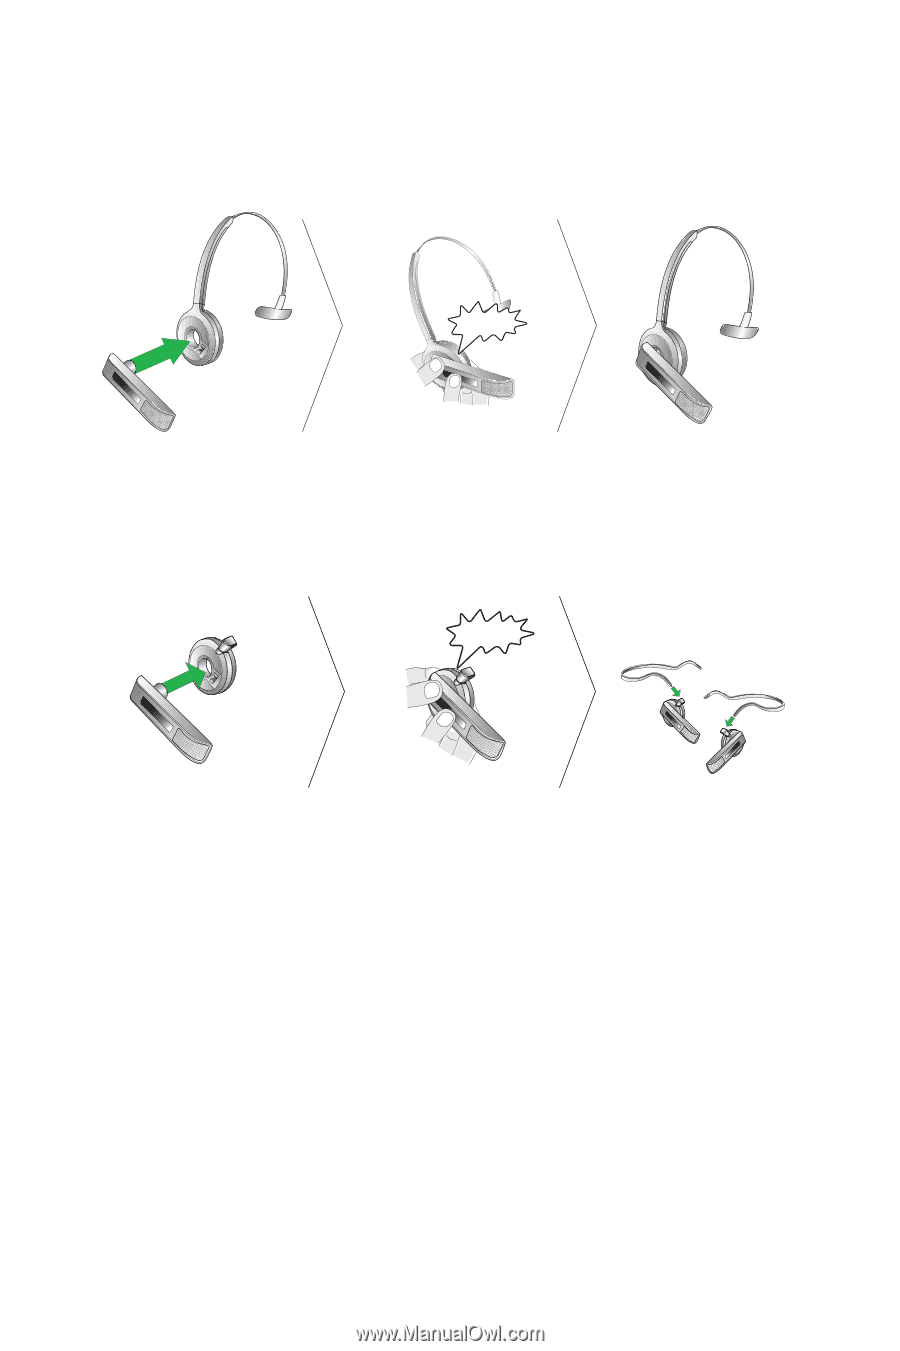
ENGLISH Attaching the headband 1. Remove the current wearing style attachment, if any. 2. Align the headset earbud with the matching holes of the headband wearing style, as illustrated, and press firmly until they click into place (snap-to-click). 3. Adjust the length of the headband to fit against the head. 4. Position the microphone as close to the mouth as possible. CLICK Attaching the neckband (optional accessory) 1. Remove the current wearing style attachment, if any. 2. Align the headset earbud with the matching holes of the neckband wearing style, as illustrated, and press firmly until they click into place (snap-to-click). 3. Position the microphone as close to the mouth as possible. CLICK RRR LLL JABRA GO 6470 9
-
 1
1 -
2
-
3
-
 4
4 -
 5
5 -
 6
6 -
 7
7 -
 8
8 -
 9
9 -
 10
10 -
 11
11 -
 12
12 -
 13
13 -
 14
14 -
15
-
16
-
17
-
18
-
19
-
20
-
21
-
22
-
23
-
24
-
25
-
26
-
27
-
28
-
29
-
30
-
31
-
32
-
33
-
34
-
35
-
36
-
37
-
38
-
39
 |
 |
9
ENGLISH
JABRA GO 6470
Attaching the headband
1.
Remove the current wearing style attachment, if any.
2.
Align the headset earbud with the matching holes of the headband wearing style, as illustrated, and press
firmly until they click into place (snap-to-click).
3.
Adjust the length of the headband to fit against the head.
4.
Position the microphone as close to the mouth as possible.
CLICK
Attaching the neckband (optional accessory)
1.
Remove the current wearing style attachment, if any.
2.
Align the headset earbud with the matching holes of the neckband wearing style, as illustrated, and press
firmly until they click into place (snap-to-click).
3.
Position the microphone as close to the mouth as possible.
CLICK
R
L
CLICK