Kenmore 7754 Installation Instructions - Page 6
PLEASEREADCAREFULLY, Forpersonal, safety, thisproduct, mustbeproperlygrounded., Grounding
 |
View all Kenmore 7754 manuals
Add to My Manuals
Save this manual to your list of manuals |
Page 6 highlights
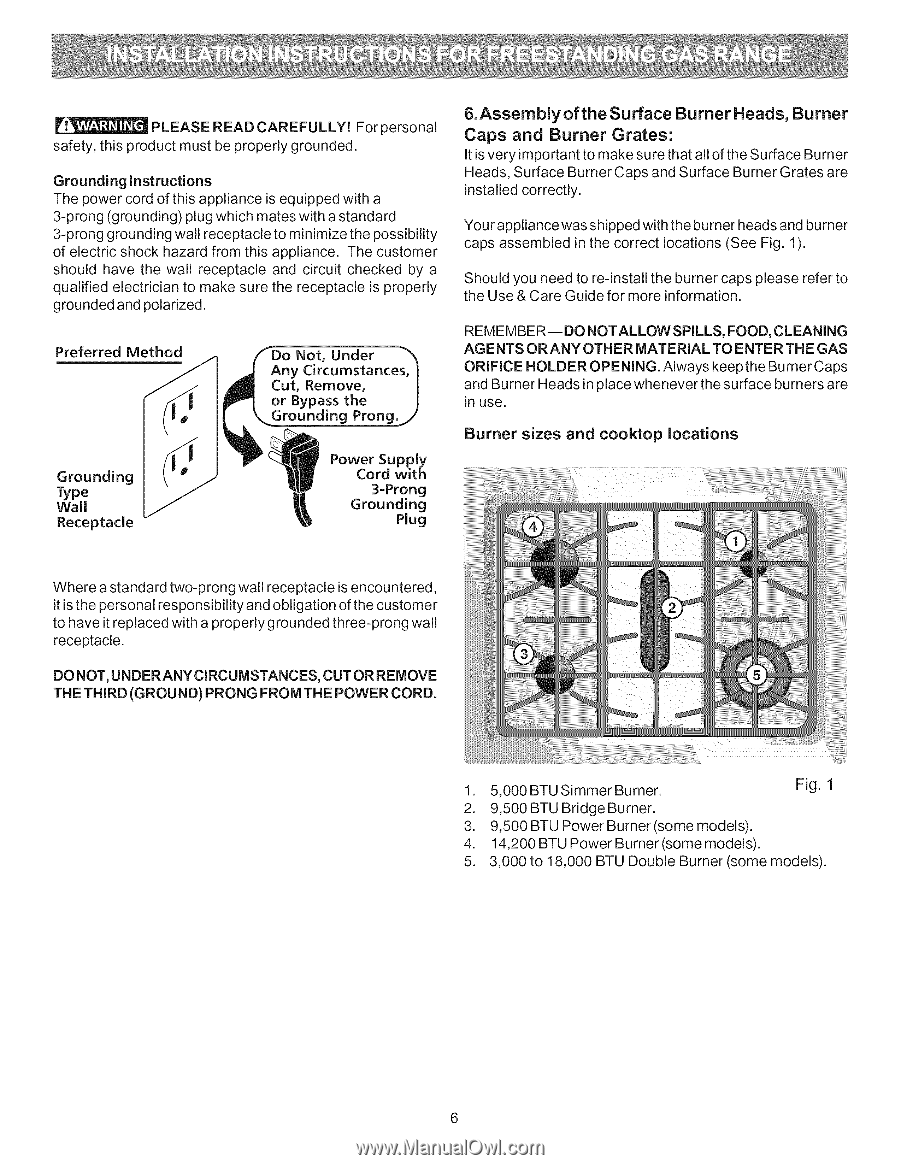
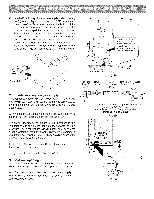
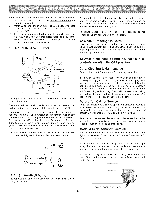
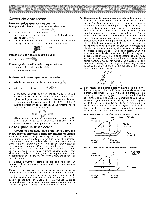
PLEASEREADCAREFULLYF! orpersonal safetyt,hisproducmt ustbeproperlygrounded. GroundingInstructions The power cord of this appliance is equipped with a 3-prong (grounding) plug which mates with a standard 3-prong grounding wall receptacle to minimize the possibility of electric shock hazard from this appliance. The customer should have the wall receptacle and circuit checked by a qualified electrician to make sure the receptacle is properly grounded and polarized. 6.Assembly of the Surface Burner Heads, Burner Caps and Burner Grates: It is very important to make sure that all of the Surface Burner Heads, Surface Burner Caps and Surface Burner Grates are installed correctly. Your appliance was shipped with the burner heads and burner caps assembled in the correct locations (See Fig. 1). Should you need to re-install the burner caps please refer to the Use & Care Guide for more information. Preferred Do Not, Under REMEMBER--DO NOTALLOW SPILLS, FOOD, CLEANING AGENTS ORANY OTHER MATERIAL TO ENTER THE GAS ORIFICE HOLDER OPENING. Always keepthe Burner Caps and Burner Heads in place whenever the surface burners are in use. Grounding Type Wall Receptacle Power Supply Cord with 3=Prong Grounding Plug Burner sizes and cooktop locations Where a standard two-prong wall receptacle is encountered, it is the personal responsibility and obligation of the customer to have it replaced with a properly g rou nded three-prong wall receptacle. DO NOT, UNDERANY CIRCUMSTANCES, CUT OR REMOVE THE THIRD (GROUND) PRONG FROM THE POWER CORD. 1. 5,000 BTU Simmer Burner. Fig. 1 2. 9,500BTU Bridge Burner. 3. 9,500 BTU Power Burner(some models). 4. 14,200 BTU Power Burner (some models). 5. 3,000 to 18,000 BTU Double Burner (some models).
-
 1
1 -
 2
2 -
 3
3 -
 4
4 -
 5
5 -
 6
6 -
 7
7 -
 8
8 -
 9
9 -
 10
10 -
 11
11 -
 12
12 -
13
-
14
-
15
-
16
 |
 |