Kenmore 9787 Installation Instructions
Kenmore 9787 - Elite HE3 7.0 cu. Ft. Gas Dryer Manual
 |
View all Kenmore 9787 manuals
Add to My Manuals
Save this manual to your list of manuals |
Kenmore 9787 manual content summary:
- Kenmore 9787 | Installation Instructions - Page 1
Table of Contents/indice WASHER/DRYER SAFETY 3 INSTALLATION INSTRUCTIONS 3 Tools and Parts 13 Complete Installation 13 SERVICE NUMBERS BACK COVER SEGURIDAD DE DRYER SAFETY Your safety and the safety of others are very important. We have provided many important safety messages in this manual - Kenmore 9787 | Installation Instructions - Page 2
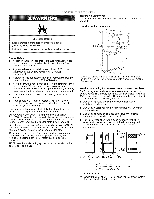
When discarding or storing your old clothes dryer, remove the door= SAVE THESE INSTRUCTIONS WARNING: For your safety, the information in this manual must be followed to minimize the risk of fire or explosion, or to prevent property damage, personal injury, or death. - Do not store or use - Kenmore 9787 | Installation Instructions - Page 3
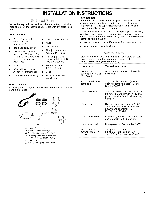
starting installation. Read and follow the instructions provided with any tools listed here. Tools are included. Parts needed: Check local codes and with gas supplier, check existing are available from your local Sears store or Sears Service Center. For further information, please call 1-800-4- - Kenmore 9787 | Installation Instructions - Page 4
Requirements." • A sturdy floor to support the laundry center weight (laundry center or stored in an area where it will be exposed Instructions for winterizing information. Do not operate your dryer in temperatures below 45°F (7°C). At lower temperatures, the dryer installation and servicing. • - Kenmore 9787 | Installation Instructions - Page 5
local codes and service representative or personnel if you are in doubt as to whether the washer/dryer is properly grounded. Do not modify the plug provided with the washer/dryer: if it will not fit the outlet, have a proper outlet installed by a qualified electrician. SAVE THESE INSTRUCTIONS - Kenmore 9787 | Installation Instructions - Page 6
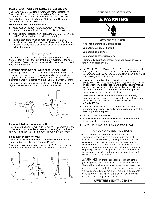
(1.8 m) of the laundry center in accordance with the National Fuel Gas Code, ANSI Z223.1. The location should be easy to reach for opening and door well of your dryer. If this information does not agree with the type of gas available, contact your local Sears store or Sears Service Center. LP gas - Kenmore 9787 | Installation Instructions - Page 7
fully extended and supported when the dryer is in its . Failure to follow these instructions can resumt in death or IMPORTANT: Observe all governing codes and ordinances. The dryer exhaust must not be connected rigid or flexible heavy metal vent. • Review Vent system chart. Modify existing vent - Kenmore 9787 | Installation Instructions - Page 8
Housecleaning problems and health problems. Install support the weight of the laundry center. 2. Screw the Iocknut onto each foot to within 1" (2.5 cm) of the base. 1" (2.5 cm} Excessive Weight Hazard Use two or more people to move and install washer/dryer the following instructions: IMPORTANT: To - Kenmore 9787 | Installation Instructions - Page 9
sealants on the valve. Damage to the valves can result. A. Drain hose form 2. Put hooked end of drain hose into laundry tub or standpipe. Rotate the valves can result. If you are working in a closet or recessed area Move the laundry center into its final location and remove cardboard from under - Kenmore 9787 | Installation Instructions - Page 10
your exhaust installation type Recommended exhaust installations Typical installations vent the dryer from the rear of the laundry center. Other installations are (biscuit) Follow the instructions in the kit to install. Kits are available from your local Sears store or Sears Service Center. B C - Kenmore 9787 | Installation Instructions - Page 11
-clearance installations are shown. Refer to the manufacturer's instructions provided with the vent system. A. Loop system with 4663). • Over-the-Top Installation: Part Number 26-49900 Periscope Installation (For use with dryer vent to wall vent mismatch): Part Number 26-49901 - Less than 5" (12.7 cm - Kenmore 9787 | Installation Instructions - Page 12
hood. 2. Connect vent to exhaust hood. Vent must fit inside exhaust hood. Secure vent to exhaust hood with 4" (10.2 cm) clamp. 3. Run vent to dryer location. Use the straightest path possible. See "Determine vent path" in "Plan Vent System." Avoid 90 ° turns. Use clamps to seal all joints, Do not - Kenmore 9787 | Installation Instructions - Page 13
Remove the blue protective film on the console and any tape remaining on the laundry center. 10. Read the Laundry Center User Instructions. 11. Wipe the dryer drum interior thoroughly with a damp cloth to remove any dust. 12. To test the washer, measure 1/2the normal recommended amount of detergent - Kenmore 9787 | Installation Instructions - Page 14
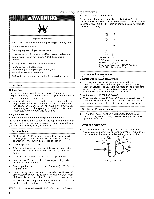
DE LA LAVADORNSECADORA Su seguridad y la seguridad de los demds es muy importante. Hemos incluido muchos mensajes importantes de seguridad en este manual yen su electrodomestico. Lea y obedezca siempre todos los mensajes de seguridad= Este simbolo le llama la atenci6n sobre peligros potenciales que - Kenmore 9787 | Installation Instructions - Page 15
el riesgo de incendio o explosi6n, heridas o la muerte. en este manual debe ser observada o para prevenir dahos a propiedades, - No almacene o en su edificio. • Desaloje a todos los ocupantes del cuarto, edificio o area. • Llame inmediatamente a su proveedor de gas desde el tel_fono de un vecino - Kenmore 9787 | Installation Instructions - Page 16
INSTRUCCIONES Re0na las herramientas y piezas necesarias antes de comenzar la instalaci6n. Lea y siga las instrucciones provistas con cualquiera de las herramientas enlistadas aqui. Herramientas necesarias: Llave de tuercas ajustable de 8" 6 10" (para conexiones de gas) Destornillador de hoja - Kenmore 9787 | Installation Instructions - Page 17
(34,5-689,6 kPa). No debe instalarse ni guardarse el centro de lavandefia en un Area en donde pueda estar expuesto al agua y/o a la intemperie. No haga funcionar su ) detras de la secadora para acomodar el ducto de escape con code. Vea "Requisitos de ventilaci6n". Espacio para la instalacibn en un - Kenmore 9787 | Installation Instructions - Page 18
conectarse a tierra de acuerdo con los c6digos locales, o en ausencia de los mismos, con el C6digo Nacional de Electricidad (National Electrical Code), ANSI/NFPA 70. Siesta permitido en los c6digos y se utiliza un alambre a tierra separado, es recomendable que un electricista calificado determine - Kenmore 9787 | Installation Instructions - Page 19
individual a una distancia de unos seis (6) pies (1,8 m) de la secadora de acuerdo con el C6digo Nacional de Gas combustible (National Fuel Gas Code), ANSI Z223.1. La valvula debera ubicarse en un lugar donde se pueda alcanzar con facilidad para cerrarla y abrirla. A. V41vula de cierre del gas - Kenmore 9787 | Installation Instructions - Page 20
Requisitos de entrada del quemador: Elevaciones de hasta los 10.000 pies (3.048 metros): • El dise_o de este centro de lavanderia esta certificado per CSA Internacional para uso en altitudes que alcanzan los 10.000 pies (3.048 m) sobre el nivel del mar en la categoria de Btu indicada en la placa del - Kenmore 9787 | Installation Instructions - Page 21
Ducto de escape de metal flexible • Los ductos de escape de metal flexible son aceptables Qnicamente si se puede acceder a los mismos para limpiarlos. • El ducto de escape de metal flexible debe extenderse y sostenerse por completo cuando la secadora esta en su ubicaci6n final, • Quite el exceso del - Kenmore 9787 | Installation Instructions - Page 22
recto de la manguera de desagQe con agua del grifo. IMPORTANTE: No use ningOn otro lubricante que no sea agua. 5. Coloque la abrazadera sobre el Area que tiene la marca "Abrazadera" (CLAMP). Suelte la abrazadera. Para los sistemas de desagiie en tina de lavadero o tubo vertical 1. Aseg@esede que el - Kenmore 9787 | Installation Instructions - Page 23
panel, los tornillos y el tope. Complete la conexi6n de las mangueras de agua y (en los modelos a gas) el conector flexible de gas a traves del area de acceso. Vuelva a colocar el panel de acceso una vez que haya completado la instalaci6n del centre de lavander[a. J Revise si hay fugas 7. Abra los - Kenmore 9787 | Installation Instructions - Page 24
D. Pared E. Codo E Abrazaderas G. Codo H. Capota de ventilacidn ',,d.......... A i, 1 "\ i ......... B [. " J C A. Sistema de lazo con codes est#ndares B. Sistema de lazo con un codo estbndar y un code de desviacidn C. Sistema de ventilacidn con un periscopio (espacio de 2" [5 cm]) 24 - Kenmore 9787 | Installation Instructions - Page 25
la vfa que proporcione el trayecto mas recto y directo al exterior. • Planifique la instalaci6n a fin de usar el menor n0mero posible de codes y vueltas. • Cuando use los codos o haga vueltas, deje todo el espacio que sea posible. • Doble el ducto gradualmente para evitar torceduras. • Use - Kenmore 9787 | Installation Instructions - Page 26
2, Si el centro de lavandeda no esta nivelado, apuntale la parte frontal con el bloque de madera y ajuste las patas hacia arriba o hacia abajo, segQn sea necesario. Quite el bloque de madera. 4, Una el conector de gas flexible al adaptador NPT de 1/2". No use el pegamento de uni6n de tubos para - Kenmore 9787 | Installation Instructions - Page 27
_i:;iiii'i_i_i_i_:_:iiii!:i__i!i_i :i!:_iiii¸i¸_i¸ii¸i_ii_ii!%!i!i_ 1. Revise para cerciorarse de que todas las piezas esten instaladas. Si hay alguna pieza extra, vuelva a revisar todos los pasos para ver cual se omiti6. 2. Verifique si tiene todas las herramientas. 3. Deshagase de todos los - Kenmore 9787 | Installation Instructions - Page 28
who sold it! For the replacement parts, accessories and owner's manuals that you need to do-it-yourself. For Sears professional installation of © 2006 Sears Brands, LLC TM SM • ® Registered Trademark / Trademark / Service Mark of Sears Brands, LLC ® Marca reg_.strada / TMMarca de comerc_.o /
-
 1
1 -
 2
2 -
 3
3 -
 4
4 -
 5
5 -
 6
6 -
 7
7 -
8
-
9
-
10
-
11
-
12
-
13
-
14
-
15
-
16
-
17
-
18
-
19
-
20
-
21
-
22
-
23
-
24
-
25
-
26
-
27
-
28
 |
 |
27" (69 CM) GAS LAUNDRY CENTER
INSTALLATION
INSTRUCTIONS
INSTRUCCIONES DE INSTALACION PARA EL CENTRO
DE
LAVANDERiA
A GAS DE 27" (69 CM)
Table of Contents/indice
WASHER/DRYER
SAFETY
..........................................
3
INSTALLATION
INSTRUCTIONS
................................
3
Tools
and Parts
.........................................................
3
Alternate
Parts
...........................................................
3
Lecatien
Requirements
.............................................
4
Drain System
.............................................................
5
Electrical
Requirements
............................................
5
Gas Supply Requirements
........................................
6
Venting
Requirements
...............................................
7
Remove Shipping
Strap
............................................
8
Install
Leveling
Legs
..................................................
8
Connect
the Drain
Hose
............................................
8
Connect
Inlet Heses
..................................................
9
Secure the Drain Hose
............................................
10
Plan
Vent System
....................................................
10
Install
Vent System
..................................................
t
2
Level Laundry
Center
..............................................
12
Make Gas Connection
.............................................
t
2
Connect
Vent
...........................................................
13
Complete
Installation
...............................................
13
SERVICE
NUMBERS
............................
BACK
COVER
SEGURIDAD
DE LA LAVADORA/SECADORA
........
14
INSTRUCCIONES
DE INSTALACION
......................
16
Herramientas
y piezas
............................................
16
Piezas
alternativas
..................................................
16
Requisitos
de ubicacion
.........................................
17
Sistema
de desagLie
............................................
18
Requisitos
el_ctricos
...............................................
18
Requisitos
del suministro
de gas
............................
19
Requisitos
de ventilacion
........................................
20
Quite el fleje de embalaje
........................................
21
Instalacion
de las patas niveladoras
.......................
22
Conecte
la manguera
de desagQe
.........................
22
Conecte
las mangueras
de entrada
.......................
23
Fijacion de la manguera
de desagQe
.....................
24
Planificacion
del sistema de ventilaci6n
.................
24
Instalacion
del sistema de ventilacion
....................
25
C6mo
nivelar el centro de lavanderia
.....................
25
Conexion
del suministro
de gas
.............................
26
Conexion
del ducto de escape
...............................
26
C6mo
terminar
la instalacion
..................................
27
NUMEROS
DE SERVICIO
..........
CONTRAPORTADA
WASHER/DRYER SAFETY
Your
safety
and
the safety
of others
are very
important.
We
have
provided
many
important
safety
messages
in this
manual
and
on your
appliance.
Always
read
and
obey
all safety
messages.
This is the safety alert symbol.
This symbol alerts you to potential
hazards that can kill or hurt you and others.
All safety messages
will follow the safety alert symbol and either the word "DANGER"
or "WARNING."
These words mean:
You can be killed or seriously
injured if you don't immediately
follow
instructions.
You can be killed or seriously
injured
if you don't
follow
instructions.
All safety messages
will tell you what the potential
hazard is, tell you how to reduce the chance
of injury, and tell you what can
happen
if the instructions
are not followed.
W10112499