Konica Minolta bizhub 25e bizhub 25e Copier Guide
Konica Minolta bizhub 25e Manual
 |
View all Konica Minolta bizhub 25e manuals
Add to My Manuals
Save this manual to your list of manuals |
Konica Minolta bizhub 25e manual content summary:
- Konica Minolta bizhub 25e | bizhub 25e Copier Guide - Page 1
Plain-paper digital Fax/Copier/Printer/Scanner Copier Guide - Konica Minolta bizhub 25e | bizhub 25e Copier Guide - Page 2
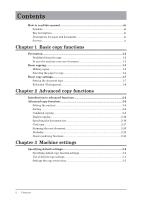
Chapter 1 Basic copy functions 1 Chapter 2 Advanced copy functions 2 Chapter 3 Machine settings 3 - Konica Minolta bizhub 25e | bizhub 25e Copier Guide - Page 3
Contents How to read this manual iii Symbols...iii Key descriptions...iii Descriptions for paper Scanning the next document 2-20 DocIndex...2-22 About combining functions 2-24 Chapter 3 Machine settings Specifying default settings 3-2 Specifying default copy function settings 3-2 List of default - Konica Minolta bizhub 25e | bizhub 25e Copier Guide - Page 4
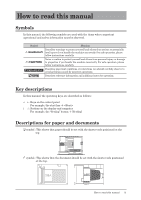
How to read this manual Symbols 1 In this manual, the following symbols are used with the items where important For safe operation, please follow instructions carefully. Describes important conditions or restrictions you should carefully observe to avoid problems caused by incorrect operations. - Konica Minolta bizhub 25e | bizhub 25e Copier Guide - Page 5
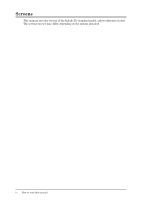
Screens This manual uses the screens of the bizhub 25e standard model, unless otherwise stated. The screens you see may differ, depending on the options installed. iv How to read this manual - Konica Minolta bizhub 25e | bizhub 25e Copier Guide - Page 6
Chapter 1 Basic copy functions Precaution...1-2 Prohibited items for copy 1-2 In case the machine runs out of memory 1-2 Basic copying...1-3 Making copies...1-3 Selecting the paper to copy 1-4 Basic copy settings...1-7 Setting the document type 1-7 Reduction / Enlargement 1-8 - Konica Minolta bizhub 25e | bizhub 25e Copier Guide - Page 7
out of memory while scanning documents, the following message will be displayed: • Press [Yes] to copy the scanned document. • Press [No] to cancel copying. Change the settings, or wait until the machine has enough memory free. • When the automatic reset time (three minutes at default) passes while - Konica Minolta bizhub 25e | bizhub 25e Copier Guide - Page 8
Copy] on My MFP Menu screen. • If My MFP Menu screen is not displayed, press repeatedly until "Copy Ready" screen is displayed. • Set the document type, as necessary. . • When all the documents are scanned and "Copy Reserve Ready" is displayed, you can load the next document and start - Konica Minolta bizhub 25e | bizhub 25e Copier Guide - Page 9
Selecting the paper to copy At default, the paper size is set to "Auto", and paper is automatically selected according to the document size. However you can select the paper manually from the cassettes or bypass tray. „„ Selecting paper in the cassette 1 Load the document. 2 Press [Copy] on My MFP - Konica Minolta bizhub 25e | bizhub 25e Copier Guide - Page 10
the bypass tray. For details, see "Loading paper into the bypass tray" in the User's Guide. 1 2 Load the document. 3 Press [Copy] on My MFP Menu screen. • If My MFP Menu screen is not displayed, press repeatedly until "Copy Ready" screen is displayed. • Set the document type, as necessary - Konica Minolta bizhub 25e | bizhub 25e Copier Guide - Page 11
using the numeric keys. You can set 1 to 99 copies. 10 Press . NOTE For details, see "Loading paper into the bypass tray" in the User's Guide, how to load paper. 1-6 Basic copying - Konica Minolta bizhub 25e | bizhub 25e Copier Guide - Page 12
settings, as necessary. For details, see "Specifying default copy function settings" (page 3-2). Basic copy functions Setting the document type Set the document type according to the document. Text: Suitable to scan text. Auto: Suitable to scan a document that contains both text and photos - Konica Minolta bizhub 25e | bizhub 25e Copier Guide - Page 13
magnification between 25 % and 400 % using the document glass and between 25 % and If My MFP Menu screen is not displayed, press repeatedly until "Copy Ready" screen is displayed. indicated here is displayed when the paper supply units is installed. • If [Doc. Size] is not displayed, press - Konica Minolta bizhub 25e | bizhub 25e Copier Guide - Page 14
/ out to fixed magnification 1 Load the document. 2 Press [Copy] on My MFP Menu screen. If My MFP Menu screen is not displayed, press repeatedly until "Copy Ready" screen is displayed. 3 Press [Advanced]. 4 Press [Zoom]. 5 Select the magnification, and press [Enter]. You can select the zoom - Konica Minolta bizhub 25e | bizhub 25e Copier Guide - Page 15
magnification You can set the magnification within the range of 25 % to 400 % in increments or decrements of 1 %. 1 Load the document. 2 Press [Copy] on My MFP Menu screen. If My MFP Menu screen is not displayed, press repeatedly until "Copy Ready" screen is displayed. 3 Select the cassette - Konica Minolta bizhub 25e | bizhub 25e Copier Guide - Page 16
functions Introduction to advanced functions 2-2 Advanced copy functions 2-5 Setting the contrast 2-5 Sorting...2-6 Combined copying...2-8 Duplex copying...2-10 Specifying the document size 2-16 Card copy...2-17 Scanning the next document 2-20 DocIndex...2-22 About combining functions 2-24 - Konica Minolta bizhub 25e | bizhub 25e Copier Guide - Page 17
"Reduction / Enlargement" (page 1-8). Contrast Set the contrast to scan with according to the document. For details, see "Setting the The copied documents can be sorted in page order. This eliminates the need to sort them manually after copying. For details, see "Sorting" (page 2-6). 1 2 3 4 1 2 - Konica Minolta bizhub 25e | bizhub 25e Copier Guide - Page 18
is completed for the current job, you can begin scanning the next copy job. For details, see "Scanning the next document" (page 2-20). Card copy You can copy the front and back of ID cards, checks, and custom size documents so that both sides are printed together on a single page. For details, see - Konica Minolta bizhub 25e | bizhub 25e Copier Guide - Page 19
and send a metadata tag automatically to a network computer. For details, see "DocIndex" (page 2-22). Copy reservation Another document can be scanned into memory while the current job is printing. For details, see "Settings the copy reservation" (page 3-5). 2-4 Introduction to advanced functions - Konica Minolta bizhub 25e | bizhub 25e Copier Guide - Page 20
between the normal contrast and the darkest contrast. Darkest: Select to scan with the darkest contrast. 1 Load the document. 2 Press [Copy] on My MFP Menu screen. If My MFP Menu screen is not displayed, press repeatedly until "Copy Ready" screen is displayed. 3 Press [Contrast]. If - Konica Minolta bizhub 25e | bizhub 25e Copier Guide - Page 21
The copied documents can be sorted in page order. This eliminates the need to sort them manually after copying. No sorting The paper is sorted for each page of the document. 1 screen. If My MFP Menu screen is not displayed, press repeatedly until "Copy Ready" screen is displayed. 3 Press [ - Konica Minolta bizhub 25e | bizhub 25e Copier Guide - Page 22
feeder, this will complete the operation. • When you have loaded the document on the document glass, the following message will appear when the first page of the document is scanned. 1 2 Advanced copy functions 8 Load the next page of the document, and press or [Next Doc]. • Repeat - Konica Minolta bizhub 25e | bizhub 25e Copier Guide - Page 23
the direction you load the document. 1 Load the document. 2 Press [Copy] on My MFP Menu screen. If My MFP Menu screen is not displayed, press repeatedly until "Copy Ready" screen is displayed. 3 Press [Advanced]. 4 Press [Combine]. 2-8 Advanced copy functions - Konica Minolta bizhub 25e | bizhub 25e Copier Guide - Page 24
document feeder, this will complete the operation. • When you have loaded the document on the document glass, the following message will appear when the first page of the document is scanned. 9 Load the next page of the document, and press or [Next Doc]. • Repeat this step until all pages - Konica Minolta bizhub 25e | bizhub 25e Copier Guide - Page 25
a duplex document (2 2 sided). Only the Automatic Document Feeder can be used for copying. • Letter, legal, A4, F4, A5, A5 , A6 paper are available for duplex printing. 2-10 Advanced copy functions - Konica Minolta bizhub 25e | bizhub 25e Copier Guide - Page 26
How to load your document Binding position Document orientation Long Edge 1 1 1 2 sided Short Edge Long Edge Short Edge 1 1 1 Long Edge 2 1 1 2 1 Short Edge 2 2 sided Long Edge Short Edge 1 1 1 1 2 2 Result image of duplexed copy 1 2 1 1 1 2 2 Advanced copy - Konica Minolta bizhub 25e | bizhub 25e Copier Guide - Page 27
Binding position Long Edge 1 Document orientation 2 1 1 2 1 Short Edge 2 1 sided Long Edge Short Edge 1 1 1 1 2 2 How to select the binding position See the illustration below to select the binding type. • Long edge binding Result image of duplexed copy 12 12 12 12 • Short edge - Konica Minolta bizhub 25e | bizhub 25e Copier Guide - Page 28
[Copy] on My MFP Menu screen. 1 If My MFP Menu screen is not displayed, press repeatedly until "Copy Ready" screen is displayed. 3 Press [DuplexCopy]. 2 Advanced copy functions If [ document on the document glass, the following message will appear when the first page of the document is - Konica Minolta bizhub 25e | bizhub 25e Copier Guide - Page 29
finished scanning all pages, press [Complete]. „„ Duplex Copying of a Duplex Document (2 2 sided) NOTE Use the automatic document feeder for copying. The document glass cannot be used. 1 Load the document. 2 Press [Copy] on My MFP Menu screen. If My MFP Menu screen is not displayed, press - Konica Minolta bizhub 25e | bizhub 25e Copier Guide - Page 30
be used. 1 Load the document. 1 2 Press [Copy] on My MFP Menu screen. 2 If My MFP Menu screen is not displayed, press repeatedly until "Copy Ready" screen is displayed. 3 Press [DuplexCopy]. If [DuplexCopy] is not displayed, press [Advanced] and then select [DuplexCopy]. 4 Select - Konica Minolta bizhub 25e | bizhub 25e Copier Guide - Page 31
copy when you copy the document with the platen cover open or when you copy books and magazines. These shadows can be erased. 1 Load the document. 2 Press [Copy] on My MFP Menu screen. If My MFP Menu screen is not displayed, press repeatedly until "Copy Ready" screen is displayed. 3 Press - Konica Minolta bizhub 25e | bizhub 25e Copier Guide - Page 32
Card copy You can copy the front and back of ID cards, checks, and custom size documents so that both sides are printed together on a single sheet. NOTE 1 • Use the document glass for copying. The automatic document feeder cannot be used. • When you set the card copy setting, - Konica Minolta bizhub 25e | bizhub 25e Copier Guide - Page 33
an ID card or check 1 Load the document. 2 Press [Copy] on My MFP Menu screen. If My MFP Menu screen is not displayed, press repeatedly until "Copy the paper to copy" (page 1-4). 5 Press . The front side is scanned. 6 Turn the document over, and press [Next Doc] or . • Load - Konica Minolta bizhub 25e | bizhub 25e Copier Guide - Page 34
MFP Menu screen. 1 If My MFP Menu screen is not displayed, press repeatedly until "Copy Ready" screen is displayed. 3 Press [Card Copy]. 2 the paper to copy" (page 1-4). 7 Press . The front side is scanned. 8 Turn the document over, and press [Next Doc] or . • Load - Konica Minolta bizhub 25e | bizhub 25e Copier Guide - Page 35
all the documents on the automatic document feeder or when you want to scan multiple pages on document glass, use this setting to continuously scan document of a large volume. NOTE The next document setting is enabled automatically at sorting (page 2-6) or card copy (page 2-17), or at combine copy - Konica Minolta bizhub 25e | bizhub 25e Copier Guide - Page 36
>. When the documents have been scanned, the message "Set next document." is displayed. 1 2 8 Load the next document to scan. 9 Press [Next Doc] or . If you want to scan another document, repeat steps 8 and 9. 10 When you have finished scanning all the documents, press [Complete]. Advanced - Konica Minolta bizhub 25e | bizhub 25e Copier Guide - Page 37
Guide. 1 Load the document. 2 Press [Copy] on My MFP Menu screen. If My MFP Menu screen is not displayed, press - Konica Minolta bizhub 25e | bizhub 25e Copier Guide - Page 38
select the value and edit it. 8 Press [Close]. 9 Press . 1 The message "Checking copy DocIndex availability" is displayed, and the folder in which the DocIndex was registered is checked. Scanning will start when the check is complete. 2 10 Press [Yes] to copy another document using the - Konica Minolta bizhub 25e | bizhub 25e Copier Guide - Page 39
select one in addition. In such case cancel one of the functions by deselecting it. • When the latter function wins the priority, you see a message on the display that the former setting is deselected. Here is an example: Here the magnification is automatically canceled. • When you set a function - Konica Minolta bizhub 25e | bizhub 25e Copier Guide - Page 40
Chapter 3 Machine settings Specifying default settings 3-2 Specifying default copy function settings 3-2 List of default copy settings 3-4 Settings the copy reservation 3-5 - Konica Minolta bizhub 25e | bizhub 25e Copier Guide - Page 41
values are those applied when you press . The machine returns to the default setting when you press or the machine is left idle without any operation for a designated period of time. Changing the default values of often-used functions can shorten the time required to adjust settings - Konica Minolta bizhub 25e | bizhub 25e Copier Guide - Page 42
Machine settings 5 Select the item to set. 1 2 3 For details, see "List of default copy settings" (page 3-4). 6 Select the default value, and press [Enter]. To continue to specify other default values, repeat the operation from step 5. Specifying default settings 3-3 - Konica Minolta bizhub 25e | bizhub 25e Copier Guide - Page 43
this is set to ON, when the scanning of a document has finished, you can set the next document continuously as the same job. ADF (Automatic document feeder) OFF ON FBS (Document glass) OFF ON You can set to have the sort function enabled by default. No Sorting Sort NOTE Underlined values - Konica Minolta bizhub 25e | bizhub 25e Copier Guide - Page 44
start scanning the document while the machine is printing out the former job. Copy reservation is enabled at shipment. 1 Press [Setting] on My MFP Menu screen. 1 If My MFP Menu screen is not displayed, press repeatedly until My MFP menu screen is displayed. 2 2 Press [Default Settings - Konica Minolta bizhub 25e | bizhub 25e Copier Guide - Page 45
This page intentionally left blank. 3-6 Specifying default settings - Konica Minolta bizhub 25e | bizhub 25e Copier Guide - Page 46
© 2013 KONICA MINOLTA BUSINESS © 2012 SOLUTION U.S.A., INC.
-
 1
1 -
 2
2 -
 3
3 -
 4
4 -
 5
5 -
 6
6 -
 7
7 -
8
-
9
-
10
-
11
-
12
-
13
-
14
-
15
-
16
-
17
-
18
-
19
-
20
-
21
-
22
-
23
-
24
-
25
-
26
-
27
-
28
-
29
-
30
-
31
-
32
-
33
-
34
-
35
-
36
-
37
-
38
-
39
-
40
-
41
-
42
-
43
-
44
-
45
-
46
 |
 |

Copier Guide
Plain-paper digital Fax/Copier/Printer/Scanner