Konica Minolta bizhub 42 bizhub 36/42 Administrator Operations User Guide - Page 58
Gradation Adjustment]
 |
View all Konica Minolta bizhub 42 manuals
Add to My Manuals
Save this manual to your list of manuals |
Page 58 highlights
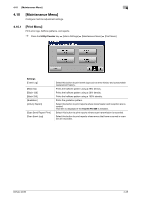
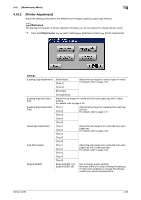
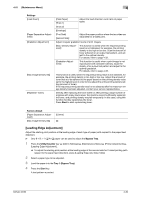
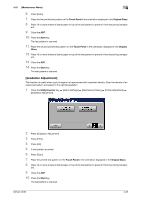
4.10 [Maintenance Menu] 4 6 Press [Scan]. 7 Place the first printed test pattern on the Touch Panel in the orientation displayed in the Original Glass. 8 Place 10 or more sheets of blank paper on top of the test pattern to prevent it from becoming transpar- ent. 9 Close the ADF. 10 Press the Start key. The test pattern is scanned. 11 Place the second printed test pattern on the Touch Panel in the orientation displayed in the Original Glass. 12 Place 10 or more sheets of blank paper on top of the test pattern to prevent it from becoming transpar- ent. 13 Close the ADF. 14 Press the Start key. The test pattern is scanned. [Gradation Adjustment] This function is useful when a print image is not reproduced with consistent density. Scan the density of an output test pattern and adjust to the optimal gradation. 1 Press the Utility/Counter key ö [Admin Settings] ö [Maintenance Menu] ö [Printer Adjustment] ö [Gradation Adjustment]. 2 Press [Gradation Adjustment]. 3 Press [Print]. 4 Press [OK]. 5 A test pattern is printed. 6 Press [Scan]. 7 Place the printed test pattern on the Touch Panel in the orientation displayed in the Original Glass. 8 Place 10 or more sheets of blank paper on top of the test pattern to prevent it from becoming transpar- ent. 9 Close the ADF. 10 Press the Start key. The test pattern is scanned. bizhub 42/36 4-33
-
 1
1 -
2
-
3
-
4
-
5
-
6
-
7
-
8
-
9
-
10
-
11
-
12
-
13
-
14
-
15
-
16
-
17
-
18
-
19
-
20
-
21
-
22
-
23
-
24
-
25
-
26
-
27
-
28
-
29
-
30
-
31
-
32
-
33
-
34
-
35
-
36
-
37
-
38
-
39
-
40
-
41
-
42
-
43
-
44
-
45
-
46
-
47
-
48
-
49
-
50
-
51
-
52
-
 53
53 -
 54
54 -
 55
55 -
 56
56 -
 57
57 -
 58
58 -
 59
59 -
 60
60 -
 61
61 -
 62
62 -
 63
63 -
64
-
65
-
66
-
67
-
68
-
69
-
70
-
71
-
72
-
73
-
74
-
75
-
76
-
77
-
78
-
79
-
80
-
81
-
82
-
83
-
84
-
85
-
86
-
87
-
88
-
89
-
90
-
91
-
92
-
93
-
94
-
95
-
96
-
97
-
98
-
99
-
100
-
101
-
102
-
103
-
104
-
105
-
106
-
107
-
108
-
109
-
110
-
111
-
112
-
113
-
114
-
115
-
116
-
117
-
118
-
119
-
120
-
121
-
122
-
123
-
124
-
125
-
126
-
127
-
128
-
129
-
130
-
131
-
132
-
133
-
134
-
135
-
136
-
137
-
138
-
139
-
140
-
141
-
142
-
143
-
144
-
145
-
146
-
147
-
148
-
149
-
150
-
151
-
152
-
153
-
154
-
155
-
156
-
157
-
158
-
159
-
160
-
161
-
162
-
163
-
164
-
165
-
166
-
167
-
168
-
169
-
170
-
171
-
172
-
173
-
174
-
175
-
176
-
177
-
178
-
179
-
180
-
181
-
182
-
183
-
184
-
185
-
186
-
187
-
188
-
189
-
190
-
191
-
192
-
193
-
194
-
195
-
196
-
197
-
198
-
199
-
200
-
201
-
202
-
203
-
204
-
205
-
206
-
207
-
208
-
209
-
210
-
211
-
212
-
213
-
214
-
215
-
216
-
217
-
218
-
219
-
220
-
221
-
222
-
223
-
224
-
225
-
226
-
227
-
228
-
229
-
230
-
231
-
232
-
233
-
234
-
235
-
236
-
237
-
238
-
239
-
240
-
241
-
242
-
243
-
244
-
245
-
246
-
247
-
248
-
249
-
250
-
251
-
252
-
253
-
254
-
255
-
256
-
257
-
258
-
259
-
260
-
261
-
262
-
263
-
264
-
265
-
266
-
267
-
268
-
269
-
270
-
271
-
272
-
273
-
274
-
275
-
276
-
277
-
278
-
279
-
280
-
281
-
282
-
283
-
284
 |
 |
