Konica Minolta bizhub PRESS C6000 bizhub PRESS C6000/C7000 Network Scanner Use - Page 40
Registering a User Box
 |
View all Konica Minolta bizhub PRESS C6000 manuals
Add to My Manuals
Save this manual to your list of manuals |
Page 40 highlights
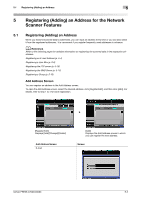
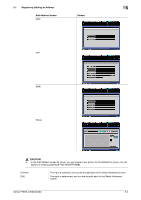
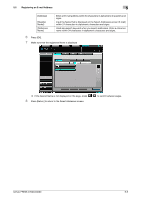
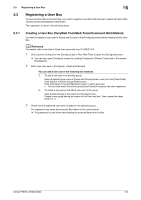
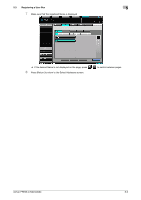
5.3 Registering a User Box 5 5.3 Registering a User Box To save scanned data in the hard disk, you need to register a User Box that has been created with Fiery Web Tools/Command WorkStation beforehand. The registration is done in the following steps. 5.3.1 Creating a User Box (FieryWeb ToolsWeb Tools/Command WorkStation) You need to register a scan user in [Users and Groups] in the [Configure] screen before creating his/her User Box. d Reference For details, refer to the User's Guide that came with your IC-306/IC-413. 1 Click [Launch Configure] in the [Configure] tab in Fiery Web Tools to open the [Configure] screen. % You can also open [Configure] screen by clicking [Configure] in [Device Center] tab in [Command WorkStation]. 2 Add a new scan user in [Configure] - [Users and Groups]. You can add a new user in the following two methods. 1) To add a new user in an existing group: Select a desired group name in [Users and Groups] screen, and then click [View Detail]. Click [Add] in the [View Group Detail] screen. Click [Add New] in the [Add Member] screen to add a new user. • You can also select the default group [Scan Users] if no group has been registered. 2) To create a new group and add a new user to the group: Click [Create Group] in the [Users and Groups] screen. Create a new group having an access to the Fiery mail box. Then, repeat the steps shown in 1). 3 Check that the registered user name is added in the specified group. The registered user name becomes the Box Name on the control panel. % The password is used when downloading the scanned data from the Box. bizhub PRESS C7000/C6000 5-6
-
 1
1 -
2
-
3
-
4
-
5
-
6
-
7
-
8
-
9
-
10
-
11
-
12
-
13
-
14
-
15
-
16
-
17
-
18
-
19
-
20
-
21
-
22
-
23
-
24
-
25
-
26
-
27
-
28
-
29
-
30
-
31
-
32
-
33
-
34
-
 35
35 -
 36
36 -
 37
37 -
 38
38 -
 39
39 -
 40
40 -
 41
41 -
 42
42 -
 43
43 -
 44
44 -
 45
45 -
46
-
47
-
48
-
49
-
50
-
51
-
52
-
53
-
54
-
55
-
56
-
57
-
58
-
59
-
60
-
61
-
62
-
63
-
64
-
65
-
66
-
67
-
68
-
69
-
70
-
71
-
72
-
73
-
74
-
75
-
76
-
77
-
78
-
79
-
80
-
81
-
82
-
83
-
84
-
85
-
86
-
87
-
88
-
89
-
90
-
91
-
92
-
93
-
94
-
95
-
96
-
97
-
98
-
99
-
100
-
101
-
102
-
103
-
104
-
105
-
106
 |
 |