Konica Minolta bizhub PRESS C6000 bizhub PRESS C6000/C7000 Network Scanner Use - Page 68
screen may be left until it is restarted. It is recommended to release the setting and address once
 |
View all Konica Minolta bizhub PRESS C6000 manuals
Add to My Manuals
Save this manual to your list of manuals |
Page 68 highlights
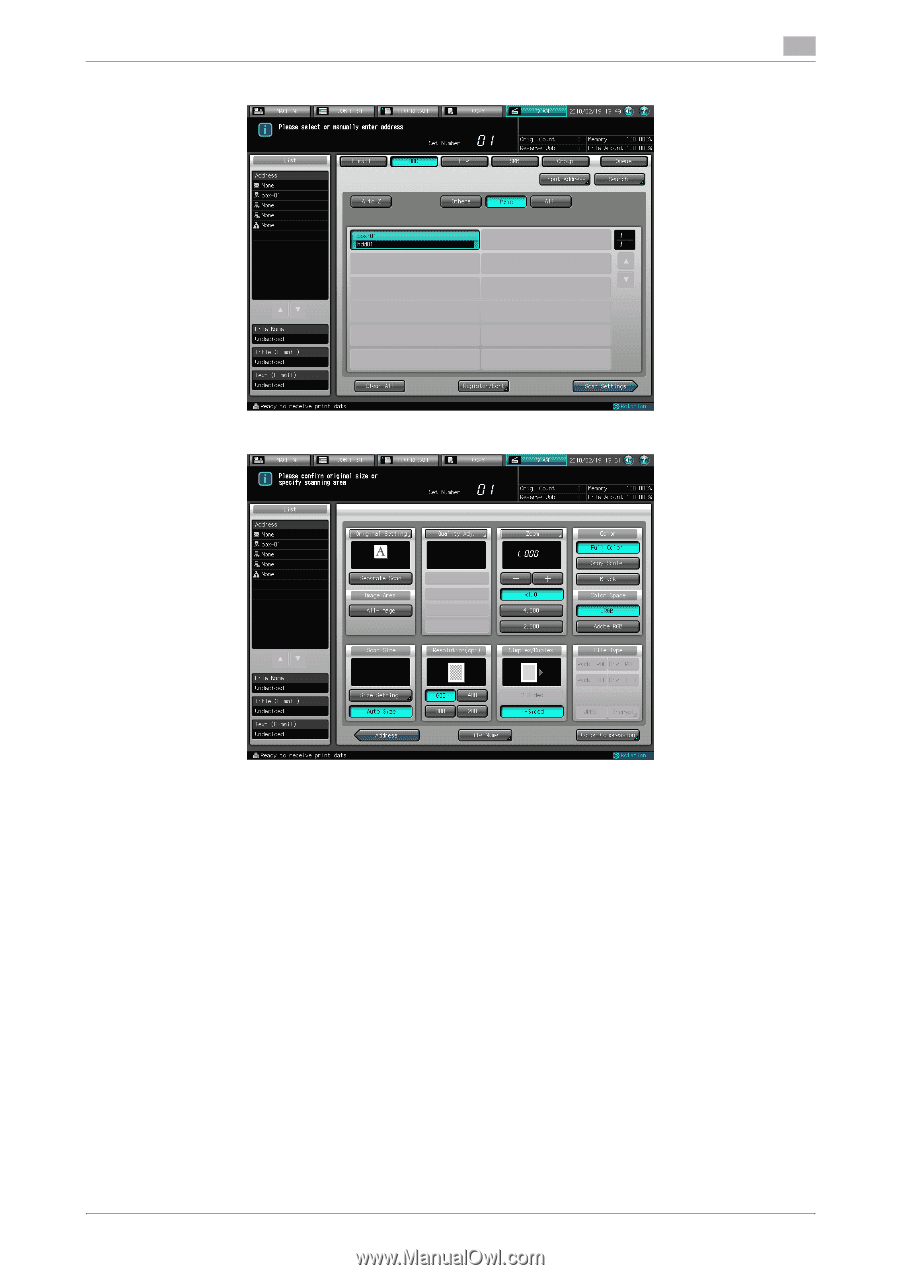
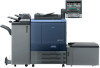
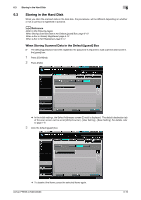
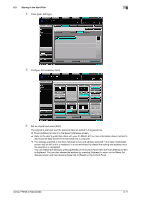
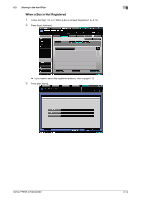
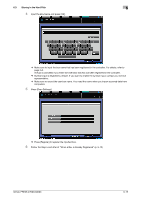
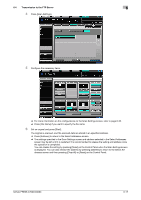
6.3 Storing in the Hard Disk 6 4 Press [Scan Settings]. 5 Configure the necessary items. % For more information on the configurations on the Scan Settings screen, refer to page 6-32. % Press [File Name] if you want to specify the file name. 6 Set an original and press [Start]. The original is scanned, and the scanned data are stored in an specified address. % Press [Address] to return to the Select Addresses screen. % Refer to the user's guide that came with your IC-306/IC-413 or more information about method to load scanned data stored in the hard disk into a computer. % The settings specified in the Scan Settings screen and address selected in the Select Addresses screen may be left until it is restarted. It is recommended to release the setting and address once the operation is completed. You can release the setting by pressing [Reset] on the Control Panel when the Scan Settings screen is displayed. You can also release the address by pressing [Address] to return to the Select Addresses screen and then pressing [Clear All] or [Reset] on the Control Panel. bizhub PRESS C7000/C6000 6-13
-
 1
1 -
2
-
3
-
4
-
5
-
6
-
7
-
8
-
9
-
10
-
11
-
12
-
13
-
14
-
15
-
16
-
17
-
18
-
19
-
20
-
21
-
22
-
23
-
24
-
25
-
26
-
27
-
28
-
29
-
30
-
31
-
32
-
33
-
34
-
35
-
36
-
37
-
38
-
39
-
40
-
41
-
42
-
43
-
44
-
45
-
46
-
47
-
48
-
49
-
50
-
51
-
52
-
53
-
54
-
55
-
56
-
57
-
58
-
59
-
60
-
61
-
62
-
 63
63 -
 64
64 -
 65
65 -
 66
66 -
 67
67 -
 68
68 -
 69
69 -
 70
70 -
 71
71 -
 72
72 -
 73
73 -
74
-
75
-
76
-
77
-
78
-
79
-
80
-
81
-
82
-
83
-
84
-
85
-
86
-
87
-
88
-
89
-
90
-
91
-
92
-
93
-
94
-
95
-
96
-
97
-
98
-
99
-
100
-
101
-
102
-
103
-
104
-
105
-
106
 |
 |