Kyocera C220N User Guide - Page 37
If the wire cleaner knob is not restored to its home position,
 |
UPC - 632983011973
View all Kyocera C220N manuals
Add to My Manuals
Save this manual to your list of manuals |
Page 37 highlights
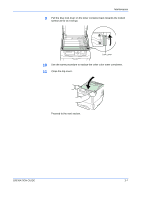
1 Open the left cover. Maintenance Left Cover 2 First clean the main charger wire. Grasp the green wire cleaner knob. Gently pull the wire cleaner knob out and push it back in. Repeat this 2 to 3 times. After cleaning, make sure you restore the wire cleaner knob to its home position. Wire Cleaner Knob NOTE: If the wire cleaner knob is not restored to its home position, a band will print along the length of the page. 3 Next, clean the main charger grid. Take the grid cleaner out of the toner kit. Take the grid cleaner out of the protective bag and remove the cap. Cap Grid Cleaner OPERATION GUIDE 3-9
-
 1
1 -
2
-
3
-
4
-
5
-
6
-
7
-
8
-
9
-
10
-
11
-
12
-
13
-
14
-
15
-
16
-
17
-
18
-
19
-
20
-
21
-
22
-
23
-
24
-
25
-
26
-
27
-
28
-
29
-
30
-
31
-
 32
32 -
 33
33 -
 34
34 -
 35
35 -
 36
36 -
 37
37 -
 38
38 -
 39
39 -
 40
40 -
 41
41 -
 42
42 -
43
-
44
-
45
-
46
-
47
-
48
-
49
-
50
-
51
-
52
-
53
-
54
-
55
-
56
-
57
-
58
-
59
-
60
-
61
-
62
-
63
-
64
-
65
-
66
-
67
-
68
-
69
-
70
-
71
-
72
 |
 |
Maintenance
OPERATION GUIDE
3-9
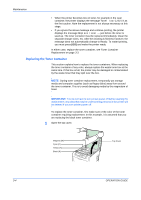
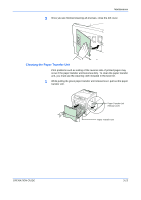
1
Open the left cover.
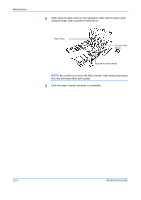
2
First clean the main charger wire. Grasp the green wire cleaner knob.
Gently pull the wire cleaner knob out and push it back in. Repeat this 2 to
3 times. After cleaning, make sure you restore the wire cleaner knob to its
home position.
NOTE:
If the wire cleaner knob is not restored to its home position, a
band will print along the length of the page.
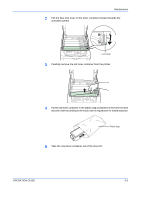
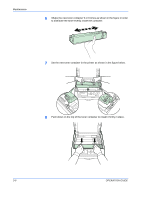
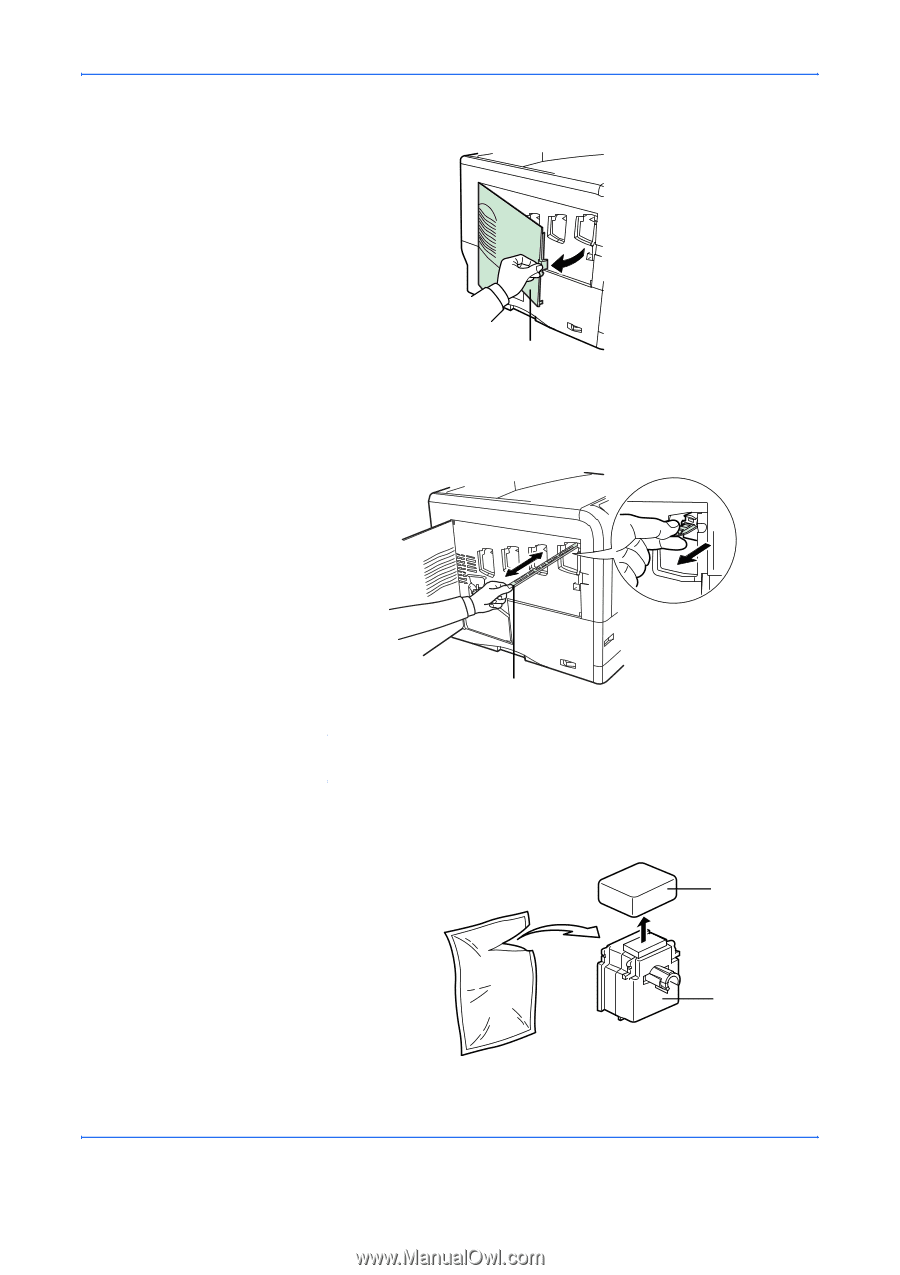
3
Next, clean the main charger grid. Take the grid cleaner out of the toner kit.
Take the grid cleaner out of the protective bag and remove the cap.
Left Cover
Wire Cleaner Knob
Cap
Grid Cleaner