Kyocera ECOSYS FS-1135MFP Kyocera MAC Driver 3.0 PDE Help - Page 25
Job Accounting
 |
View all Kyocera ECOSYS FS-1135MFP manuals
Add to My Manuals
Save this manual to your list of manuals |
Page 25 highlights
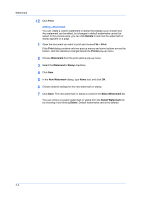
10 Job Accounting Mac PDE Help You can use Job Accounting to check the number of prints associated with each account ID, as well as limit the number of copies for individual IDs. Account IDs can be up to 8 digits. Job Accounting must be set to On at the printing system. A maximum of 1000 account IDs can be assigned at the printing system. In the driver, you can use User Login or Job Accounting, not both. Printing with Job Accounting After account IDs are assigned and Job Accounting is set to On at the printing system, the number of pages printed is added to the selected account ID total. 1 Open the document you want to print and choose File > Print. If the Print dialog contains only two pop-up menus and some buttons across the bottom, click the disclosure triangle beside the Printer pop-up menu. 2 Choose Job Accounting from the print options pop-up menu. 3 Select the Job Accounting checkbox. 4 Select an account ID by typing a number in the Account ID box, or by clicking Choose Account and selecting an account ID from the list. 5 Click Print. Creating an Account ID List You can create a list of account IDs to make it easier to choose IDs when printing. 1 Open the document you want to print and choose File > Print. If the Print dialog contains only two pop-up menus and some buttons across the bottom, click the disclosure triangle beside the Printer pop-up menu. 2 Choose Job Accounting from the print options pop-up menu. 3 Click the Account ID List button. 4 In the Account ID List dialog, click Add. 5 Type an account ID from 1 to 8 digits. 6 Type a description of the ID, such as a user or group. 10-1
-
 1
1 -
2
-
3
-
4
-
5
-
6
-
7
-
8
-
9
-
10
-
11
-
12
-
13
-
14
-
15
-
16
-
17
-
18
-
19
-
 20
20 -
 21
21 -
 22
22 -
 23
23 -
 24
24 -
 25
25 -
 26
26
 |
 |
