Kyocera ECOSYS FS-1135MFP Kyocera MAC Driver 3.0 PDE Help - Page 4
Finishing
 |
View all Kyocera ECOSYS FS-1135MFP manuals
Add to My Manuals
Save this manual to your list of manuals |
Page 4 highlights
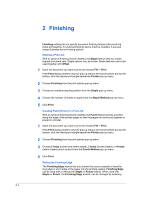
2 Finishing Finishing settings let you specify document finishing features like punching holes and stapling. An optional finishing device must be installed. A preview image illustrates some finishing options. Stapling a Print Job With an optional finishing device installed, the Staple feature lets you create stapled document sets. Staple options vary by model. Staple features cannot be used together with Offset. 1 Open the document you want to print and choose File > Print. If the Print dialog contains only two pop-up menus and some buttons across the bottom, click the disclosure triangle beside the Printer pop-up menu. 2 Choose Finishing from the print options pop-up menu. 3 Choose an available stapling position from the Staple pop-up-menu. 4 Choose the number of sheets to staple from the Staple Method pop-up menu. 5 Click Print. Creating Punch Holes for a Print Job With an optional finishing device installed, the Punch feature places punches along the edge of the printed pages so that the pages can be bound together or placed in a binder. 1 Open the document you want to print and choose File > Print. If the Print dialog contains only two pop-up menus and some buttons across the bottom, click the disclosure triangle beside the Printer pop-up menu. 2 Choose Finishing from the print options pop-up menu. 3 Choose 2 holes (inches and metric based), 3 holes (inches based), or 4 holes (metric based) punch options from the Punch Method pop-up-menu. 4 Click Print. Setting the Finishing Edge The Finishing Edge feature lets you choose the source cassette to feed the long edge or short edge of the paper into the printing system. Finishing Edge can be used with or without the Staple or Punch feature. When used with Staple or Punch, the Finishing Edge position can be changed by selecting 2-1
-
 1
1 -
 2
2 -
 3
3 -
 4
4 -
 5
5 -
 6
6 -
 7
7 -
 8
8 -
 9
9 -
 10
10 -
11
-
12
-
13
-
14
-
15
-
16
-
17
-
18
-
19
-
20
-
21
-
22
-
23
-
24
-
25
-
26
 |
 |
