Kyocera FS-C1020MFP FS-C1020MFP Quick Operation Guide - Page 17
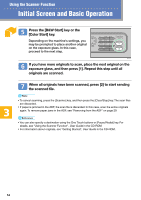
Press the [B&W Start] key.
 |
View all Kyocera FS-C1020MFP manuals
Add to My Manuals
Save this manual to your list of manuals |
Page 17 highlights
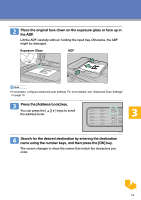
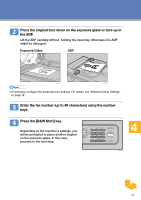
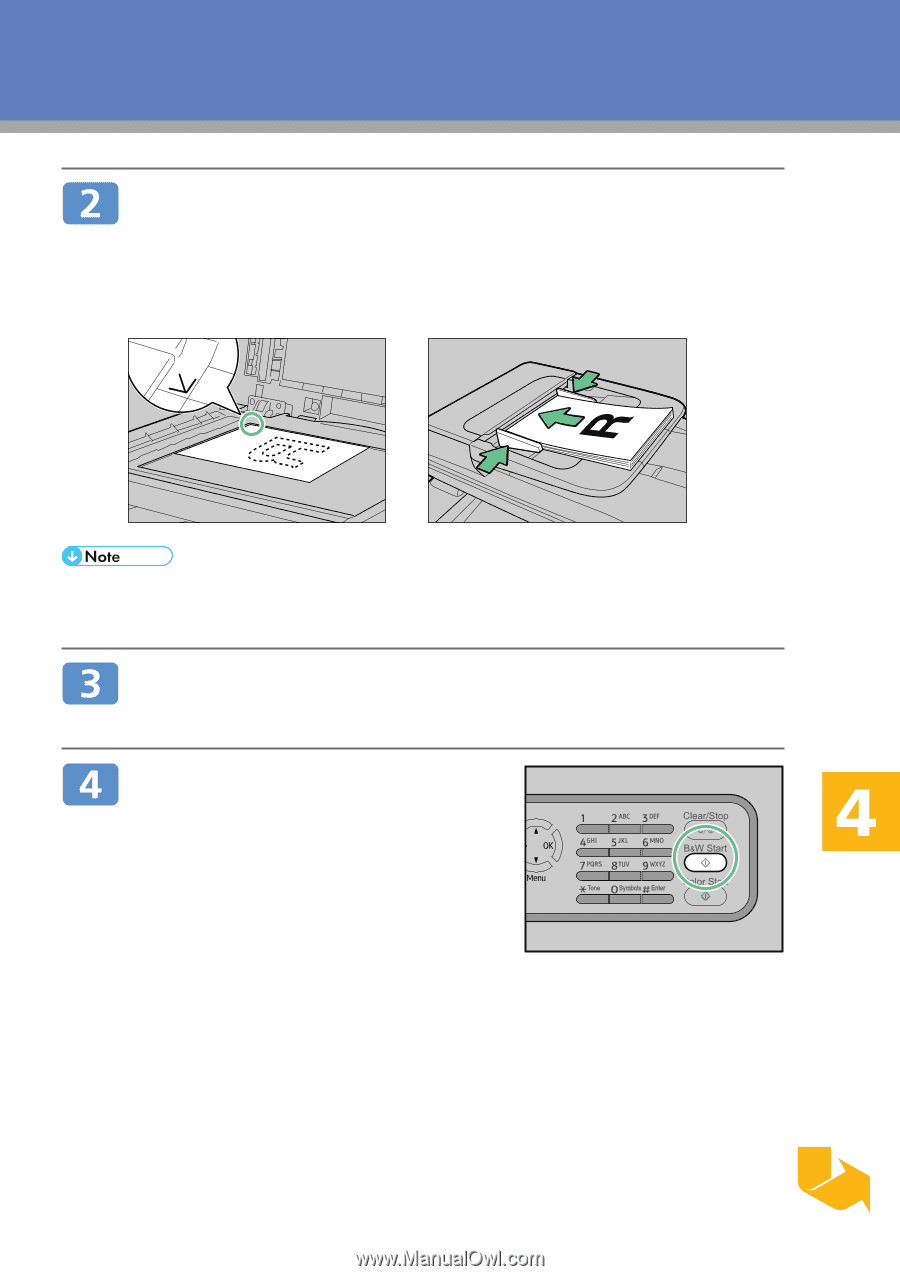
Place the original face down on the exposure glass or face up in the ADF. Lift the ADF carefully without holding the input tray. Otherwise, the ADF might be damaged. Exposure Glass ADF BAA357S BAA353S • If necessary, configure the advanced scan settings. For details, see "Advanced Scan Settings" on page 19. Enter the fax number (up to 40 characters) using the number keys. Press the [B&W Start] key. Depending on the machine's settings, you will be prompted to place another original on the exposure glass. In this case, proceed to the next step. BPC205S 17
-
 1
1 -
2
-
3
-
4
-
5
-
6
-
7
-
8
-
9
-
10
-
11
-
 12
12 -
 13
13 -
 14
14 -
 15
15 -
 16
16 -
 17
17 -
 18
18 -
 19
19 -
 20
20 -
 21
21 -
 22
22 -
23
-
24
-
25
-
26
-
27
-
28
-
29
-
30
-
31
-
32
-
33
-
34
-
35
-
36
-
37
-
38
 |
 |
17
Place the original face down on the exposure glass or face up in
the ADF.
Lift the ADF carefully without
holding the input tray. Otherwise, the ADF
might be damaged.
Exposure Glass
ADF
•
If necessary, configure the advanced scan settings. For details, see "Advanced Scan Settings"
on page 19.
Enter the fax number (up to 40 characters) using the number
keys.
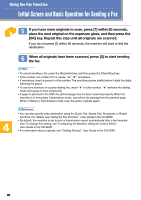
Press the [B&W Start] key.
Depending on the machine's settings, you
will be prompted to place another original
on the exposure glass. In this case,
proceed to the next step.
BPC205S
BAA357S
BAA353S