Kyocera KM-3035 Printer Accounting Systems Settings Guide - Page 12
ENTER], Change Admin. ID, Account Management On, Ready, Account, Management
 |
View all Kyocera KM-3035 manuals
Add to My Manuals
Save this manual to your list of manuals |
Page 12 highlights
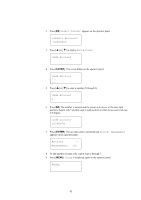
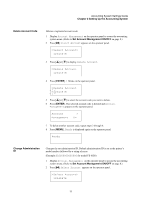
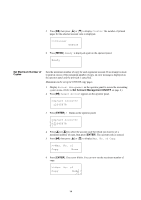
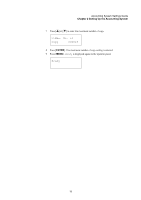
3 Press [ ] or [ ] to display Change Admin. ID. >Change Admin.ID 4 Press [ENTER]. The cursor blinks on the operator panel. >Change Admin.ID 5 Enter the first digit of the new account code. Press [ ] or [ ] to enter a number (0 through 9). >Change Admin.ID 1 6 Press [ ]. The number is entered and the cursor auto moves to the next right position. Repeat step 5 and this step at each position to enter all 15 digits of the new administration ID. >Change Admin.ID 123456789012345 7 Press [ENTER]. OK? appears on the operator panel. OK? 123456789012345 8 Make sure the entered administration ID is correct, then press [ENTER]. The administration ID is changed and Account Management On appears on the operator panel. Account Management > On 9 Press [MENU]. Ready is displayed again on the operator panel. Ready 12
-
 1
1 -
2
-
3
-
4
-
5
-
6
-
 7
7 -
 8
8 -
 9
9 -
 10
10 -
 11
11 -
 12
12 -
 13
13 -
 14
14 -
 15
15 -
 16
16 -
 17
17 -
18
-
19
-
20
-
21
-
22
-
23
-
24
-
25
-
26
-
27
-
28
-
29
-
30
-
31
-
32
-
33
-
34
-
35
-
36
 |
 |
