Kyocera TASKalfa 500ci KM-NET for Accounting Operation Guide Rev-1.4 - Page 6
Accounting System Configuration, 2.1. Basic Flow, Basic Flow
 |
View all Kyocera TASKalfa 500ci manuals
Add to My Manuals
Save this manual to your list of manuals |
Page 6 highlights
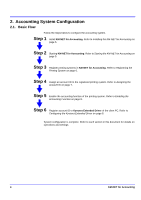
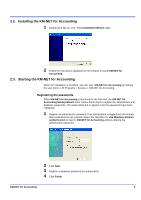
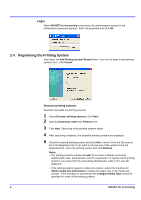
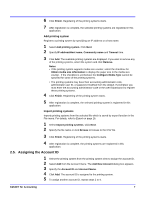
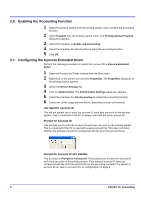
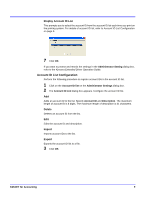
2. Accounting System Configuration 2.1. Basic Flow Follow the steps below to configure the accounting system. Step 1 Install KM-NET for Accounting. Refer to Installing the KM-NET for Accounting on page 5. Step 2 Starting KM-NET for Accounting. Refer to Starting the KM-NET for Accounting on page 5. Step 3 Register printing systems in KM-NET for Accounting. Refer to Registering the Printing System on page 6. Step 4 Assign an account ID to the registered printing system. Refer to Assigning the Account ID on page 7. Step 5 Enable the accounting function of the printing system. Refer to Enabling the Accounting Function on page 8. Step 6 Register account ID to Kyocera Extended Driver of the client PC. Refer to Configuring the Kyocera Extended Driver on page 8. System configuration is complete. Refer to each section in this document for details on operations and settings. 4 KM-NET for Accounting
-
 1
1 -
 2
2 -
 3
3 -
 4
4 -
 5
5 -
 6
6 -
 7
7 -
 8
8 -
 9
9 -
 10
10 -
 11
11 -
 12
12 -
13
-
14
-
15
-
16
-
17
-
18
-
19
-
20
-
21
-
22
-
23
-
24
-
25
-
26
-
27
-
28
-
29
-
30
-
31
-
32
-
33
 |
 |
