Kyocera TASKalfa 500ci KM-NET for Accounting Operation Guide Rev-1.4 - Page 9
Assigning the Account ID, Add printing system, Import printing systems
 |
View all Kyocera TASKalfa 500ci manuals
Add to My Manuals
Save this manual to your list of manuals |
Page 9 highlights
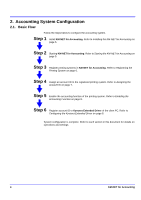
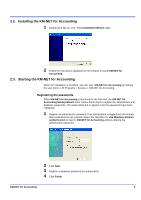
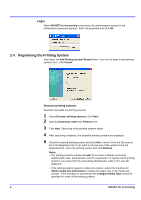
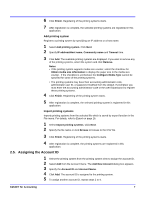
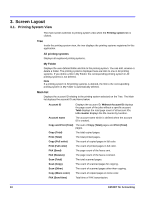
6 Click Finish. Registering of the printing systems starts. 7 After registration is complete, the selected printing systems are registered in this application. Add printing system Registers a printing system by specifying an IP address or a host name. 1 Select Add printing system. Click Next. 2 Specify IP address/Host name, Community name and Timeout time. 3 Click Add. The available printing systems are displayed. If you want to remove any of the printing systems, select the system and click Remove. Notes • If the printing system supports media size counter, select the checkbox for Obtain media size information to display the paper size in the media size counter. If the checkbox is unchecked, the Configure Media Type cannot be specified for some of the printing systems. • The printing systems may have their accounting administrator code, administrator user ID, or password modified from the default. If prompted, you must enter the accounting administrator code or the user ID/password to register these printing systems. 4 Click Finish. Registering of the printing system starts. 5 After registration is complete, the selected printing system is registered in this application. Import printing systems Imports printing systems from the selected file which is saved by export function in the File menu. For details, refer to Export on page 16. 1 Select Import printing systems. Click Next. 2 Specify the file name or click Browse to browse to the CSV file. 3 Click Finish. Registering of the printing systems starts. 4 After registration is complete, the printing systems are registered in this application. 2.5. Assigning the Account ID 1 Select the printing system from the printing system view to assign the account ID. 2 Select Add from the Account menu. The Add New Account dialog box appears. 3 Specify the Account ID and Account Name. 4 Click Add. The account ID is assigned to the printing system. 5 To assign another account ID, repeat steps 2 to 4. KM-NET for Accounting 7
-
 1
1 -
2
-
3
-
 4
4 -
 5
5 -
 6
6 -
 7
7 -
 8
8 -
 9
9 -
 10
10 -
 11
11 -
 12
12 -
 13
13 -
 14
14 -
15
-
16
-
17
-
18
-
19
-
20
-
21
-
22
-
23
-
24
-
25
-
26
-
27
-
28
-
29
-
30
-
31
-
32
-
33
 |
 |
