LG 32LD655H Owners Manual - Page 108
Detailed Descriptions of Installer Menu Items, AC ON AC Power Switchable
 |
View all LG 32LD655H manuals
Add to My Manuals
Save this manual to your list of manuals |
Page 108 highlights
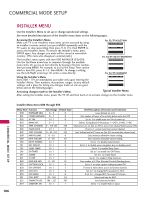
COMMERCIAL MODE SETUP Detailed Descriptions of Installer Menu Items 000 - INSTALLER SEQUENCE Specifies entry sequence to the Installer Menu. 0 = 9876 1 = 4321 2 = 1478 3 = 3698 001 - POWER MANAGE (Power Management) Determines hours of no activity before automatic shutoff. The POWER MANAGE function is for saving energy. If set to 0, Power Manage is Off. Settings range from 0 ~ 7, with 1 ~ 7 representing the hours that the unit will remain On, unless there has been activity from either the control panel or remote control. 002 - AC ON (AC Power Switchable) If set to 1, allows the TV to turn On just by applying AC power. Pressing the On button is not necessary. This is desirable if the TV is plugged into a cable box or a power outlet controlled by a wall switch. Use ADJ Left/Right arrow to choose 0 or 1 where 0 is the default is Off, and 1 is On. NOTE: If set to 1 (On), the TV does not respond to On/Off commands from either the remote or the display control panel, and the SLEEP TIMER is also nonfunctional. 003 - BAND/AFC (Band/Automatic Frequency Control) There are 4 possible settings for this option: 0 = Broadcast 2 = HRC 1 = CATV 3 = IRC If some channels were not found by Auto Tuning (Channel Search), select the appropriate Band setting here and add the channels using the Channel Edit option in the Channel Menu. 004 - STRT CHANNEL (Start Channel) If active, this function allows you to determine the initial channel number when the TV is turned On. This feature is useful for an in-house information channel, since the TV would always select that channel when it is turned On. Setting this to 255 causes the last channel viewed when the TV was turned Off, to be the tuned to channel when the TV is turned On again. Note: For a digital Start Channel, always remember to set item 104 to the Minor Start Channel number. 005 - CHAN LOCK (Channel Lock) CHAN LOCK is ideal if the system must always be on the same channel. Changing channels with Channel Up/Down or keypad numbers is impossible. Channel Lock is inactive if set to 0 (default). Generally, this feature is used in connection with START CHANNEL (Installer item 004) where the start channel may, for example, be set to 3 or 4. If the start channel is 3, then the TV will remain locked on Channel 3. NOTE: For Items 007, 008 and 009 For legacy reasons, the scale used is 0 - 63. The PTC software will translate this to the 0 - 100 scale used by the TV. To translate a TV volume level to the installer menu value, use the following formula: Installer Value = TV Value x 63 100 Enter only the whole number (disregard fractions). 007 - STRT VOLUME (Start Volume) This function allows the Installer to determine the initial volume level setting when the TV is turned On. This feature is useful for an in-house information channel, since the TV would always select that volume level when it is turned On. The range of values are 0 - 63, 255. If 255 is selected, the current volume level will be retained in memory when the TV is turned Off; at turn On, the volume level will be automatically set at the previous or last level. 008 - MIN VOLUME (Minimum Volume) This function determines the minimum volume level allowable with the VOLUME (VOL) Up/Down control. In this way, for example, someone cannot set the volume too low to hear. The value range is from 0 to 63 - change values with ADJ Left/Right arrow. The factory default is 0, which provides the full range of volume control, if item 009 MAX VOLUME is also set to 63. It may be best to set the same value on every TV. NOTE: The minimum volume level cannot have a value setting higher than the MAX VOLUME level (described below). 255 = Last channel 1 ~ 125 = Ch X 0 = Aux 126 Map to Channel 3. 127 Map to Channel 4. COMMERCIAL MODE SETUP 108
-
 1
1 -
2
-
3
-
4
-
5
-
6
-
7
-
8
-
9
-
10
-
11
-
12
-
13
-
14
-
15
-
16
-
17
-
18
-
19
-
20
-
21
-
22
-
23
-
24
-
25
-
26
-
27
-
28
-
29
-
30
-
31
-
32
-
33
-
34
-
35
-
36
-
37
-
38
-
39
-
40
-
41
-
42
-
43
-
44
-
45
-
46
-
47
-
48
-
49
-
50
-
51
-
52
-
53
-
54
-
55
-
56
-
57
-
58
-
59
-
60
-
61
-
62
-
63
-
64
-
65
-
66
-
67
-
68
-
69
-
70
-
71
-
72
-
73
-
74
-
75
-
76
-
77
-
78
-
79
-
80
-
81
-
82
-
83
-
84
-
85
-
86
-
87
-
88
-
89
-
90
-
91
-
92
-
93
-
94
-
95
-
96
-
97
-
98
-
99
-
100
-
101
-
102
-
 103
103 -
 104
104 -
 105
105 -
 106
106 -
 107
107 -
 108
108 -
 109
109 -
 110
110 -
 111
111 -
 112
112 -
 113
113 -
114
-
115
-
116
-
117
-
118
-
119
-
120
-
121
-
122
-
123
-
124
-
125
-
126
-
127
-
128
-
129
-
130
-
131
-
132
-
133
-
134
-
135
-
136
-
137
-
138
-
139
-
140
-
141
-
142
-
143
-
144
-
145
-
146
-
147
-
148
-
149
-
150
-
151
 |
 |
