LG LSEL6331F Owners Manual - Page 21
Using the Anti-Tip Bracket Template, Engaging the Anti-tip Device, Test Run, Test the Range Before Use
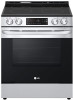 |
View all LG LSEL6331F manuals
Add to My Manuals
Save this manual to your list of manuals |
Page 21 highlights
• Install the anti-tip device to the structure and/or the range. Verify the anti-tip device has been properly installed and engaged by following the guide on the anti-tip bracket template. • Engage the range to the anti-tip device by following the guide on the anti-tip bracket template. Ensure the anti-tip device is reengaged when the range is moved by following the guide on the anti-tip bracket template. • Re-engage the anti-tip device if the range is moved. Do not operate the range without the anti-tip device in place and engaged. • See installation instructions for details. • Failure to follow these instructions can result in death or serious burns to children or adults. • Range must be secured with an approved anti- tip device. • The range could be tipped by standing, sitting or leaning on an open door if the range or anti-tip device is not properly installed. • The use of this device does not preclude tipping of the range when not properly installed. • After installing the anti-tip device, verify that it is in place by carefully attempting to tilt the range forward. • This range has been designed to meet all recognized industry tip standards for all normal conditions. • The installation of the anti-tip device must meet all local codes for securing the appliance. Using the Anti-Tip Bracket Template • The anti-tip bracket is packaged with an installation template. The instructions include necessary information to complete the installation. Read and follow the range installation instruction sheet. • Screws c must enter wood or concrete. a Anti-tip bracket b Wall plate INSTALLATION 21 Engaging the Anti-tip Device a Anti-tip bracket b Leveling leg 1 Slide the range against the wall, making sure the back leg slides into and engages the antitip bracket. • Make sure the back leg slides into and engages the anti-tip bracket. 2 Check for proper installation by grasping the front edge of the cooktop and carefully attempting to tilt the range forward. Test Run Test the Range Before Use Check if the range is properly installed and run a test cycle. Model LSEL6333* 1 Before using the cooktop for the first time, clean it with a ceramic cooktop cleaner. This helps protect the top and makes cleanup easier. 2 Turn the oven mode knob to the OFF position to start test. 3 Turn each knob to the Hi position to check that the surface heating elements are working properly. The elements should glow red and radiate heat, and they should cycle on and off periodically even when the knob is in the Hi position. This cycling prevents the glass-ceramic from being cracked by thermal shock. NOTE • The Warm Zone does not consume enough power to glow red. ENGLISH
-
 1
1 -
2
-
3
-
4
-
5
-
6
-
7
-
8
-
9
-
10
-
11
-
12
-
13
-
14
-
15
-
 16
16 -
 17
17 -
 18
18 -
 19
19 -
 20
20 -
 21
21 -
 22
22 -
 23
23 -
 24
24 -
 25
25 -
 26
26 -
27
-
28
-
29
-
30
-
31
-
32
-
33
-
34
-
35
-
36
-
37
-
38
-
39
-
40
-
41
-
42
-
43
-
44
-
45
-
46
-
47
-
48
-
49
-
50
-
51
-
52
-
53
-
54
-
55
-
56
-
57
-
58
-
59
-
60
-
61
-
62
-
63
-
64
-
65
-
66
-
67
-
68
-
69
-
70
-
71
-
72
-
73
-
74
-
75
-
76
-
77
-
78
-
79
-
80
 |
 |
