Lenovo ThinkCentre A58e English (User guide) - Page 33
Obtaining device drivers, Installing security features, Integrated cable lock
 |
View all Lenovo ThinkCentre A58e manuals
Add to My Manuals
Save this manual to your list of manuals |
Page 33 highlights
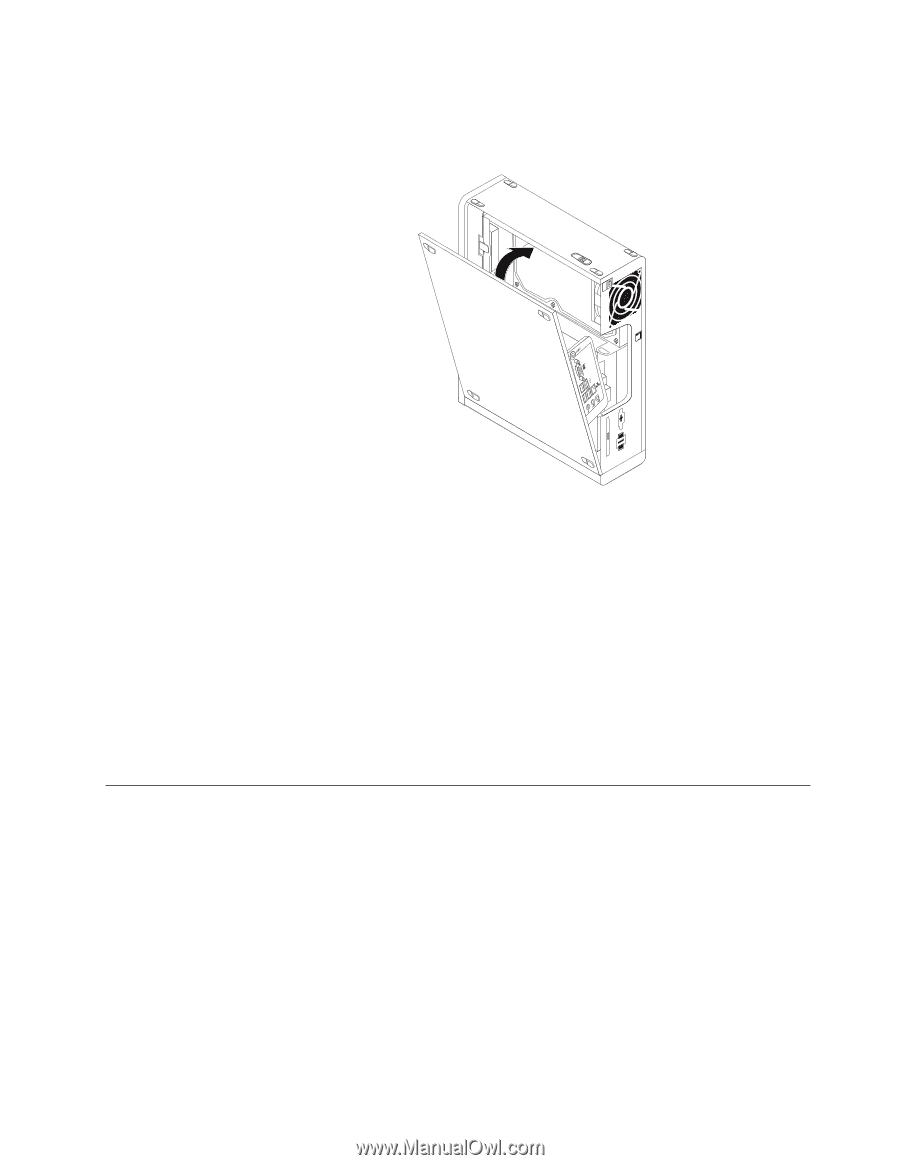
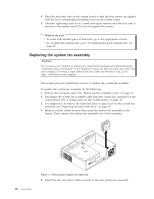
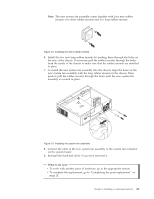
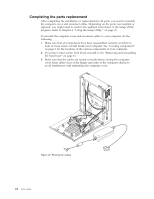
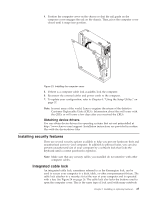
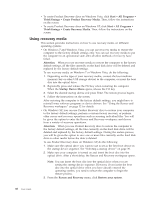
4. Position the computer cover on the chassis so that the rail guide on the computer cover engages the rail on the chassis. Then, pivot the computer cover closed until it snaps into position. Figure 23. Installing the computer cover 5. If there is a computer cable lock available, lock the computer. 6. Reconnect the external cables and power cords to the computer. 7. To update your configuration, refer to Chapter 4, "Using the Setup Utility," on page 37. Note: In most areas of the world, Lenovo requires the return of the defective Customer Replaceable Units (CRUs). Information about this will come with the CRUs or will come a few days after you received the CRUs. Obtaining device drivers You can obtain device drivers for operating systems that are not preinstalled at http://www.lenovo.com/support. Installation instructions are provided in readme files with the device-driver files. Installing security features There are several security options available to help you prevent hardware theft and unauthorized access to your computer. In addition to physical locks, you can also prevent unauthorized use of your computer by a software lock that locks the keyboard until a correct password is typed in. Note: Make sure that any security cables you installed do not interfere with other computer cables. Integrated cable lock An integrated cable lock, sometimes referred to as the Kensington lock, can be used to secure your computer to a desk, table, or other non-permanent fixture. The cable lock attaches to a security slot at the rear of your computer and is operated with a key. See Figure 24 on page 26. The cable lock also locks the buttons used to open the computer cover. This is the same type of lock used with many notebook Chapter 2. Installing or replacing hardware 25
-
 1
1 -
2
-
3
-
4
-
5
-
6
-
7
-
8
-
9
-
10
-
11
-
12
-
13
-
14
-
15
-
16
-
17
-
18
-
19
-
20
-
21
-
22
-
23
-
24
-
25
-
26
-
27
-
 28
28 -
 29
29 -
 30
30 -
 31
31 -
 32
32 -
 33
33 -
 34
34 -
 35
35 -
 36
36 -
 37
37 -
 38
38 -
39
-
40
-
41
-
42
-
43
-
44
-
45
-
46
-
47
-
48
-
49
-
50
-
51
-
52
-
53
-
54
-
55
-
56
-
57
-
58
-
59
-
60
-
61
-
62
-
63
-
64
-
65
-
66
-
67
-
68
 |
 |