Lenovo ThinkPad X30 ThinkPad X30, X31, X32 - Hardware Maintenance Manual - Page 110
latches
 |
View all Lenovo ThinkPad X30 manuals
Add to My Manuals
Save this manual to your list of manuals |
Page 110 highlights
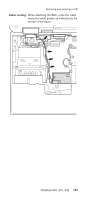
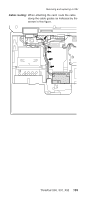
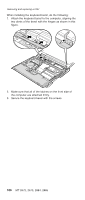
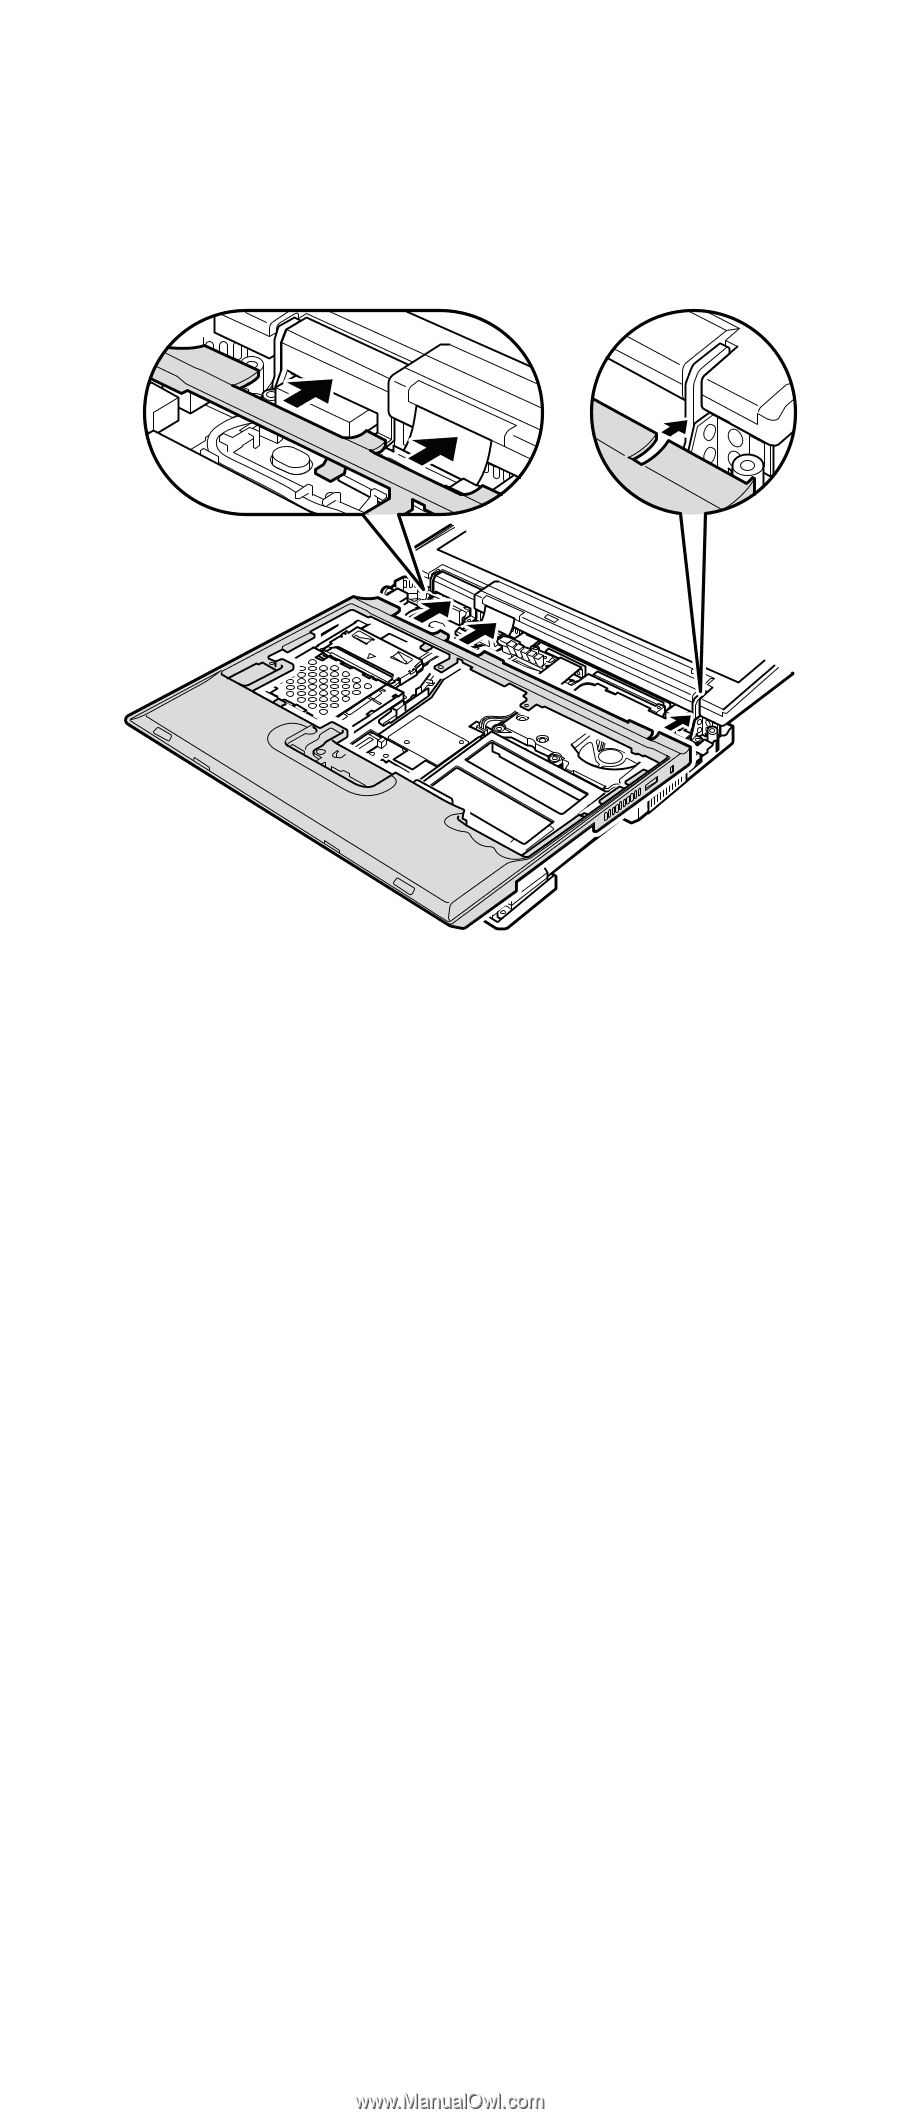
Removing and replacing a FRU When installing the keyboard bezel, do the following: 1. Attach the keyboard bezel to the computer, aligning the two dents of the bezel with the hinges as shown in this figure. 2. Make sure that all of the latches on the front side of the computer are attached firmly. 3. Secure the keyboard bezel with the screws. 106 MT 2672, 2673, 2884, 2885
-
 1
1 -
2
-
3
-
4
-
5
-
6
-
7
-
8
-
9
-
10
-
11
-
12
-
13
-
14
-
15
-
16
-
17
-
18
-
19
-
20
-
21
-
22
-
23
-
24
-
25
-
26
-
27
-
28
-
29
-
30
-
31
-
32
-
33
-
34
-
35
-
36
-
37
-
38
-
39
-
40
-
41
-
42
-
43
-
44
-
45
-
46
-
47
-
48
-
49
-
50
-
51
-
52
-
53
-
54
-
55
-
56
-
57
-
58
-
59
-
60
-
61
-
62
-
63
-
64
-
65
-
66
-
67
-
68
-
69
-
70
-
71
-
72
-
73
-
74
-
75
-
76
-
77
-
78
-
79
-
80
-
81
-
82
-
83
-
84
-
85
-
86
-
87
-
88
-
89
-
90
-
91
-
92
-
93
-
94
-
95
-
96
-
97
-
98
-
99
-
100
-
101
-
102
-
103
-
104
-
 105
105 -
 106
106 -
 107
107 -
 108
108 -
 109
109 -
 110
110 -
 111
111 -
 112
112 -
 113
113 -
 114
114 -
 115
115 -
116
-
117
-
118
-
119
-
120
-
121
-
122
-
123
-
124
-
125
-
126
-
127
-
128
-
129
-
130
-
131
-
132
-
133
-
134
-
135
-
136
-
137
-
138
-
139
-
140
-
141
-
142
-
143
-
144
-
145
-
146
-
147
-
148
-
149
-
150
-
151
-
152
-
153
-
154
-
155
-
156
-
157
-
158
-
159
-
160
-
161
-
162
-
163
-
164
-
165
-
166
-
167
-
168
-
169
-
170
-
171
-
172
-
173
-
174
-
175
-
176
-
177
-
178
-
179
-
180
-
181
-
182
-
183
-
184
-
185
-
186
-
187
-
188
-
189
-
190
-
191
-
192
-
193
-
194
-
195
-
196
 |
 |
When
installing
the
keyboard
bezel,
do
the
following:
1.
Attach
the
keyboard
bezel
to
the
computer,
aligning
the
two
dents
of
the
bezel
with
the
hinges
as
shown
in
this
figure.
2.
Make
sure
that
all
of
the
latches
on
the
front
side
of
the
computer
are
attached
firmly.
3.
Secure
the
keyboard
bezel
with
the
screws.
Removing
and
replacing
a
FRU
106
MT
2672,
2673,
2884,
2885