Lenovo ThinkPad X60 Hardware Maintenance Manual - Page 35
Detecting, system, information, PC-Doctor
 |
View all Lenovo ThinkPad X60 manuals
Add to My Manuals
Save this manual to your list of manuals |
Page 35 highlights
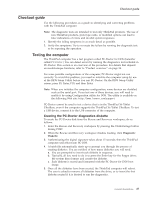
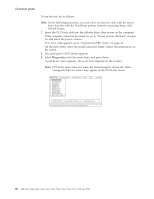
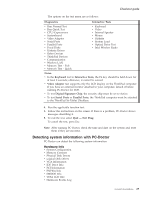
Checkout guide The options on the test menu are as follows: Diagnostics Interactive Tests v Run Normal Test v Run Quick Test v CPU/Coprocessor v Systemboard v Video Adapter v Serial Ports v Parallel Ports v Fixed Disks v Diskette Drives v Other Devices v ThinkPad Devices v Communication v Wireless LAN v Memory Test - Full v Memory Test - Quick v Keyboard v Video v Internal Speaker v Mouse v Diskette v System Load v Optical Drive Test v Intel Wireless Radio Notes: v In the Keyboard test in Interactive Tests, the Fn key should be held down for at least 2 seconds; otherwise, it cannot be sensed. v Video Adapter test supports only the LCD display on the ThinkPad computer. If you have an external monitor attached to your computer, detach it before running PC-Doctor for DOS. v To test Digital Signature Chip, the security chip must be set to Active. v To test Serial Ports or Parallel Ports, the ThinkPad computer must be attached to the ThinkPad X6 Tablet UltraBase. 4. Run the applicable function test. 5. Follow the instructions on the screen. If there is a problem, PC-Doctor shows messages describing it. 6. To exit the test, select Quit - Exit Diag. To cancel the test, press Esc. Note: After running PC-Doctor, check the time and date on the system and reset them if they are incorrect. Detecting system information with PC-Doctor PC-Doctor can detect the following system information: Hardware Info v System Configuration v Memory Contents v Physical Disk Drives v Logical Disk Drives v VGA Information v IDE Drive Info v PCI Information v PNPISA Info v SMBIOS Info v VESA LCD Info v Hardware Events Log General descriptions 29
-
 1
1 -
2
-
3
-
4
-
5
-
6
-
7
-
8
-
9
-
10
-
11
-
12
-
13
-
14
-
15
-
16
-
17
-
18
-
19
-
20
-
21
-
22
-
23
-
24
-
25
-
26
-
27
-
28
-
29
-
 30
30 -
 31
31 -
 32
32 -
 33
33 -
 34
34 -
 35
35 -
 36
36 -
 37
37 -
 38
38 -
 39
39 -
 40
40 -
41
-
42
-
43
-
44
-
45
-
46
-
47
-
48
-
49
-
50
-
51
-
52
-
53
-
54
-
55
-
56
-
57
-
58
-
59
-
60
-
61
-
62
-
63
-
64
-
65
-
66
-
67
-
68
-
69
-
70
-
71
-
72
-
73
-
74
-
75
-
76
-
77
-
78
-
79
-
80
-
81
-
82
-
83
-
84
-
85
-
86
-
87
-
88
-
89
-
90
-
91
-
92
-
93
-
94
-
95
-
96
-
97
-
98
-
99
-
100
-
101
-
102
-
103
-
104
-
105
-
106
-
107
-
108
-
109
-
110
-
111
-
112
-
113
-
114
-
115
-
116
-
117
-
118
-
119
-
120
-
121
-
122
-
123
-
124
-
125
-
126
-
127
-
128
-
129
-
130
-
131
-
132
-
133
-
134
-
135
-
136
-
137
-
138
-
139
-
140
-
141
-
142
-
143
-
144
-
145
-
146
-
147
-
148
-
149
-
150
-
151
-
152
-
153
-
154
-
155
-
156
-
157
-
158
-
159
-
160
-
161
-
162
-
163
-
164
-
165
-
166
 |
 |