Lexmark 9350 User's Guide - Page 134
Customizing dial settings, Setting up a dialing prefix
 |
UPC - 734646031202
View all Lexmark 9350 manuals
Add to My Manuals
Save this manual to your list of manuals |
Page 134 highlights
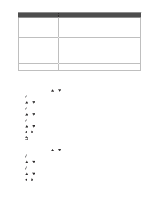
Use this Add Entry Group Search Add Group Print List To Add a name and a fax number. The printer automatically assigns a new entry a Speed Dial number. Note: Enter a name and a fax number in the provided fields using the keypad numbers. You spell out a name using the numbers associated with each letter as you do on a telephone or cell phone. Search for a previously defined group, and add it to a fax list. Create a group name, and select previously defined names to be added to the group. Print a list with the name, the fax number, and the Speed Dial number of each person. Note: This is available when Phone Book entries exist. 6 Press to enter the menu item you highlighted, and follow the instructions on the display. 7 Press to exit and save any entries you made. Note: For instructions on how to add Speed Dial or Group Dial entries to the Phone Book using the computer, see "Setting up Speed Dial numbers" on page 132. Customizing dial settings Setting up a dialing prefix You can add a prefix of up to eight characters to the beginning of each number dialed. Characters can include numbers, commas, and/or the symbols * or #. 1 From the control panel, press or repeatedly until Fax is highlighted. 2 Press . 3 Press or repeatedly until the Fax Setup submenu is highlighted. 4 Press . 5 Press or repeatedly until the Dialing and Sending submenu is highlighted. 6 Press . 7 Press or repeatedly until you reach the Dial Prefix menu item. 8 Press or repeatedly until Create appears. 9 Press . 10 Enter the prefix to be dialed before each telephone number. 11 Press to save and exit. 134
-
 1
1 -
2
-
3
-
4
-
5
-
6
-
7
-
8
-
9
-
10
-
11
-
12
-
13
-
14
-
15
-
16
-
17
-
18
-
19
-
20
-
21
-
22
-
23
-
24
-
25
-
26
-
27
-
28
-
29
-
30
-
31
-
32
-
33
-
34
-
35
-
36
-
37
-
38
-
39
-
40
-
41
-
42
-
43
-
44
-
45
-
46
-
47
-
48
-
49
-
50
-
51
-
52
-
53
-
54
-
55
-
56
-
57
-
58
-
59
-
60
-
61
-
62
-
63
-
64
-
65
-
66
-
67
-
68
-
69
-
70
-
71
-
72
-
73
-
74
-
75
-
76
-
77
-
78
-
79
-
80
-
81
-
82
-
83
-
84
-
85
-
86
-
87
-
88
-
89
-
90
-
91
-
92
-
93
-
94
-
95
-
96
-
97
-
98
-
99
-
100
-
101
-
102
-
103
-
104
-
105
-
106
-
107
-
108
-
109
-
110
-
111
-
112
-
113
-
114
-
115
-
116
-
117
-
118
-
119
-
120
-
121
-
122
-
123
-
124
-
125
-
126
-
127
-
128
-
 129
129 -
 130
130 -
 131
131 -
 132
132 -
 133
133 -
 134
134 -
 135
135 -
 136
136 -
 137
137 -
 138
138 -
 139
139 -
140
-
141
-
142
-
143
-
144
-
145
-
146
-
147
-
148
-
149
-
150
-
151
-
152
-
153
-
154
-
155
-
156
-
157
-
158
-
159
-
160
-
161
-
162
-
163
-
164
-
165
-
166
-
167
-
168
-
169
-
170
-
171
-
172
-
173
-
174
-
175
-
176
-
177
-
178
-
179
-
180
-
181
-
182
-
183
-
184
-
185
-
186
-
187
-
188
-
189
-
190
-
191
-
192
-
193
-
194
-
195
-
196
-
197
-
198
 |
 |
