Lexmark 9350 User's Guide - Page 45
Using Photo and the Photo Card Mode menu, Photo, Photo Card Mode, Photo Menu
 |
UPC - 734646031202
View all Lexmark 9350 manuals
Add to My Manuals
Save this manual to your list of manuals |
Page 45 highlights
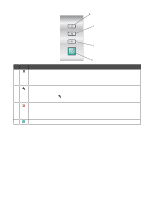
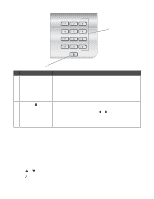
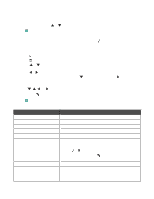
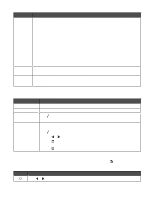
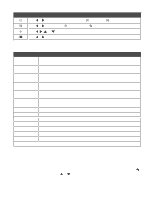
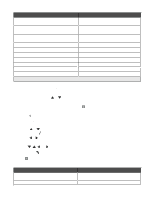
Using Photo and the Photo Card Mode menu Make sure you have inserted a memory card or flash drive into the printer. 1 From the control panel, press or repeatedly until Photo is highlighted. 2 Press to view a quick slideshow of the photos on your memory card. Press for more photo options. The Photo Card Mode menu appears. 3 From the Photo Card Mode menu, you can: • Press or to enter any of the submenus in this menu. • Press or repeatedly to scroll through the submenus or menu items until you reach the one you want to change. • Press or repeatedly to reach the value you want or to move through each photo shown on the control panel. • Press to select a photo when the control panel instructions indicate this is possible. Control panel instructions also indicate when you can press to edit a photo, view it full screen, change print settings, or see a print preview. • To go into other submenus, menu items, and values to make additional changes, continue to use the navigation buttons ( , , , and ). • Press repeatedly to return to the previous menu, if needed. 4 Press to start printing the photo job. The following table explains the function of submenus, menu items, and values in the Photo Card Mode menu. Menu item How to View Slideshow Press to start a slideshow of all the photos on the card. You can select how fast you want to see each photo displayed on the control panel. Values are: • Fast (3 Seconds/Image) which means each image or photo appears for three seconds. • Moderate (5 Seconds/Image) • Slow (10 Seconds/Image) Browse and Print Photos Press to browse and print the photos on the card. • Press or repeatedly to scroll to the photo you want. • Press • Press • Press to select an individual photo. or to set the number of copies you want to print. to enter the Photo Menu to make changes that affect the appearance or printing of the photo. When you finish changing settings, press . 45
-
 1
1 -
2
-
3
-
4
-
5
-
6
-
7
-
8
-
9
-
10
-
11
-
12
-
13
-
14
-
15
-
16
-
17
-
18
-
19
-
20
-
21
-
22
-
23
-
24
-
25
-
26
-
27
-
28
-
29
-
30
-
31
-
32
-
33
-
34
-
35
-
36
-
37
-
38
-
39
-
 40
40 -
 41
41 -
 42
42 -
 43
43 -
 44
44 -
 45
45 -
 46
46 -
 47
47 -
 48
48 -
 49
49 -
 50
50 -
51
-
52
-
53
-
54
-
55
-
56
-
57
-
58
-
59
-
60
-
61
-
62
-
63
-
64
-
65
-
66
-
67
-
68
-
69
-
70
-
71
-
72
-
73
-
74
-
75
-
76
-
77
-
78
-
79
-
80
-
81
-
82
-
83
-
84
-
85
-
86
-
87
-
88
-
89
-
90
-
91
-
92
-
93
-
94
-
95
-
96
-
97
-
98
-
99
-
100
-
101
-
102
-
103
-
104
-
105
-
106
-
107
-
108
-
109
-
110
-
111
-
112
-
113
-
114
-
115
-
116
-
117
-
118
-
119
-
120
-
121
-
122
-
123
-
124
-
125
-
126
-
127
-
128
-
129
-
130
-
131
-
132
-
133
-
134
-
135
-
136
-
137
-
138
-
139
-
140
-
141
-
142
-
143
-
144
-
145
-
146
-
147
-
148
-
149
-
150
-
151
-
152
-
153
-
154
-
155
-
156
-
157
-
158
-
159
-
160
-
161
-
162
-
163
-
164
-
165
-
166
-
167
-
168
-
169
-
170
-
171
-
172
-
173
-
174
-
175
-
176
-
177
-
178
-
179
-
180
-
181
-
182
-
183
-
184
-
185
-
186
-
187
-
188
-
189
-
190
-
191
-
192
-
193
-
194
-
195
-
196
-
197
-
198
 |
 |
