Lexmark E232 User's Guide - Page 44
How to reattach the system board cover, Close the side cover.
 |
View all Lexmark E232 manuals
Add to My Manuals
Save this manual to your list of manuals |
Page 44 highlights
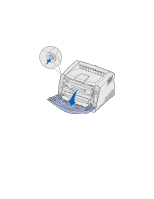
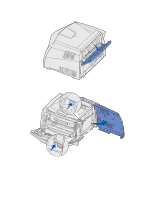
How to reattach the system board cover When you are finished adding a memory or flash card, be sure to properly reattach the system board's metal cover. 1 Insert the two tabs on the right side of the metal plate into the holes toward the back of the system board and rotate the system board until it is flush against the printer. 2 Screw in the two screws at the top and side of the metal plate. 3 Close the side cover. 4 Close the rear exit. 5 Close the front cover. How to install options 44
-
 1
1 -
2
-
3
-
4
-
5
-
6
-
7
-
8
-
9
-
10
-
11
-
12
-
13
-
14
-
15
-
16
-
17
-
18
-
19
-
20
-
21
-
22
-
23
-
24
-
25
-
26
-
27
-
28
-
29
-
30
-
31
-
32
-
33
-
34
-
35
-
36
-
37
-
38
-
 39
39 -
 40
40 -
 41
41 -
 42
42 -
 43
43 -
 44
44 -
 45
45 -
 46
46 -
 47
47 -
 48
48 -
 49
49 -
50
-
51
-
52
-
53
-
54
-
55
-
56
-
57
-
58
-
59
-
60
-
61
-
62
-
63
-
64
-
65
-
66
-
67
-
68
-
69
-
70
-
71
-
72
-
73
-
74
-
75
-
76
-
77
-
78
-
79
-
80
-
81
-
82
-
83
-
84
-
85
-
86
-
87
-
88
-
89
-
90
-
91
-
92
-
93
-
94
-
95
-
96
-
97
-
98
-
99
-
100
-
101
-
102
-
103
-
104
-
105
-
106
-
107
-
108
-
109
-
110
-
111
-
112
-
113
-
114
-
115
-
116
-
117
-
118
-
119
-
120
-
121
-
122
-
123
-
124
-
125
-
126
-
127
 |
 |
How to install options
44
How to reattach the system board cover
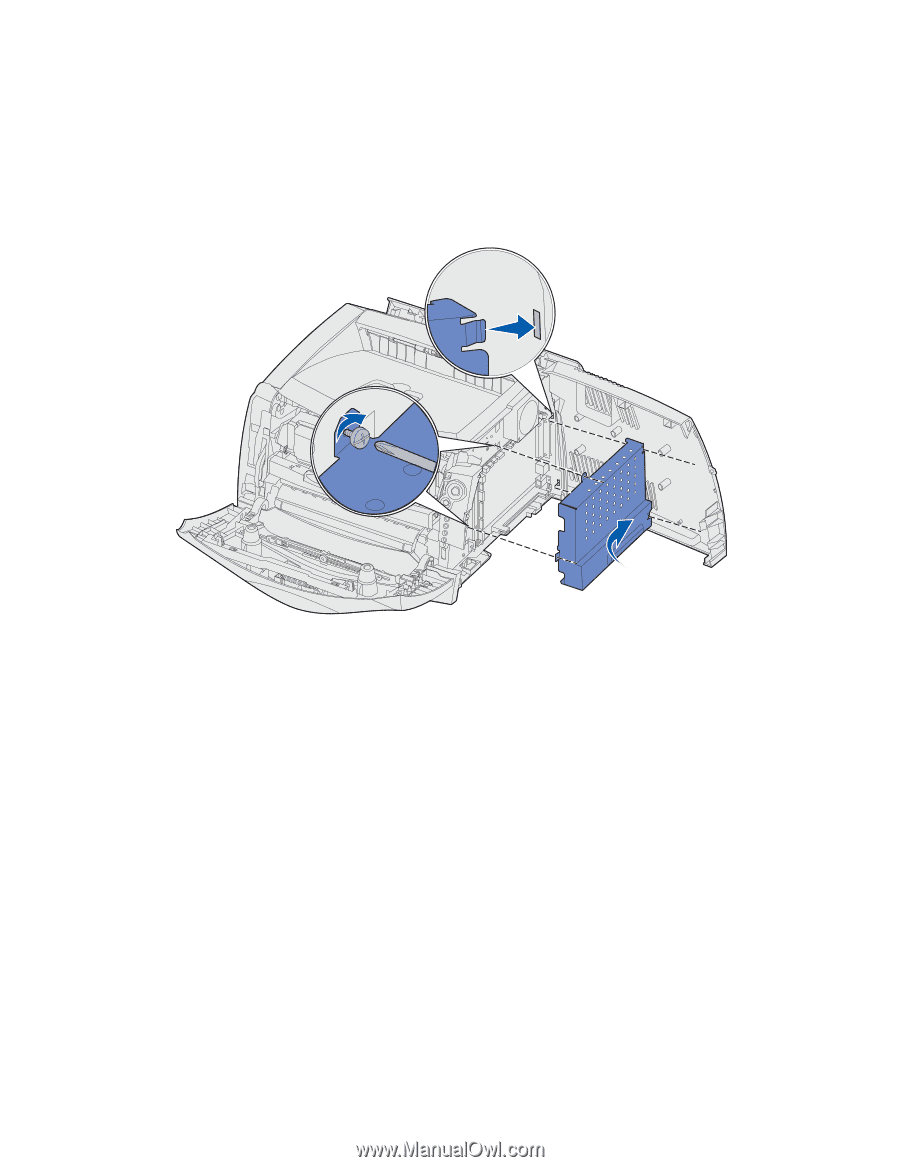
When you are finished adding a memory or flash card, be sure to properly reattach the system
board’s metal cover.
1
Insert the two tabs on the right side of the metal plate into the holes toward the back of the
system board and rotate the system board until it is flush against the printer.
2
Screw in the two screws at the top and side of the metal plate.
3
Close the side cover.
4
Close the rear exit.
5
Close the front cover.