Lexmark M410 Service Manual - Page 70
Print Quality - Banding, Print Quality - Black bands on outer edges of
 |
UPC - 734646261005
View all Lexmark M410 manuals
Add to My Manuals
Save this manual to your list of manuals |
Page 70 highlights
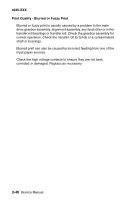
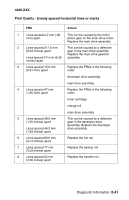
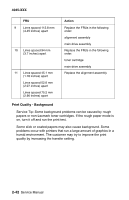
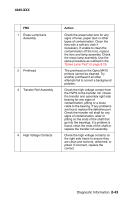
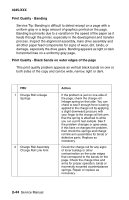
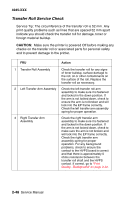
4045-XXX Print Quality - Banding Service Tip: Banding is difficult to detect except on a page with a uniform gray or a large amount of graphics printed on the page. Banding is primarily due to a variation in the speed of the paper as it feeds through the printer, especially in the development and transfer process. Inspect the alignment assembly, main drive assembly and all other paper feed components for signs of wear, dirt, binds, or damage, especially the drive gears. Banding appears as light or dark horizontal lines on a uniformly gray page. Print Quality - Black bands on outer edges of the page This print quality problem appears as vertical black bands on one or both sides of the copy and can be wide, narrow, light or dark. FRU 1 Charge Roll Linkage Springs 2 Charge Roll Assembly Charge Roll Link Arm Action If the problem is just on one side of the page, check the charge roll linkage spring on that side. You can check to see if enough force is being applied to the charge roll by applying a slight downward pressure with your finger to the charge roll link arm that the spring is attached to while you run a print test sample. See if the problem changes or goes away. If this fixes or changes the problem, then check the springs and charge roll link arm assemblies for binds or defective parts. Replace as necessary. Check the charge roll for any signs of toner buildup or other contamination on the outer edges that correspond to the bands on the page. Check the charge links and arms for proper operation, binds or incorrectly mounted counterbalance springs. Repair or replace as necessary. 2-44 Service Manual
-
 1
1 -
2
-
3
-
4
-
5
-
6
-
7
-
8
-
9
-
10
-
11
-
12
-
13
-
14
-
15
-
16
-
17
-
18
-
19
-
20
-
21
-
22
-
23
-
24
-
25
-
26
-
27
-
28
-
29
-
30
-
31
-
32
-
33
-
34
-
35
-
36
-
37
-
38
-
39
-
40
-
41
-
42
-
43
-
44
-
45
-
46
-
47
-
48
-
49
-
50
-
51
-
52
-
53
-
54
-
55
-
56
-
57
-
58
-
59
-
60
-
61
-
62
-
63
-
64
-
 65
65 -
 66
66 -
 67
67 -
 68
68 -
 69
69 -
 70
70 -
 71
71 -
 72
72 -
 73
73 -
 74
74 -
 75
75 -
76
-
77
-
78
-
79
-
80
-
81
-
82
-
83
-
84
-
85
-
86
-
87
-
88
-
89
-
90
-
91
-
92
-
93
-
94
-
95
-
96
-
97
-
98
-
99
-
100
-
101
-
102
-
103
-
104
-
105
-
106
-
107
-
108
-
109
-
110
-
111
-
112
-
113
-
114
-
115
-
116
-
117
-
118
-
119
-
120
-
121
-
122
-
123
-
124
-
125
-
126
-
127
-
128
-
129
-
130
-
131
-
132
-
133
-
134
-
135
-
136
-
137
-
138
-
139
-
140
-
141
-
142
-
143
-
144
-
145
-
146
-
147
-
148
-
149
-
150
-
151
-
152
-
153
-
154
-
155
-
156
-
157
-
158
-
159
-
160
-
161
-
162
-
163
-
164
-
165
-
166
-
167
-
168
-
169
-
170
-
171
-
172
-
173
-
174
-
175
-
176
-
177
-
178
-
179
-
180
-
181
-
182
-
183
-
184
-
185
-
186
-
187
-
188
-
189
-
190
-
191
-
192
-
193
-
194
-
195
 |
 |
