Lexmark MS818 Users Guide PDF - Page 40
Setting up serial printing (Windows only), Verifying printer setup
 |
View all Lexmark MS818 manuals
Add to My Manuals
Save this manual to your list of manuals |
Page 40 highlights
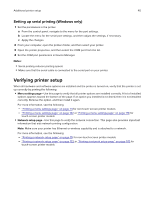
Additional printer setup 40 Setting up serial printing (Windows only) 1 Set the parameters in the printer. a From the control panel, navigate to the menu for the port settings. b Locate the menu for the serial port settings, and then adjust the settings, if necessary. c Apply the changes. 2 From your computer, open the printers folder, and then select your printer. 3 Open the printer properties, and then select the COM port from the list. 4 Set the COM port parameters in Device Manager. Notes: • Serial printing reduces printing speed. • Make sure that the serial cable is connected to the serial port on your printer. Verifying printer setup When all hardware and software options are installed and the printer is turned on, verify that the printer is set up correctly by printing the following: • Menu settings page-Use this page to verify that all printer options are installed correctly. A list of installed options appears toward the bottom of the page. If an option you installed is not listed, then it is not installed correctly. Remove the option, and then install it again. For more information, see the following: - "Printing a menu settings page" on page 74 for non‑touch‑screen printer models - "Printing a menu settings page" on page 122 or "Printing a menu settings page" on page 170 for touch‑screen printer models • Network setup page-Use this page to verify the network connection. This page also provides important information that aids network printing configuration. Note: Make sure your printer has Ethernet or wireless capability and is attached to a network. For more information, see the following: - "Printing a network setup page" on page 75 for non‑touch‑screen printer models - "Printing a network setup page" on page 122 or "Printing a network setup page" on page 170 for touch‑screen printer models
-
 1
1 -
2
-
3
-
4
-
5
-
6
-
7
-
8
-
9
-
10
-
11
-
12
-
13
-
14
-
15
-
16
-
17
-
18
-
19
-
20
-
21
-
22
-
23
-
24
-
25
-
26
-
27
-
28
-
29
-
30
-
31
-
32
-
33
-
34
-
 35
35 -
 36
36 -
 37
37 -
 38
38 -
 39
39 -
 40
40 -
 41
41 -
 42
42 -
 43
43 -
 44
44 -
 45
45 -
46
-
47
-
48
-
49
-
50
-
51
-
52
-
53
-
54
-
55
-
56
-
57
-
58
-
59
-
60
-
61
-
62
-
63
-
64
-
65
-
66
-
67
-
68
-
69
-
70
-
71
-
72
-
73
-
74
-
75
-
76
-
77
-
78
-
79
-
80
-
81
-
82
-
83
-
84
-
85
-
86
-
87
-
88
-
89
-
90
-
91
-
92
-
93
-
94
-
95
-
96
-
97
-
98
-
99
-
100
-
101
-
102
-
103
-
104
-
105
-
106
-
107
-
108
-
109
-
110
-
111
-
112
-
113
-
114
-
115
-
116
-
117
-
118
-
119
-
120
-
121
-
122
-
123
-
124
-
125
-
126
-
127
-
128
-
129
-
130
-
131
-
132
-
133
-
134
-
135
-
136
-
137
-
138
-
139
-
140
-
141
-
142
-
143
-
144
-
145
-
146
-
147
-
148
-
149
-
150
-
151
-
152
-
153
-
154
-
155
-
156
-
157
-
158
-
159
-
160
-
161
-
162
-
163
-
164
-
165
-
166
-
167
-
168
-
169
-
170
-
171
-
172
-
173
-
174
-
175
-
176
-
177
-
178
-
179
-
180
-
181
-
182
-
183
-
184
-
185
-
186
-
187
-
188
-
189
-
190
-
191
-
192
-
193
-
194
-
195
-
196
-
197
-
198
-
199
-
200
-
201
-
202
-
203
-
204
-
205
-
206
-
207
-
208
-
209
-
210
-
211
-
212
-
213
-
214
-
215
-
216
-
217
-
218
-
219
-
220
-
221
-
222
-
223
-
224
-
225
-
226
-
227
-
228
-
229
-
230
-
231
-
232
-
233
-
234
-
235
-
236
-
237
-
238
-
239
-
240
-
241
-
242
-
243
-
244
-
245
-
246
-
247
-
248
-
249
-
250
-
251
-
252
-
253
-
254
-
255
-
256
-
257
-
258
-
259
-
260
-
261
-
262
-
263
-
264
-
265
-
266
-
267
-
268
-
269
-
270
-
271
-
272
-
273
-
274
-
275
-
276
-
277
-
278
-
279
-
280
-
281
-
282
-
283
-
284
-
285
-
286
-
287
-
288
-
289
-
290
-
291
-
292
-
293
-
294
-
295
-
296
-
297
-
298
-
299
-
300
-
301
-
302
-
303
-
304
-
305
-
306
-
307
-
308
-
309
-
310
-
311
-
312
-
313
-
314
-
315
-
316
-
317
-
318
-
319
-
320
-
321
-
322
-
323
-
324
-
325
-
326
-
327
-
328
-
329
-
330
-
331
-
332
-
333
-
334
-
335
-
336
-
337
-
338
-
339
-
340
-
341
-
342
-
343
-
344
-
345
-
346
-
347
-
348
-
349
-
350
-
351
-
352
-
353
-
354
-
355
-
356
-
357
-
358
-
359
-
360
-
361
-
362
 |
 |
